Tuna Cakes: 5 Easy Steps to a Crispy, Flavor-Packed Meal
Table of Contents
If you’re looking for a budget-friendly dinner that delivers gourmet flavor without the fuss, my tried-and-true tuna cakes recipe is about to become your new weeknight hero. As someone who’s tested dozens of tuna cake variations over the years, I’ve perfected a foolproof method that guarantees crispy exteriors and tender, flavorful interiors every single time.
How to Make Tuna Cakes:
Quick Overview
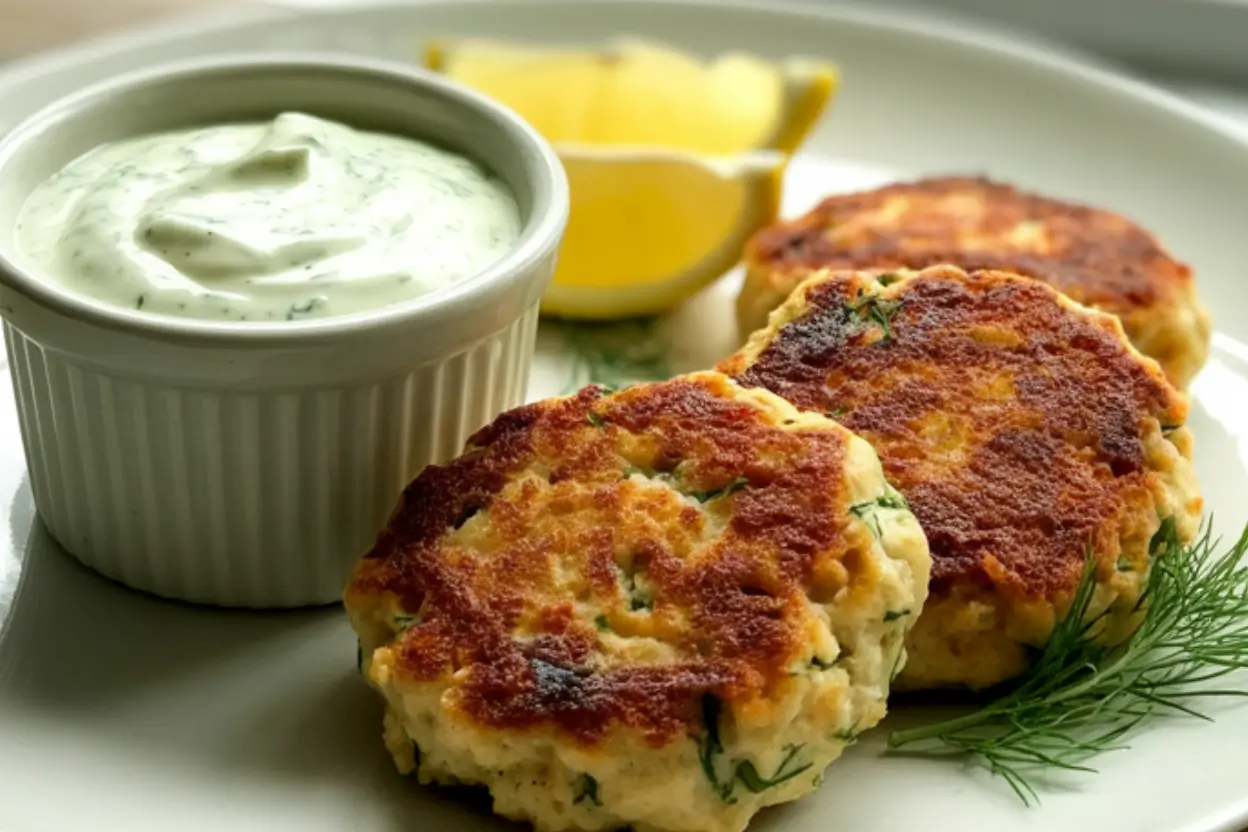
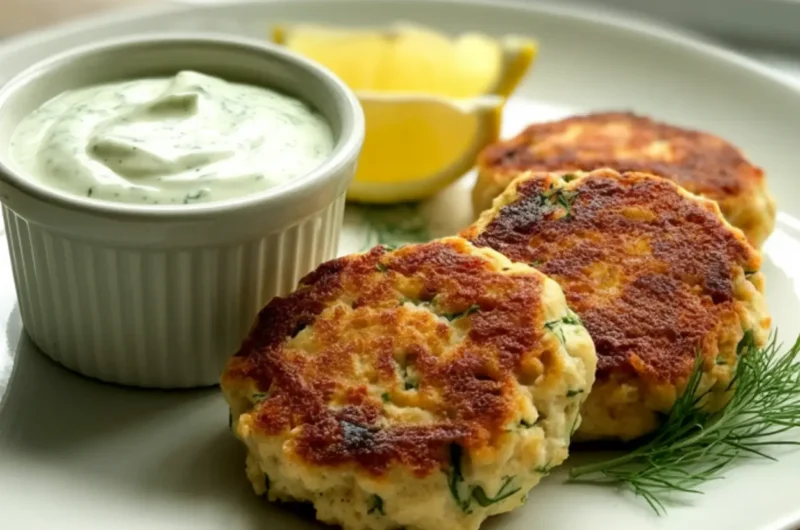
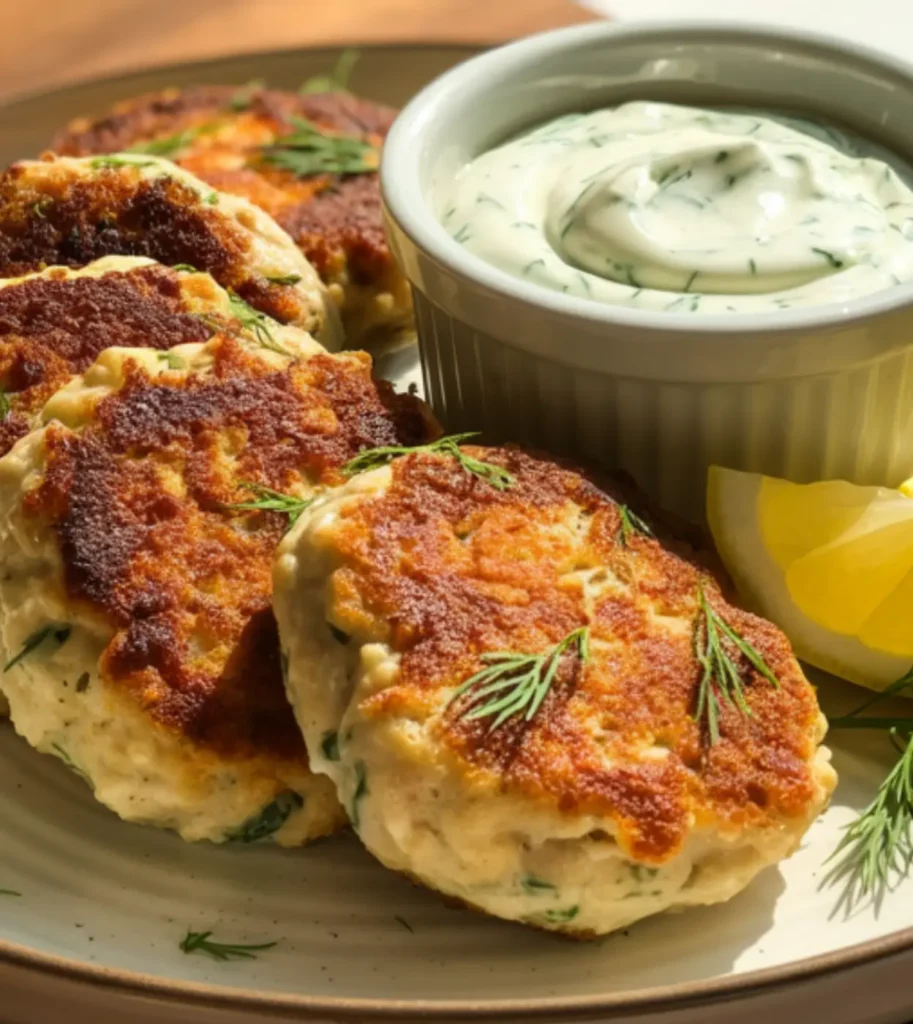
These homemade tuna cakes feature a perfect balance of flaky tuna, aromatic herbs, and a golden-brown crust that provides a satisfying crunch with every bite. What makes this recipe stand out is the combination of panko breadcrumbs for exceptional crispiness and a secret blend of seasonings that elevates canned tuna to restaurant-quality status. The cakes hold together beautifully without being dense, and the addition of lemon zest brings a bright, fresh flavor that cuts through the richness.
From start to finish, you’ll spend just 25 minutes preparing these tuna cakes—10 minutes of prep and 15 minutes of cooking time. This efficiency makes them perfect for busy weeknights when you want something satisfying but don’t have hours to spend in the kitchen. The recipe yields 8 medium-sized tuna cakes, easily serving a family of four with potential leftovers for lunch the next day.
The Ingredients I Use to Bring My Tuna Cakes to Life
For the tuna cakes (makes 8 medium cakes):
- 3 5-ounce cans of solid white albacore tuna in water, thoroughly drained
- 1 cup panko breadcrumbs, divided (¾ cup for mixture, ¼ cup for coating)
- 2 large eggs, lightly beaten
- ¼ cup mayonnaise
- 3 tablespoons finely diced red bell pepper
- 2 tablespoons finely chopped fresh parsley
- 2 tablespoons finely diced celery
- 2 tablespoons finely diced red onion
- 1 tablespoon Dijon mustard
- 1 tablespoon lemon zest (from approximately 1 lemon)
- 1 tablespoon fresh lemon juice
- 1 teaspoon Old Bay seasoning
- ½ teaspoon garlic powder
- ¼ teaspoon black pepper
- ¼ teaspoon salt (adjust according to the saltiness of your tuna)
- 3 tablespoons olive oil for frying
For the optional lemon-dill sauce:
- ½ cup plain Greek yogurt
- 2 tablespoons mayonnaise
- 1 tablespoon fresh dill, finely chopped
- 1 teaspoon lemon juice
- ¼ teaspoon garlic powder
- Salt and pepper to taste
Step-by-Step Instructions
Step 1: Prepare the Tuna Mixture
- Drain the tuna thoroughly: Place the tuna in a fine-mesh strainer and press firmly with a fork to remove as much liquid as possible. This crucial step prevents soggy tuna cakes.
- Flake the tuna: Transfer the drained tuna to a large mixing bowl and flake it with a fork, breaking up any large chunks until evenly shredded.
- Add binding ingredients: Add the beaten eggs and mayonnaise to the tuna and mix well. These ingredients help hold the cakes together while adding moisture and richness.
- Incorporate aromatics and seasonings: Add the bell pepper, parsley, celery, red onion, Dijon mustard, lemon zest, lemon juice, Old Bay seasoning, garlic powder, black pepper, and salt to the bowl.
- Add breadcrumbs: Stir in ¾ cup of the panko breadcrumbs, setting aside the remaining ¼ cup for coating. Mix until everything is well combined and the mixture holds its shape when pressed.
Step 2: Form the Tuna Cakes
- Portion the mixture: Using a ¼-cup measuring cup or an ice cream scoop, portion the tuna mixture into 8 equal parts.
- Shape the cakes: With slightly damp hands (to prevent sticking), gently form each portion into a patty about ½-inch thick and 3 inches in diameter, pressing firmly enough for the cake to hold together but not so firmly that it becomes dense.
- Coat with panko: Place the remaining ¼ cup panko in a shallow dish. Carefully press both sides of each tuna cake into the panko, creating a light, even coating.
- Rest the cakes: Place the formed tuna cakes on a plate and refrigerate for 10 minutes. This brief chilling time helps them hold together during cooking.
Step 3: Cook the Tuna Cakes
- Heat the oil: Heat 1½ tablespoons of olive oil in a large non-stick skillet over medium heat until it shimmers but doesn’t smoke.
- Cook in batches: Place 4 tuna cakes in the skillet, being careful not to overcrowd the pan. Cook for 3-4 minutes on the first side until golden brown.
- Flip carefully: Using a thin, wide spatula, gently flip each cake and cook for an additional 3 minutes on the second side until crispy and heated through.
- Drain excess oil: Transfer the cooked tuna cakes to a paper towel-lined plate to absorb any excess oil.
- Cook remaining batch: Add the remaining 1½ tablespoons of oil to the skillet and repeat the cooking process with the remaining 4 tuna cakes.
Step 4: Prepare the Optional Sauce
- Combine sauce ingredients: While the tuna cakes are cooking or chilling, mix together the Greek yogurt, mayonnaise, dill, lemon juice, garlic powder, salt, and pepper in a small bowl.
- Chill the sauce: Cover and refrigerate the sauce until ready to serve, allowing the flavors to meld.
Step 5: Serve the Tuna Cakes
- Plate the tuna cakes: Arrange the cooked tuna cakes on a serving platter or individual plates.
- Add the sauce: Either drizzle the lemon-dill sauce over the tuna cakes or serve it on the side for dipping.
- Garnish (optional): Sprinkle with additional fresh parsley or dill and add lemon wedges for an extra pop of color and flavor.
What to Serve Tuna Cakes With
Tuna cakes are incredibly versatile and pair beautifully with numerous side dishes. Here are some of my favorite serving suggestions:
Light and Fresh Options:
- Simple green salad with lemon vinaigrette
- Cucumber tomato salad with fresh herbs
- Roasted asparagus with a light drizzle of olive oil and lemon
- Steamed green beans with a touch of butter and sliced almonds
Heartier Accompaniments:
- Creamy coleslaw with a tangy dressing
- Roasted sweet potato wedges with a sprinkle of paprika
- Garlic mashed potatoes for ultimate comfort
- Lemon-herb quinoa or rice pilaf for a complete meal
Serving Styles:
- Place tuna cakes on a bed of mixed greens for a sophisticated salad
- Serve on slider buns with lettuce, tomato, and sauce for mini sandwiches
- Create a grain bowl with quinoa, roasted vegetables, and tuna cakes on top
- Pair with a cool gazpacho in summer or a warm tomato soup in winter
Beverage Pairings:
- Crisp white wines like Sauvignon Blanc or Pinot Grigio
- Light lagers or wheat beers
- Sparkling water with lemon for a refreshing non-alcoholic option
Top Tips for Perfecting Tuna Cakes
After years of making tuna cakes, I’ve gathered these invaluable tips that will elevate your results from good to exceptional:
Ingredient Selection and Preparation:
- Choose the right tuna: Solid white albacore packed in water provides the best texture and flavor. While slightly more expensive than chunk light tuna, the improved texture is worth it.
- Finely dice the vegetables: Larger vegetable pieces can cause the cakes to fall apart during cooking. Aim for uniform, small pieces about 1/8-inch in size.
- Don’t skip the mayonnaise: It’s tempting to reduce fat by eliminating mayo, but it provides crucial moisture and helps bind the ingredients together.
- Fresh herbs make a difference: While dried herbs can work in a pinch, fresh parsley contributes brightness and color that dried simply can’t match.
Technique Tips:
- Drain the tuna aggressively: After draining in a strainer, consider pressing the tuna between paper towels to remove every bit of excess moisture.
- Chill before cooking: The 10-minute refrigeration isn’t just a suggestion—it allows the binding ingredients to set, resulting in cakes that hold together beautifully during cooking.
- Control your cooking temperature: Medium heat is ideal. Too hot, and the panko will burn before the interior heats through; too low, and the cakes will absorb too much oil and become greasy.
- Use a fish spatula: Its thin, flexible edge slides easily under delicate tuna cakes without breaking them.
Common Mistakes to Avoid:
- Overhandling the mixture: Mix just until combined; overmixing can make the cakes dense rather than tender.
- Making cakes too thick: Keep them about ½-inch thick for the perfect ratio of crispy exterior to tender interior.
- Flipping too early: Wait for a golden-brown crust to form before attempting to flip, which helps prevent breaking.
- Overcrowding the pan: Leave at least an inch between cakes to ensure even browning and make flipping easier.
Substitution Guide:
- Gluten-free option: Replace panko with gluten-free breadcrumbs or crushed Rice Chex.
- Egg allergy: Use 2 tablespoons of flaxseed meal mixed with 5 tablespoons of water (let sit for 5 minutes before using).
- No Old Bay seasoning: Replace with a blend of paprika, celery salt, black pepper, and a dash of cayenne.
- Lighter version: Replace half the mayonnaise with additional Greek yogurt in both the cakes and sauce.
Storing and Reheating Tips
Tuna cakes are excellent for meal prep and often taste even better the next day as the flavors continue to develop:
Short-term Storage:
- Refrigerating cooked tuna cakes: Let the cakes cool completely, then transfer them to an airtight container, separating layers with parchment paper to prevent sticking. Refrigerate for up to 3 days.
- Storing uncooked tuna cakes: Form the patties, place on a parchment-lined baking sheet, cover with plastic wrap, and refrigerate for up to 24 hours before cooking.
- Sauce storage: The lemon-dill sauce can be refrigerated in an airtight container for up to 5 days.
Long-term Storage:
- Freezing cooked tuna cakes: Arrange the cooled tuna cakes on a parchment-lined baking sheet and freeze until firm, about 2 hours. Then, transfer them to a freezer-safe bag or container, placing parchment paper between layers to prevent sticking. For best quality, use within 2 months.
- Freezing uncooked tuna cakes: Follow the same process as for cooked cakes, but expect slightly better texture results when cooking from frozen.
Reheating Methods:
- From refrigerated (best method): Reheat in a skillet over medium-low heat with a thin layer of oil for 2-3 minutes per side. This method restores the crispy exterior beautifully.
- Oven reheating: Preheat oven to 350°F. Place tuna cakes on a baking sheet and heat for 10-12 minutes until warmed through.
- Microwave (quick but compromises texture): Place on a microwave-safe plate and heat in 30-second intervals at 70% power until warmed through. The cakes will lose some crispness but remain tasty.
- From frozen: Thaw in the refrigerator overnight for best results, then reheat using one of the methods above. In a pinch, you can reheat directly from frozen in a 350°F oven for about 15-18 minutes.
These tuna cakes have become my go-to recipe for transforming pantry staples into a memorable meal that feels special despite its simplicity and affordability. With these detailed instructions and tips, you’re well-equipped to create perfectly crispy, flavor-packed tuna cakes that will have everyone asking for seconds!
click here to follow me on pinterest
Tuna Cakes: 5 Easy Steps to a Crispy, Flavor-Packed Meal
Cuisine: AmericanDifficulty: Easy6
servings20
minutes12
minutes280-320
kcalThese flavorful tuna cakes are crisp on the outside and tender on the inside, made with albacore tuna, fresh vegetables, zesty lemon, and Old Bay seasoning. Paired with a creamy, herbed Greek yogurt-dill sauce, they’re a light yet satisfying dish perfect for lunch, dinner, or even appetizers.
Ingredients
3 5-ounce cans of solid white albacore tuna in water, thoroughly drained
1 cup panko breadcrumbs, divided (¾ cup for mixture, ¼ cup for coating)
2 large eggs, lightly beaten
¼ cup mayonnaise
3 tablespoons finely diced red bell pepper
2 tablespoons finely chopped fresh parsley
2 tablespoons finely diced celery
2 tablespoons finely diced red onion
1 tablespoon Dijon mustard
1 tablespoon lemon zest (from approximately 1 lemon)
1 tablespoon fresh lemon juice
1 teaspoon Old Bay seasoning
½ teaspoon garlic powder
¼ teaspoon black pepper
¼ teaspoon salt (adjust according to the saltiness of your tuna)
3 tablespoons olive oil for frying
½ cup plain Greek yogurt
2 tablespoons mayonnaise
1 tablespoon fresh dill, finely chopped
1 teaspoon lemon juice
¼ teaspoon garlic powder
Salt and pepper to taste
Instructions
- Mix the Ingredients
Drain and flake the tuna thoroughly in a large bowl. Stir in the eggs, mayonnaise, and all remaining ingredients—vegetables, seasonings, lemon juice/zest, and ¾ cup panko breadcrumbs. Mix until the mixture binds together well. - From the Patties
Divide the mixture into 8 equal portions. Shape each into a 3-inch patty, then lightly coat both sides with the remaining ¼ cup panko. Place on a plate and chill for 10 minutes to help them firm up. - Cook the Tuna Cakes
Heat half the olive oil in a non-stick skillet over medium heat. Sear 4 cakes at a time for 3–4 minutes per side until golden and crisp. Drain briefly on paper towels and repeat with the remaining oil and cakes. - Make the Lemon-Dill Sauce
Mix the Greek yogurt, mayonnaise, dill, lemon juice, garlic powder, salt, and pepper in a small bowl. Chill until ready to serve for the best flavor. - Serve and Enjoy
Serve the hot tuna cakes with the lemon-dill sauce on the side or drizzled on top. Garnish with fresh parsley or dill and lemon wedges if desired.
Notes
- This recipe is a great way to transform pantry staples into something fresh and exciting. Solid white albacore tuna gives the cakes a firm, meaty texture, while lemon zest and Dijon mustard add brightness and depth. The Greek yogurt dill sauce not only complements the flavors beautifully but also keeps things light and protein-rich. For a gluten-free option, try using gluten-free panko.

