Takoyaki: 5 Easy Steps to Make It Like a Pro
Table of Contents
If you’ve ever wandered through the vibrant street food markets of Japan, you’ve likely encountered takoyaki – those perfectly golden, spherical treats that have captured the hearts of food enthusiasts worldwide. As a dedicated home cook who’s spent years mastering Japanese cuisine, I’m excited to share my foolproof method for creating authentic takoyaki in your own kitchen. This iconic Osaka street food might seem intimidating at first glance, but with the right tools and techniques, you’ll be crafting these delectable octopus balls like a seasoned pro in no time.
Thank you for reading this post, don't forget to subscribe!How to Make Takoyaki
Quick Overview
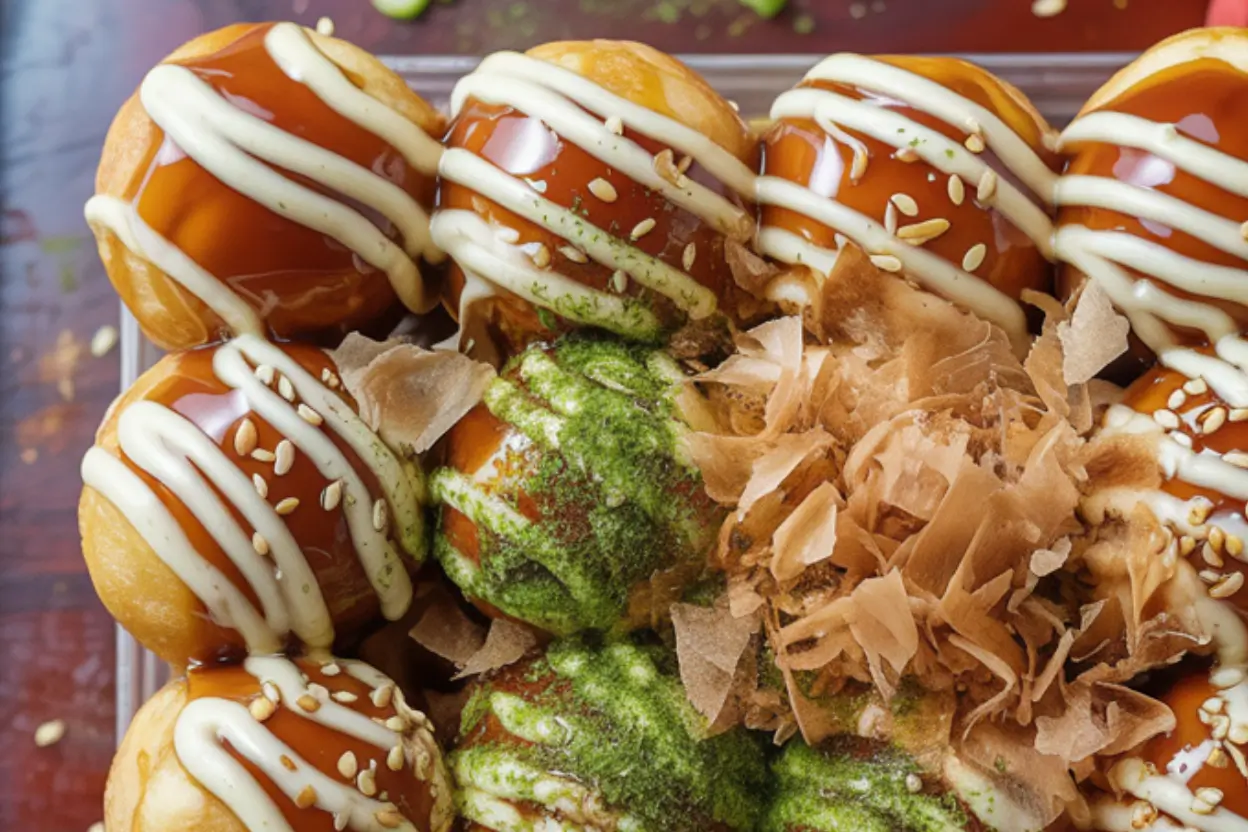
Takoyaki is the ultimate Japanese comfort food – crispy on the outside, soft and gooey on the inside, and bursting with savory flavors in every bite. What makes this dish truly special is the contrast between the crispy exterior and the creamy, tender center filled with pieces of succulent octopus. The entire preparation takes about 45 minutes from start to finish – 15 minutes to prep your ingredients and 30 minutes to cook the takoyaki to golden perfection. Don’t be intimidated by its unique appearance; the cooking process is surprisingly straightforward once you get the hang of rotating the balls. The final drizzle of takoyaki sauce, Japanese mayonnaise, and bonito flakes elevates these humble snacks into an irresistible treat that will transport you straight to the streets of Osaka.
The Ingredients I Use to Bring My Takoyaki to Life
For the Takoyaki Batter:
- 2 cups (240g) all-purpose flour
- 4 large eggs
- 3½ cups (800ml) dashi stock (made from kombu and bonito flakes, or instant dashi powder)
- 2 teaspoons soy sauce
- ½ teaspoon salt
For the Filling:
- 8 oz (230g) cooked octopus, cut into ½-inch pieces
- 4 green onions, finely chopped (reserve some for garnish)
- 2 tablespoons pickled red ginger (beni shoga), minced
- ⅓ cup (40g) tempura scraps (tenkasu) or corn flakes, crushed slightly
For Cooking:
- 2-3 tablespoons vegetable oil for greasing the pan
For the Toppings:
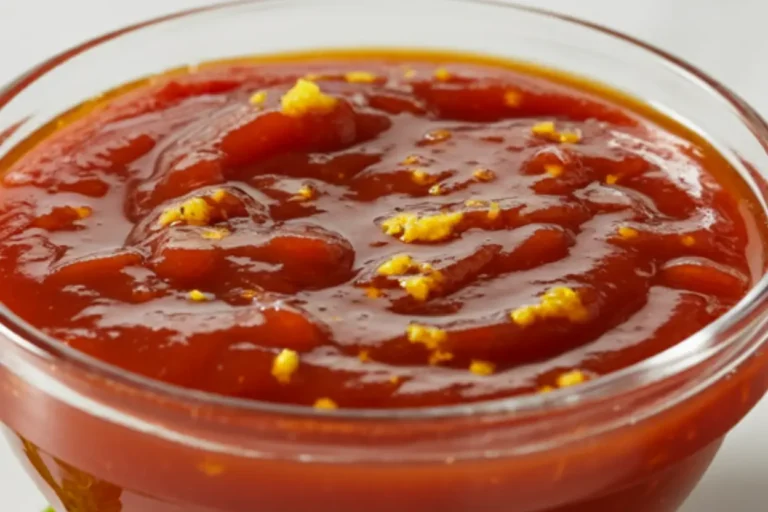
- ¼ cup takoyaki sauce (available at Asian markets or make your own with 3 tablespoons Worcestershire sauce, 1 tablespoon ketchup, 1 tablespoon soy sauce, and 1 teaspoon sugar)
- Japanese mayonnaise, in a squeeze bottle
- 2 tablespoons aonori (green seaweed flakes)
- 2 tablespoons katsuobushi (dried bonito flakes)
- 1 tablespoon toasted sesame seeds (optional)
Special Equipment:
- Takoyaki pan (a special molded pan with half-spherical depressions)
- Bamboo skewers or specialized takoyaki picks
Step-by-Step Instructions
Step 1: Prepare the Batter
- In a large mixing bowl, whisk together the flour, eggs, dashi stock, soy sauce, and salt until completely smooth.
- For best results, allow the batter to rest for at least 15 minutes at room temperature. This helps the flour hydrate properly and results in a better texture.
- The batter should be quite thin, similar to crepe batter. If it seems too thick, add a little more dashi until you reach a pourable consistency.
Step 2: Prepare Your Takoyaki Pan
- Place your takoyaki pan over medium-high heat and allow it to get properly hot.
- Brush each well generously with vegetable oil—this step is key to getting that perfectly crisp, golden-brown crust.
- The pan is ready when you drop a small amount of batter in and it sizzles immediately.
Step 3: Pour and Add Fillings
- Fill each well about 90% full with batter. Don’t worry if the batter overflows slightly and connects the wells – this actually helps with the turning process.
- Working quickly before the batter sets, add a piece of octopus, a sprinkle of green onions, a few pieces of pickled ginger, and some tempura scraps to each well.
- Drizzle a small amount of additional batter over the fillings to help seal everything inside.
Step 4: The Turning Technique (The Most Crucial Step)
- After 2-3 minutes, when the bottom of the takoyaki has set and turned golden brown, it’s time for the first turn. The edges should appear cooked, but the top will still be quite liquid.
- Using bamboo skewers or takoyaki picks, carefully break the connections between the balls and gently scrape around each half-sphere to loosen it.
- In a smooth motion, turn each ball 90 degrees, allowing the uncooked batter to flow to the bottom of the well. This takes practice, so don’t worry if your first few aren’t perfect!
- Wait another 2 minutes, then rotate each ball another 90 degrees. Continue this process, turning every 1-2 minutes.
- After about 3-4 turns, your takoyaki will have formed almost complete balls with a golden-brown surface all around.
Step 5: Final Cooking and Serving
- Once the takoyaki have become spherical, reduce the heat to medium and continue cooking and turning occasionally for another 4-5 minutes to ensure the inside is fully cooked.
- The perfect takoyaki should be golden brown and crispy on the outside, while still maintaining a slightly soft, creamy center.
- Carefully remove the finished takoyaki from the pan and place them on a serving plate.
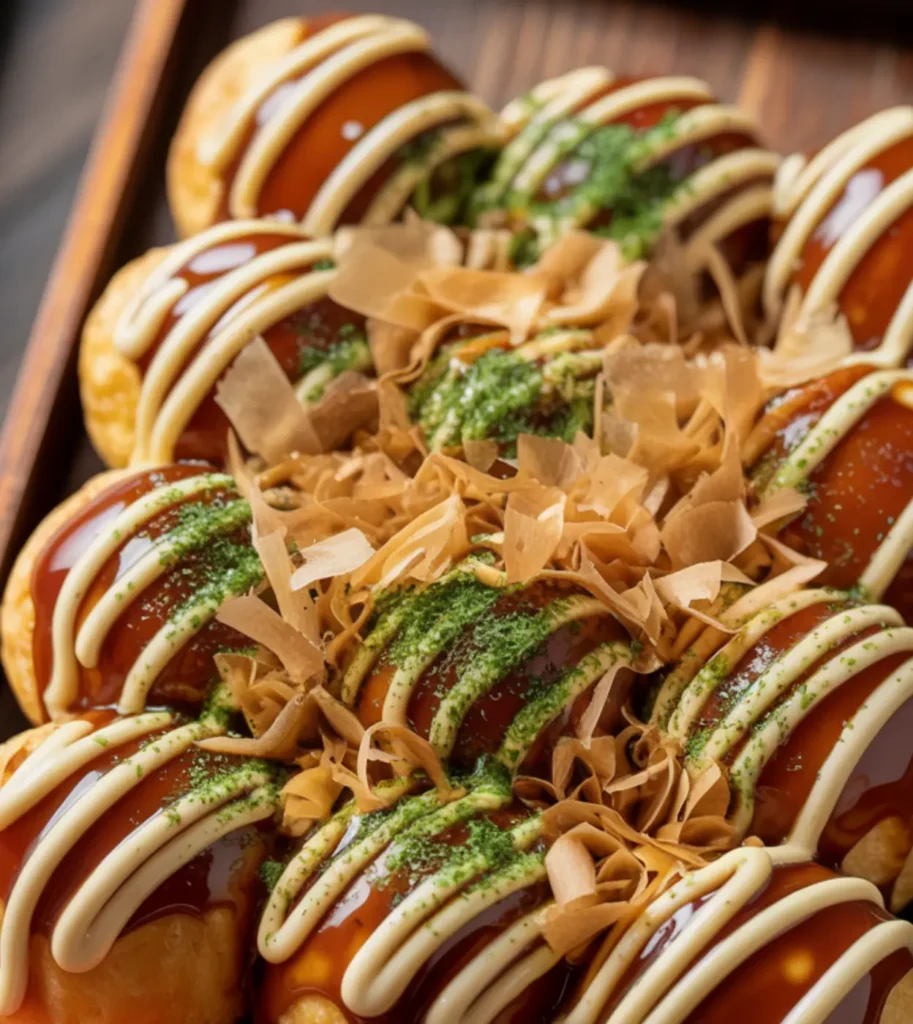
- Drizzle generously with takoyaki sauce, create a zigzag pattern with Japanese mayonnaise, and sprinkle with aonori, katsuobushi, and optional sesame seeds.
- Serve immediately while hot and watch the bonito flakes “dance” from the heat!
What to Serve Takoyaki With
Takoyaki is traditionally enjoyed as a street food snack on its own, but you can create a complete Japanese feast by pairing it with these complementary dishes:
- Okonomiyaki: Another Osakan specialty, these savory pancakes make the perfect companion to takoyaki for an authentic Kansai-region meal.
- Edamame: These lightly salted soybeans provide a refreshing contrast to the rich takoyaki and add a nutritious element to your spread.
- Miso Soup: A light, umami-rich miso soup helps balance the meal and cleanse the palate between bites of the flavorful takoyaki.
- Japanese Pickles (Tsukemono): The crisp, tangy nature of Japanese pickles offers a wonderful textural and flavor contrast.
- Green Tea or Japanese Beer: Green tea helps cut through the richness of takoyaki, while a cold Japanese beer like Asahi or Sapporo pairs beautifully with the savory flavors.
Top Tips for Perfecting Takoyaki
- Temperature Control is Key: Maintain medium-high heat for the initial cooking and first few turns, then reduce to medium for the final stage. Too high heat will burn the outside before the inside is cooked, while too low heat won’t achieve that crispy exterior.
- Octopus Alternatives: While traditional takoyaki uses octopus, you can substitute it with shrimp, chicken, firm tofu, or even vegetables like corn and bell peppers for delicious variations.
- Batter Consistency Matters: The batter should be thin enough to pour easily but not watery. Think of the consistency of heavy cream or slightly thinner pancake batter.
- Don’t Rush the Turning Process: Wait until the edges are set before attempting the first turn. Patience here prevents the dreaded “takoyaki explosion” that can happen when turning too early.
- Keep Your Pan Well-Oiled: Between batches, make sure to re-oil the wells thoroughly. This prevents sticking and helps achieve that perfect crispy exterior.
- The Secret to Creamy Centers: Don’t overcook! Properly made takoyaki should have a slightly gooey center – this is intentional and part of its charm.
- No Takoyaki Pan? No Problem: While not identical, you can use an aebleskiver pan (Danish pancake pan) or even a cake pop maker in a pinch. The results won’t be traditional, but they’ll still be delicious.
- Practice Makes Perfect: No need to stress if your first batch turns out a bit messy—flipping takoyaki is a skill that gets easier and smoother the more you practice.
Storing and Reheating Tips
Takoyaki is definitely best enjoyed fresh off the pan, but if you find yourself with leftovers (or want to make a big batch in advance), here’s how to store and reheat them properly:
Refrigeration:
- Allow the takoyaki to cool completely without toppings.
- Store them in an airtight container lined with paper towels to absorb excess moisture and help keep them fresh longer.
- Store in the refrigerator for up to 2 days.
Freezing for Longer Storage:
- Place cooled, untopped takoyaki on a baking sheet and freeze until solid (about 2 hours).
- Move the frozen balls into a freezer-safe container or a sealed ziplock bag for easy storage.
- Label with the date and use within 1 month for best quality.
- Separate layers with parchment paper to prevent sticking.
Reheating Methods:
- Oven Method (Best for Preserving Texture):
- Preheat your oven to 375°F (190°C).
- Place the takoyaki on a baking sheet lined with parchment paper.
- Bake for 10-12 minutes if refrigerated, or 15-18 minutes if frozen, until heated through and crispy on the outside.
- Toaster Oven Method:
- Heat at 350°F (175°C) for 5-7 minutes (refrigerated) or 10-12 minutes (frozen).
- This method is great for smaller portions and uses less energy than a full-sized oven.
- Microwave Method (Quick but Compromises Crispiness):
- Place the takoyaki on a microwave-safe plate.
- Cover with a damp paper towel to prevent drying out.
- Heat for 30-45 seconds (refrigerated) or 1-2 minutes (frozen), checking halfway through.
- Note that microwaving will result in a softer exterior.
Important: Always add toppings (sauce, mayonnaise, bonito flakes, etc.) after reheating, never before storing or reheating.
There’s something truly magical about biting into a perfectly made takoyaki – the contrast between the crispy exterior and soft, savory center creates an unforgettable taste experience. While making takoyaki at home requires some special equipment and a bit of practice, the results are well worth the effort. Follow these detailed instructions, and you’ll be creating restaurant-quality takoyaki that will impress friends and family alike. Whether you’re a longtime Japanese food enthusiast or just beginning your culinary journey, mastering takoyaki is a rewarding accomplishment that connects you to one of Japan’s most beloved culinary traditions. Happy cooking!
Takoyaki: 5 Easy Steps to Make It Like a Pro
Course: Fish Recipes (Cod, Salmon, Tilapia, etc.)4
servings20
minutes25
minutes350-400
kcalTakoyaki is a popular Japanese street food made of light, savory batter filled with tender octopus, green onions, pickled ginger, and crunchy tempura scraps. Cooked in a special molded pan, these golden balls are crisp on the outside and soft inside, topped with takoyaki sauce, mayo, aonori, and katsuobushi for the ultimate umami bite.
Ingredients
2 cups (240g) all-purpose flour
4 large eggs
3½ cups (800ml) dashi stock (made from kombu and bonito flakes, or instant dashi powder)
2 teaspoons soy sauce
½ teaspoon salt
8 oz (230g) cooked octopus, cut into ½-inch pieces
4 green onions, finely chopped (reserve some for garnish)
2 tablespoons pickled red ginger (beni shoga), minced
⅓ cup (40g) tempura scraps (tenkasu) or corn flakes, crushed slightly
2-3 tablespoons vegetable oil for greasing the pan
¼ cup takoyaki sauce (available at Asian markets or make your own with 3 tablespoons Worcestershire sauce, 1 tablespoon ketchup, 1 tablespoon soy sauce, and 1 teaspoon sugar)
Japanese mayonnaise, in a squeeze bottle
2 tablespoons aonori (green seaweed flakes)
2 tablespoons katsuobushi (dried bonito flakes)
1 tablespoon toasted sesame seeds (optional)
Instructions
- Make the Batter
Start by whisking together the flour, eggs, dashi stock, soy sauce, and salt in a large bowl until the batter is completely smooth. It should be thin and pourable—similar to crepe batter. Let it rest for about 15 minutes at room temperature to help the flour fully hydrate and improve the final texture. - Heat and Oil the Pan
Place your takoyaki pan over medium-high heat and let it get nice and hot. Generously brush each mold with vegetable oil to ensure a golden, crispy crust. You’ll know the pan is ready when a test drop of batter sizzles immediately on contact. - Fill the Molds
Pour the batter into each well, filling it about 90% full—it’s okay if it overflows a bit. Quickly add a piece of octopus, green onions, red ginger, and tempura scraps into each one, then drizzle a touch more batter over the top to seal everything in. - Flip and Shape
Once the edges are golden and the bottoms set (about 2–3 minutes), use skewers or picks to loosen the edges and rotate each ball 90 degrees. Continue turning every 1–2 minutes so the uncooked batter fills the bottom and rounds out the shape. After a few rotations, your takoyaki will form golden, crispy spheres. - Finish and Serve
Reduce the heat to medium and cook for another 4–5 minutes, turning occasionally, until the centers are cooked through and the outsides are perfectly crisp. Transfer to a plate, drizzle with takoyaki sauce and Japanese mayo, then sprinkle with aonori, bonito flakes, and optional sesame seeds. Serve hot and enjoy the signature “dancing” bonito topping!
Notes
- Takoyaki is more than a dish—it’s a fun, interactive cooking experience. Using cooked octopus keeps the centers tender, while pickled red ginger and green onions add zing and freshness. Don’t worry if your first few batches aren’t perfect—mastering the flip takes practice. Serve hot and watch the katsuobushi “dance” on top for a true Japanese street food moment!

