Fried Clams: 5 Tips for Crispy, Golden Perfection
Table of Contents
There’s something magical about biting into perfectly fried clams—that crispy exterior giving way to the tender, briny sweetness inside. As someone who grew up in New England, I’ve spent years perfecting the art of making restaurant-quality fried clams at home. Today, I’m sharing my definitive guide to creating the crispiest, most flavorful fried clams you’ve ever tasted, with five game-changing tips that will transform your seafood frying game forever.
Thank you for reading this post, don't forget to subscribe!Whether you’re a New England native missing a taste of home or someone who’s always been curious about this coastal classic, this recipe will help you achieve fried clam perfection without ever leaving your kitchen. Let’s dive in and discover how to create this beloved seafood dish with professional results.
How to Make Fried Clams
Quick Overview
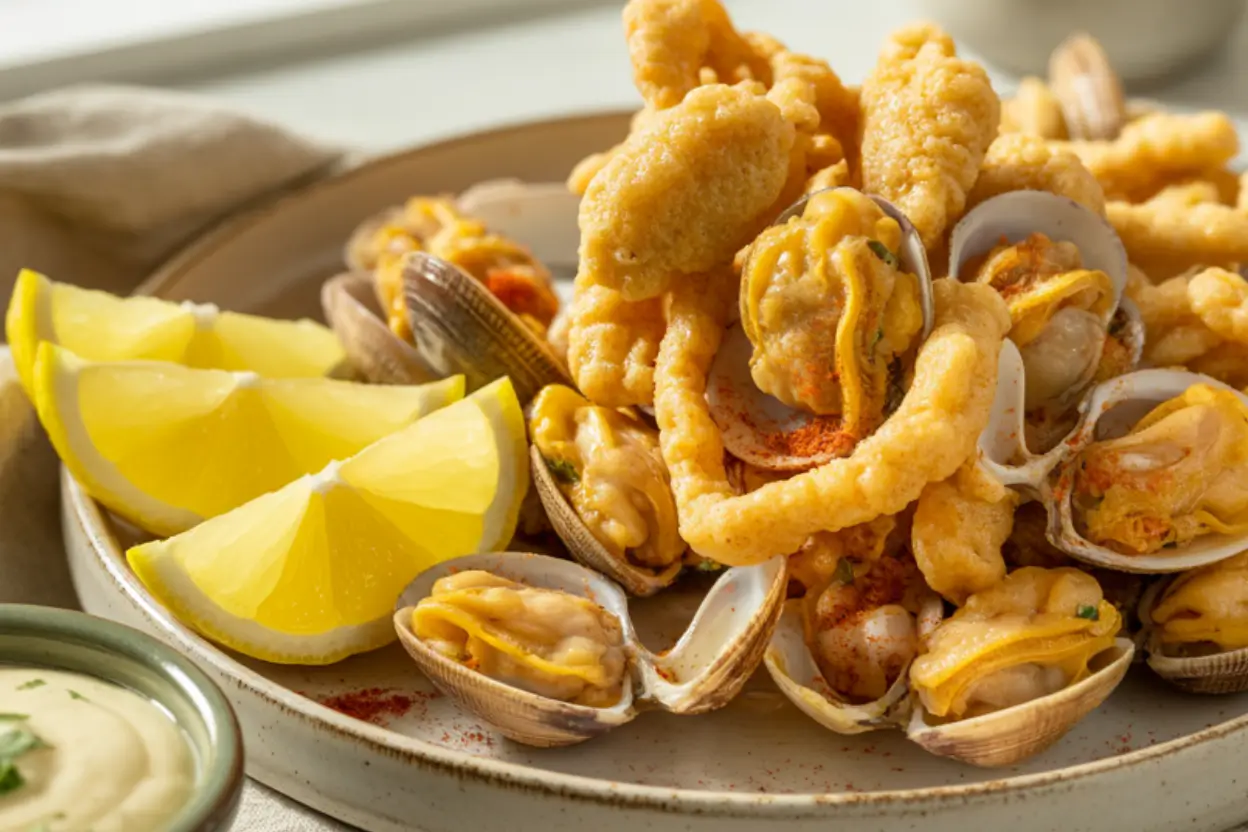
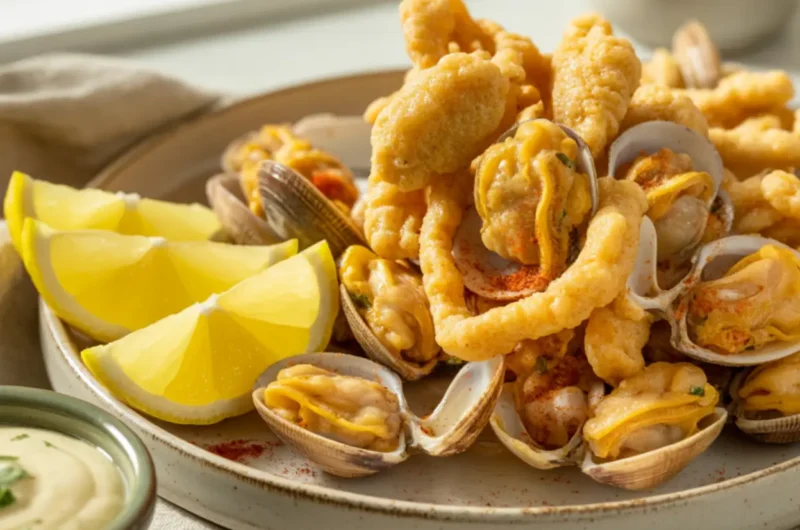
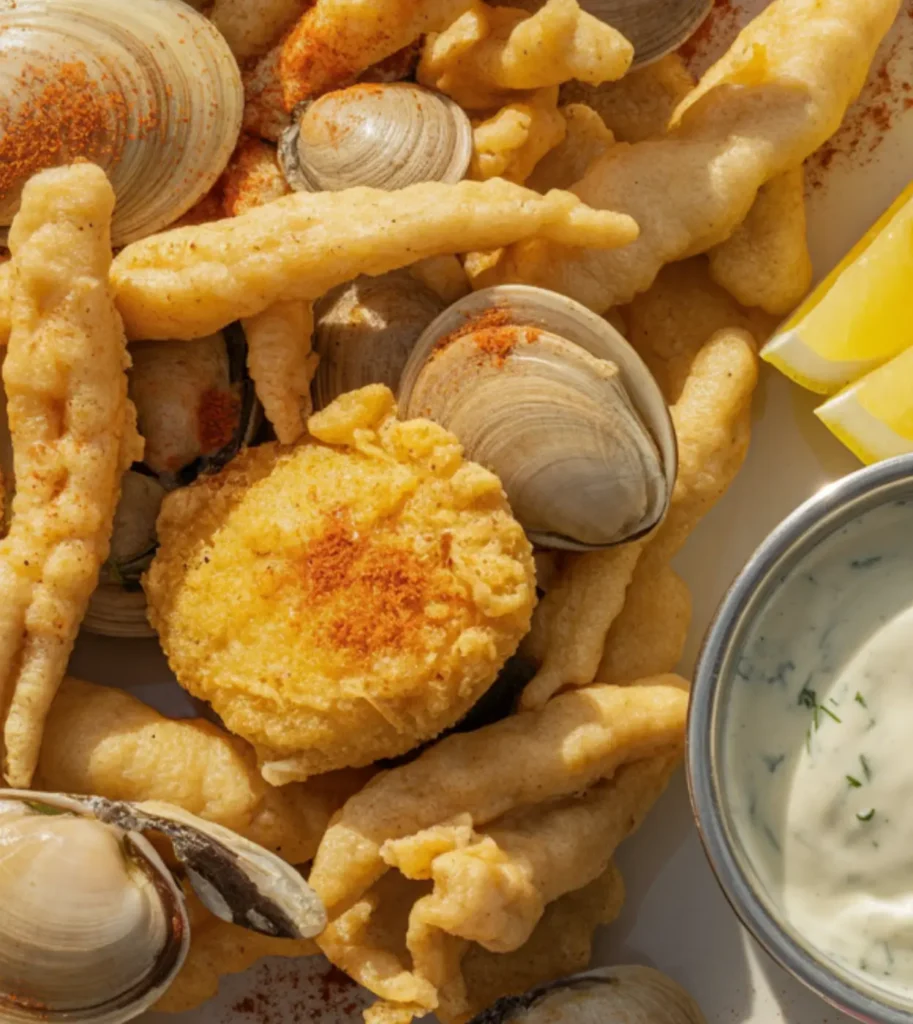
Fried clams are a deceptively simple dish that delivers extraordinary flavor when done right. The perfect fried clam features a light, crispy coating that shatters with each bite, revealing juicy, tender clams inside that burst with briny sweetness. What makes this recipe special is the contrast between the crunchy exterior and the soft interior, creating a textural masterpiece that’s deeply satisfying.
This recipe strikes the ideal balance between seasoning and simplicity, allowing the natural flavor of the clams to shine through while providing enough seasoning to make each bite memorable. The batter is light enough to crisp beautifully without becoming heavy or greasy, creating that distinctive golden exterior that’s the hallmark of perfectly fried seafood.
While restaurant-quality fried clams might seem intimidating to make at home, this recipe breaks down the process into manageable steps that even novice cooks can master. Within 30 minutes of active cooking time, you’ll have a platter of golden fried clams that rivals any seaside shack.
The Ingredients I Use to Bring My Fried Clams to Life
For the Clams:
- 2 pounds fresh whole clams (quahogs, littlenecks, or cherrystones) OR 1 pound pre-shucked clam strips if whole belly clams are unavailable
- 2 cups cold water (for soaking, if using fresh clams)
- 1/4 cup corn meal (for soaking, if using fresh clams)
For the Dredging Station:
- 1 cup all-purpose flour
- 1 cup yellow cornmeal (fine grind for best results)
- 1/4 cup cornstarch
- 2 teaspoons kosher salt
- 1 teaspoon freshly ground black pepper
- 1 teaspoon paprika
- 1/2 teaspoon cayenne pepper (optional, for heat)
- 1/2 teaspoon garlic powder
- 1/2 teaspoon onion powder
For the Wet Mixture:
- 2 large eggs
- 1 cup buttermilk (or 1 cup milk with 1 tablespoon lemon juice as substitute)
- 1 tablespoon hot sauce (optional)
For Frying:
- 4 cups vegetable oil or peanut oil (for deep frying)
For Serving:
- Lemon wedges
- 1/4 cup finely chopped fresh parsley (optional)
- Tartar sauce (see quick recipe below)
Quick Tartar Sauce Recipe:
- 1 cup mayonnaise
- 2 tablespoons sweet pickle relish
- 1 tablespoon fresh lemon juice
- 1 tablespoon finely chopped fresh dill
- 1 tablespoon finely minced shallot or onion
- 1 teaspoon Dijon mustard
- Salt and freshly ground black pepper, to taste
Step-by-Step Instructions
Step 1: Prepare the Clams
If using fresh whole clams:
- Thoroughly rinse all clams under cold running water, scrubbing the shells with a brush to remove any sand or debris.
- In a large bowl, combine 2 cups cold water with 1/4 cup cornmeal. This mixture helps the clams purge any remaining sand.
- Add the clams to this mixture and let them soak for 20-30 minutes.
- Drain and rinse the clams again under cold water.
- To shuck the clams, place them in the freezer for 15 minutes to relax them slightly, making them easier to open.
- Using a clam knife or small, sturdy knife, carefully pry open the shells and cut the clam meat away from both sides of the shell.
- Remove the tough digestive tract (if visible), rinse the clam meat again, and pat dry with paper towels.
If using pre-shucked clam strips:
- Drain the clams in a colander.
- Rinse thoroughly under cold running water.
- Lay the clams out on a few layers of paper towels and gently pat them dry. Getting rid of all the moisture is key to making sure they fry up nice and crispy.
Step 2: Set Up Your Dredging Station
- In a shallow bowl, combine the flour, cornmeal, cornstarch, salt, black pepper, paprika, cayenne (if you like some heat), garlic powder, and onion powder. Whisk everything together until evenly mixed.
- In another bowl, whisk the eggs until well beaten, then whisk in the buttermilk and hot sauce (if using).
- Set up your dredging station in order: start with the clams, then the egg mixture, followed by the dry coating, and end with a plate lined with paper towels to place the fried clams once they’re done.
Step 3: Heat the Oil
- In a heavy-bottomed pot, Dutch oven, or deep fryer, add oil to a depth of about 3 inches.
- Heat the oil to 350°F (175°C). Use a candy or deep-fry thermometer to monitor the temperature precisely.
- Line a baking sheet with paper towels and set a wire rack on top. This setup will help drain excess oil while keeping the clams crispy.
Step 4: Coat and Fry the Clams
- Working in small batches (about 8-10 clams at a time), dip the clams first in the egg mixture, allowing excess to drip off.
- Transfer to the dry mixture and coat thoroughly, gently pressing the coating onto the clams to ensure it adheres well.
- Shake off any excess coating and carefully lower the clams into the hot oil.
- Fry for approximately 2-3 minutes, or until golden brown and crispy. Avoid overcrowding the pot, as this will lower the oil temperature and result in greasy clams.
- Use a slotted spoon or spider strainer to remove the fried clams and transfer them to the prepared wire rack.
- Allow the oil to return to 350°F before frying the next batch.
Step 5: Serve Immediately
- While the last batch is frying, mix all the tartar sauce ingredients in a small bowl if using.
- Sprinkle the hot fried clams with a little extra salt while they’re still hot.
- Garnish with chopped parsley if desired and serve immediately with lemon wedges and tartar sauce.
- For the authentic experience, serve in a paper-lined basket or on a platter.
What to Serve Fried Clams With
Fried clams are a versatile main dish that pairs beautifully with various sides:
- Classic French Fries: Hand-cut, double-fried potatoes seasoned with sea salt create the perfect companion for a true clam shack experience.
- Coleslaw: A crisp, tangy coleslaw provides a refreshing contrast to the rich fried clams. Try a vinegar-based version for a lighter option or a creamy version for more decadence.
- Corn on the Cob: Sweet summer corn slathered with butter and sprinkled with salt complements the briny flavor of the clams.
- New England Clam Chowder: For the ultimate seafood feast, serve a cup of creamy clam chowder alongside your fried clams.
- Grilled Vegetables: For a healthier option, serve with a side of grilled asparagus, zucchini, or bell peppers.
- Lemon Rice Pilaf: A light, citrusy rice pilaf makes a delicious base for the fried clams.
- Beverages: Consider serving with an ice-cold craft beer, lemonade, or a crisp white wine like Sauvignon Blanc or Pinot Grigio.
Top Tips for Perfecting Fried Clams
Tip #1: Start with the Freshest Clams Possible
The quality of your clams dramatically impacts the final dish:
- Choose clams that are tightly closed, or give them a gentle tap—if they close up, they’re still alive and good to use.
- Avoid any clams with cracked shells or that remain open when touched.
- If using pre-shucked clams, ensure they’re plump, have a fresh sea scent, and are not overly fishy-smelling.
- For the best texture, many connoisseurs prefer whole belly clams over strips, but both can be delicious when prepared correctly.
Tip #2: Master the Art of Thorough Drying
Moisture is the enemy of crispiness:
- After cleaning your clams, pat them extremely dry with paper towels.
- Consider laying them out on a clean kitchen towel and patting gently with paper towels.
- Allow them to air dry for 10-15 minutes before coating.
- If using frozen clams, thaw completely in the refrigerator and pat thoroughly dry.
Tip #3: Control Your Oil Temperature Precisely
Temperature management is crucial for perfect results:
- Invest in a good quality deep-fry or candy thermometer.
- Maintain a steady 350°F (175°C) throughout the frying process.
- Let the oil come back up to temperature before adding the next batch—this keeps the clams crispy and prevents them from getting greasy.
- If the temperature drops below 325°F, your clams will absorb too much oil and become greasy.
- If the temperature exceeds 375°F, the coating may burn before the clams cook through.
- Use a heavy-bottomed pot, which helps maintain even heat distribution.
Tip #4: Perfect Your Coating Technique
The right coating approach makes all the difference:
- The cornmeal-flour mixture provides the perfect balance of crispiness and coating adhesion.
- Don’t skimp on the cornstarch—it’s your secret weapon for extra crispiness.
- For extra crunch, consider a double-dip: dredge in dry mix, then wet, then dry again.
- Let the coated clams rest for 2-3 minutes before frying to help the coating adhere better.
- When dredging, use one hand for wet ingredients and one for dry to prevent “clumpy fingers.”
Tip #5: Serve Immediately and Mind the Details
Timing and finishing touches matter:
- Fried clams wait for no one—serve them hot from the fryer for best texture.
- A final sprinkle of salt while still hot enhances flavor dramatically.
- If you must hold them temporarily, keep them warm in a 200°F oven on a wire rack (not paper towels, which can steam the bottom).
- Consider using a neutral oil with a high smoke point like peanut oil or refined avocado oil for the cleanest taste.
- Don’t overload your serving plate; piling too many hot fried clams on top of each other can create steam and soften the crispy coating.
Storing and Reheating Tips
Fried clams are unquestionably best when freshly made, but if you find yourself with leftovers:
Storage Options:
- Allow any leftover fried clams to cool completely before storing.
- Place them in a single layer in an airtight container lined with paper towels.
- Store in the refrigerator for no more than 1-2 days. Beyond this timeframe, both flavor and texture significantly deteriorate.
Reheating Methods:
- Oven Method (Best Option):
- Preheat your oven to 375°F (190°C).
- Place the fried clams on a baking sheet lined with a wire rack.
- Heat for 5-7 minutes or until heated through and crispy again.
- This method helps restore some of the lost crispiness.
- Air Fryer Method (Second Best):
- Preheat air fryer to 350°F (175°C).
- Place clams in a single layer in the basket.
- Heat for 2-3 minutes until warmed and crisp.
- Microwave Method (Not Recommended):
- If you must use a microwave, place clams on a microwave-safe plate.
- Cover with a paper towel and heat on medium power for 15-20 seconds.
- Note that microwaving will result in soggy fried clams that have lost their crispy texture.
Freezing (Generally Not Recommended):
- Fried clams don’t freeze well once cooked as they become tough and lose their crispy texture.
- If you must freeze them, place in a single layer on a parchment-lined baking sheet and freeze until solid.
- Transfer to an airtight container or freezer bag with parchment between layers.
- Freeze for no more than 1 month.
- Reheat directly from frozen using the oven method above, adding 2-3 minutes to the reheating time.
By following these detailed instructions and expert tips, you’ll be able to create restaurant-quality fried clams in your own kitchen. The combination of fresh, high-quality ingredients and proper technique results in the perfect balance of crispy exterior and tender, flavorful clams inside. Whether you’re serving them at a summer gathering or enjoying them as a special treat, these fried clams are sure to become a requested favorite.
Fried Clams: 5 Tips for Crispy, Golden Perfection
Cuisine: New England / American CoastalDifficulty: Moderate4
servings30
minutes12
minutes500–600
kcalCrispy on the outside and tender inside, these fried clams are a coastal classic made with a flavorful cornmeal-based coating. Whether you’re using fresh whole belly clams or convenient pre-shucked strips, this dish delivers bold flavor and a satisfying crunch. Perfect for serving with tartar sauce, lemon wedges, and a sprinkle of fresh parsley.
Ingredients
2 pounds fresh whole clams (quahogs, littlenecks, or cherrystones) OR 1 pound pre-shucked clam strips if whole belly clams are unavailable
2 cups cold water (for soaking, if using fresh clams)
1/4 cup corn meal (for soaking, if using fresh clams)
1 cup all-purpose flour
1 cup yellow cornmeal (fine grind for best results)
1/4 cup cornstarch
2 teaspoons kosher salt
1 teaspoon freshly ground black pepper
1 teaspoon paprika
1/2 teaspoon cayenne pepper (optional, for heat)
1/2 teaspoon garlic powder
1/2 teaspoon onion powder
2 large eggs
1 cup buttermilk (or 1 cup milk with 1 tablespoon lemon juice as substitute)
1 tablespoon hot sauce (optional)
4 cups vegetable oil or peanut oil (for deep frying)
Lemon wedges
1/4 cup finely chopped fresh parsley (optional)
Tartar sauce
Directions
- Prepare the Clams
If you’re using fresh whole clams, start by rinsing and scrubbing them under cold water. Soak them in a mix of cold water and cornmeal for 20–30 minutes to help purge any sand. Rinse again, then freeze briefly to make shucking easier. Carefully open and clean the clams, removing any visible digestive tracts, and pat them dry. If you’re using pre-shucked clam strips, just rinse them well, drain, and pat them dry thoroughly. - Set Up the Dredging Station
In one bowl, mix the flour, cornmeal, cornstarch, salt, black pepper, paprika, cayenne, garlic powder, and onion powder. In another bowl, whisk the eggs, then add the buttermilk and hot sauce if using. Set up your station in this order: clams, egg mixture, dry coating, and a plate lined with paper towels for the fried clams. - Heat the Oil
Fill a heavy-bottomed pot or deep fryer with about 3 inches of oil and heat to 350°F (175°C). Use a thermometer to keep the temperature steady. Line a baking sheet with paper towels and place a wire rack on top—this helps keep the fried clams crispy as they drain. - Coat and Fry the Clams
Dip a handful of clams into the egg mixture, let the excess drip off, then coat them in the dry mix, pressing gently so it sticks. Shake off extra coating and carefully lower them into the hot oil. Fry in small batches for 2–3 minutes until golden and crisp. Transfer the clams to the wire rack, and let the oil return to temperature before starting the next batch. - Serve and Enjoy
While the last batch cooks, stir together your tartar sauce if making it from scratch. Sprinkle the hot clams with a pinch of salt, garnish with fresh parsley if desired, and serve immediately with lemon wedges and tartar sauce. For a classic touch, serve them in a paper-lined basket or on a platter.
Notes
- Fresh whole belly clams offer the most authentic flavor, but pre-shucked clam strips are a great alternative when fresh clams aren’t available. Soaking fresh clams in cornmeal water helps purge sand and grit, improving texture and taste. The buttermilk-egg bath and cornmeal-flour blend create a golden, crunchy coating that holds up beautifully when fried. Don’t skip the tartar sauce and lemon wedges—they round out the dish perfectly.

