Californian Clam Chowder: 5 Easy Steps to Creamy Perfection
Table of Contents
There’s something undeniably comforting about a steaming bowl of clam chowder, especially when it’s made with the fresh, vibrant ingredients that California is known for. Unlike its East Coast counterparts, Californian Clam Chowder marries the creamy richness of traditional chowder with lighter, brighter flavors that reflect the Golden State’s culinary approach. After testing dozens of variations, I’ve perfected a recipe that strikes the ideal balance between luxurious texture and fresh flavor.
Thank you for reading this post, don't forget to subscribe!Whether you’re looking to impress guests or simply want to treat yourself to a restaurant-quality dish at home, this Californian Clam Chowder recipe delivers exceptional results with surprisingly little effort. Let me guide you through creating this West Coast classic in your own kitchen.
How to Make Californian Clam Chowder
Quick Overview
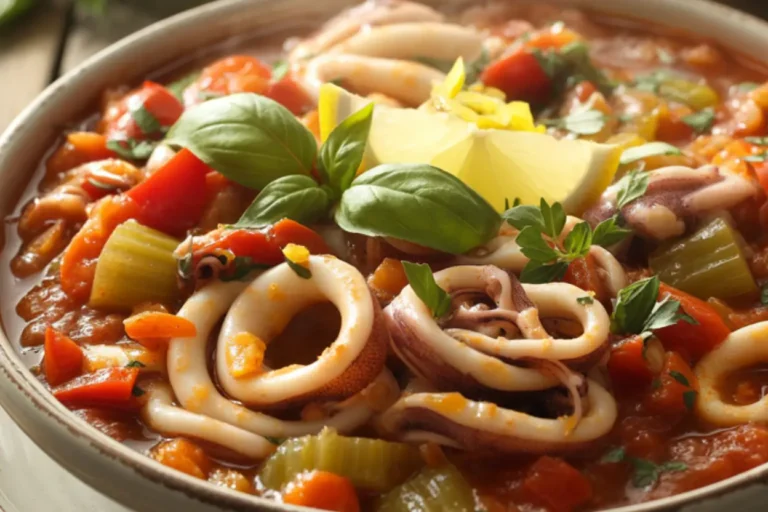
Californian Clam Chowder represents the perfect balance between indulgence and freshness. While traditional New England clam chowder is known for its thick, creamy base, and Manhattan clam chowder features a tomato-based broth, the Californian version takes the best of both worlds. It maintains the creamy texture that makes chowder so satisfying while incorporating fresh vegetables and herbs that brighten the flavor profile.
What makes this recipe particularly special is its approachability. Despite its impressive taste and presentation, this chowder comes together in just about 45 minutes, making it accessible even on busy weeknights. The combination of tender clams, hearty potatoes, and colorful vegetables creates a visually stunning dish that tastes even better than it looks.
The secret to this chowder’s success lies in its layered flavors. By building the base properly and adding ingredients in the right sequence, you create depth without complexity. The result is a luxuriously creamy chowder with a balanced flavor that lets the clams shine while still delivering the comfort-food satisfaction you crave from a good chowder.
The Ingredients I Use to Bring My Californian Clam Chowder to Life
For the Base:
- 4 tablespoons unsalted butter
- 1 large yellow onion, finely diced, should yield about 1½ cups.
- 2 stalks celery, finely diced (about ¾ cup)
- 1 medium red bell pepper, diced (about ¾ cup)
- 1 medium carrot, peeled and diced (about ½ cup)
- 4 cloves garlic, minced
- ¼ cup all-purpose flour
- 4 cups seafood stock or clam juice (can substitute with chicken broth)
- 2 bay leaves
- ½ teaspoon dried thyme
- ½ teaspoon smoked paprika
- ¼ teaspoon cayenne pepper (optional, for heat)
- 1 pound Yukon Gold potatoes, diced into ½-inch cubes (about 3 cups)
- 1½ cups half-and-half
- 1 cup whole milk
For the Clams:
- Two (6.5 oz) cans of chopped clams, drained — be sure to save the juice for later.
- 1 pound fresh clams, scrubbed clean (optional, for extra flavor and presentation)
Fresh Additions:
- 1 cup fresh corn kernels (from approximately 2 ears of corn)
- 1 medium zucchini, diced (about 1 cup)
- 1 tablespoon fresh lemon juice
- 3 tablespoons fresh parsley, chopped
- 2 tablespoons fresh chives, chopped
- Salt and freshly ground black pepper, to taste
For Garnish:
- Extra chopped fresh chives
- Lemon wedges
- Oyster crackers or sourdough croutons
Step-by-Step Instructions
Step 1: Prepare Your Base
- Melt the butter in a large, heavy-bottomed pot or Dutch oven over medium heat, letting it foam slightly before moving on.
- Add the diced onion, celery, red bell pepper, and carrot to the pot. Cook for 5-7 minutes, stirring occasionally, until the vegetables have softened but not browned. The onions should be translucent.
- Add the minced garlic and cook for an additional 30 seconds until fragrant, being careful not to burn it.
- Sprinkle the flour over the vegetable mixture and stir continuously for 1-2 minutes to create a roux. This will help thicken your chowder. Make sure all the vegetables are coated with the flour and there are no dry spots.
- Slowly pour in the seafood stock or clam juice—don’t forget to include the reserved juice from the canned clams—while stirring constantly to keep the mixture smooth. Keep stirring until it thickens slightly and has a silky consistency.
Step 2: Build Flavor and Add Potatoes
- Add the bay leaves, dried thyme, smoked paprika, and cayenne pepper (if using) to the pot. Stir to combine and allow these spices to infuse into the base.
- Add the diced potatoes to the pot, stirring to coat them in the liquid. Bring the mixture to a gentle simmer.
- Reduce heat to medium-low, cover the pot, and simmer for about 10-15 minutes, or until the potatoes are just fork-tender. Be careful not to overcook the potatoes; they should hold their shape in the finished chowder.
- Periodically stir the mixture to prevent sticking and check the consistency. If it seems too thick at this point, add a little more seafood stock or water.
Step 3: Create the Creamy Base and Add Fresh Vegetables
- Once the potatoes are tender, slowly pour in the half-and-half and whole milk, stirring gently to incorporate. Bring the mixture back to a gentle simmer (do not boil, as this can cause the dairy to separate).
- Add the fresh corn kernels and diced zucchini to the pot, stirring gently to incorporate them into the chowder. These vegetables should maintain some of their texture and bright color, so we’re adding them later in the cooking process.
- Simmer for about 5 minutes, allowing the fresh vegetables to soften slightly while maintaining their crispness.
Step 4: Add Clams and Fresh Herbs
- If using fresh clams: Add them to the pot now, cover, and simmer for about 5-7 minutes until the shells open. Remove any clams that don’t open after this time.
- If using canned clams: Add the drained, chopped clams to the pot and stir gently to incorporate.
- Stir in the fresh lemon juice, which brightens all the flavors and balances the richness of the cream.
- Add most of the chopped parsley and chives (reserving some for garnish), stirring gently to incorporate.
- Taste the chowder and season with salt and freshly ground black pepper as needed. Remember that clams and seafood stock can be naturally salty, so taste first before adding additional salt.
Step 5: Finish and Serve
- Take the pot off the heat and discard the bay leaves.
- Let the chowder sit for about 5 minutes—this short rest lets the flavors come together and gives it a chance to thicken up a bit.
- Ladle the hot chowder into bowls, making sure each serving gets plenty of clams and vegetables.
- Garnish each bowl with the reserved fresh herbs, a few grinds of black pepper, and a squeeze of fresh lemon if desired.
- Serve immediately with oyster crackers or sourdough croutons on the side.
What to Serve Californian Clam Chowder With
Californian Clam Chowder makes a satisfying meal on its own, but pairing it with complementary items creates a truly memorable dining experience:
Bread Options:
- Sourdough bread bowls: The San Francisco classic for serving chowder
- Crusty French baguette slices for dipping
- Garlic bread for an extra flavor dimension
- Rosemary focaccia for a Mediterranean twist
Fresh Accompaniments:
- Simple green salad with lemon vinaigrette
- Avocado slices with a squeeze of lime and sea salt
- Heirloom tomato salad with basil and olive oil
- Grilled asparagus with lemon zest
Heartier Side Options:
- Grilled corn on the cob with herb butter
- Roasted fingerling potatoes with rosemary
- California-style crab cakes (for a seafood feast)
- Grilled artichokes with aioli
Beverage Pairings:
- Chilled California Chardonnay or Sauvignon Blanc
- Sparkling water with cucumber and lime
- Crisp, light amber ales or pilsners
- Fresh lemonade with mint
Top Tips for Perfecting Californian Clam Chowder
Tip #1: Master the Roux for Perfect Consistency
The foundation of great chowder is a properly executed roux:
- Cook the flour and butter mixture for at least 1-2 minutes to eliminate raw flour taste
- Add liquid gradually while whisking constantly to prevent lumps
- If your chowder becomes too thick, thin it with additional seafood stock, clam juice, or a splash of milk
- For a thicker chowder, you can increase the flour to 1/3 cup, but be careful not to make it pasty
- Keep in mind that chowder thickens as it cools, so aim for a slightly thinner texture than you ultimately want.
Tip #2: Optimize Your Clam Strategy
The star ingredient deserves special attention:
- Combine canned and fresh clams for the best balance of convenience and flavor
- If using only canned clams, choose high-quality brands and add them toward the end of cooking to prevent them from becoming tough
- When purchasing fresh clams, ensure all shells are tightly closed or close when tapped
- Soak fresh clams in cold water with a tablespoon of cornmeal for 20 minutes before cooking to help purge any sand
- Don’t discard clam juice from canned clams – it adds concentrated flavor to your chowder
- For deeper clam flavor, consider adding bottled clam juice to your stock
Tip #3: Handle Dairy With Care
Proper dairy technique prevents common chowder problems:
- Never allow the chowder to boil after adding dairy – keep it at a gentle simmer
- Use room temperature half-and-half and milk to reduce the risk of curdling
- If you prefer a lighter chowder, substitute part of the half-and-half with whole milk
- For a dairy-free version, coconut milk makes a surprisingly good substitute
- Add dairy slowly while stirring to help it incorporate properly
- If you notice any curdling beginning, immediately remove from heat and whisk vigorously
Tip #4: Vegetable Timing Is Crucial
The signature of Californian Clam Chowder is its vibrant vegetables:
- Add hardy vegetables (onions, celery, carrots) at the beginning to create your flavor base
- Add potatoes after the broth is seasoned, allowing them to absorb flavor as they cook
- Add quick-cooking vegetables (corn, zucchini) later in the process so they retain color and texture
- Cut all vegetables to a similar size for even cooking and better presentation
- For summer sweetness, consider grilling the corn before adding it to the chowder
- Don’t be afraid to add seasonal California vegetables like bell peppers, fennel, or even artichoke hearts
Tip #5: Don’t Skip the Fresh Finish
The California style is defined by fresh, bright finishing touches:
- Add fresh herbs at the end of cooking to keep their flavor and vibrant color intact.
- A squeeze of lemon juice brightens the entire dish and balances the richness
- Consider adding a drizzle of good California olive oil as a garnish
- For a special presentation, reserve some fresh clams in their shells to place on top of each serving
- Fresh cracked pepper added at the table makes a noticeable difference
- Allow the chowder to rest briefly before serving to let flavors meld
Storing and Reheating Tips
Californian Clam Chowder can be successfully stored and reheated, though it’s at its best when fresh:
Short-Term Storage:
- Allow chowder to cool completely before refrigerating (within 2 hours of cooking)
- Store leftovers in airtight containers in the fridge for up to 3 days.
- For best texture, store any garnishes (fresh herbs, lemon wedges) separately
Freezing Options:
- Dairy-based chowders can be frozen, though the texture may change slightly
- For best results, prepare the chowder up to the point before adding dairy, then freeze
- When ready to use, thaw overnight in the refrigerator, then heat and add fresh dairy and clams
- If freezing completed chowder, use within 1 month for best quality
- Freeze in individual portions for convenient single servings
- Leave some headspace in containers as the chowder will expand when frozen
Reheating Methods:
- Stovetop (Preferred Method):
- Reheat over low to medium-low heat, stirring occasionally
- Add a splash of milk or seafood stock if the chowder has thickened too much
- Heat only until steaming but not boiling to prevent dairy separation
- If adding fresh herbs or lemon juice, do so after reheating
- Microwave Method:
- Heat in a microwave-safe container at 70% power in 1-minute intervals
- Stir between intervals to ensure even heating
- Cover with a microwave-safe lid or paper towel, leaving a vent
- Reheat gently to avoid overheating, as it can cause the mixture to separate.
- Slow Cooker Method (For Larger Quantities):
- Transfer refrigerated chowder to a slow cooker
- Heat on low for 1-2 hours, stirring occasionally
- This method is excellent for keeping chowder warm for gatherings
Revitalizing Leftovers:
- Add a splash of fresh lemon juice when reheating to brighten flavors
- Garnish with new fresh herbs after reheating
- Consider adding freshly steamed clams on top when serving leftovers
- A drizzle of good olive oil can refresh the mouthfeel of reheated chowder
- If the potatoes have absorbed too much liquid, add additional stock or milk when reheating
When to Start Fresh:
- If the chowder smells sour or the dairy has completely separated, it’s best to discard it
- Seafood dishes generally have a shorter refrigerated shelf life than other foods
- If uncertain about freshness, remember the adage: when in doubt, throw it out
By following these detailed instructions and expert tips, you’ll create a Californian Clam Chowder that perfectly balances creamy richness with fresh, vibrant flavors. This West Coast interpretation of the classic dish honors traditional chowder techniques while incorporating the bright, seasonal approach that makes California cuisine so celebrated. Whether served in a sourdough bread bowl on a foggy San Francisco day or in your own kitchen, this chowder brings a taste of coastal California to your table.
Californian Clam Chowder: 5 Easy Steps to Creamy Perfection
Cuisine: AmericanDifficulty: Moderate6
servings20
minutes40
minutes390–430
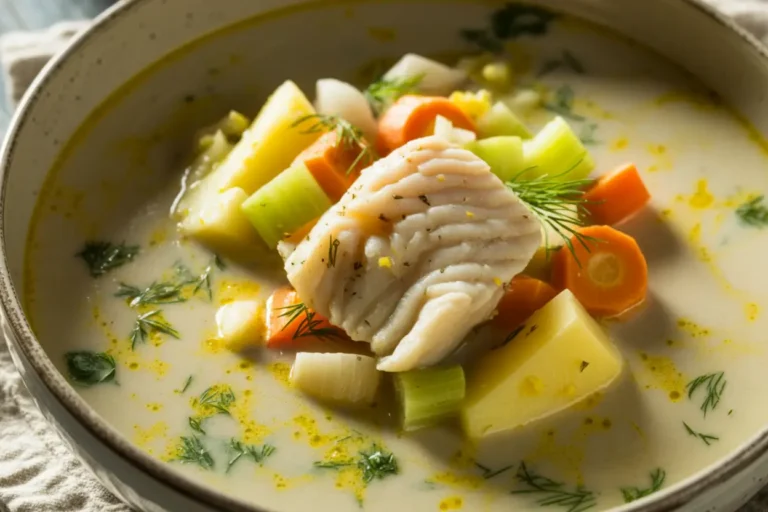
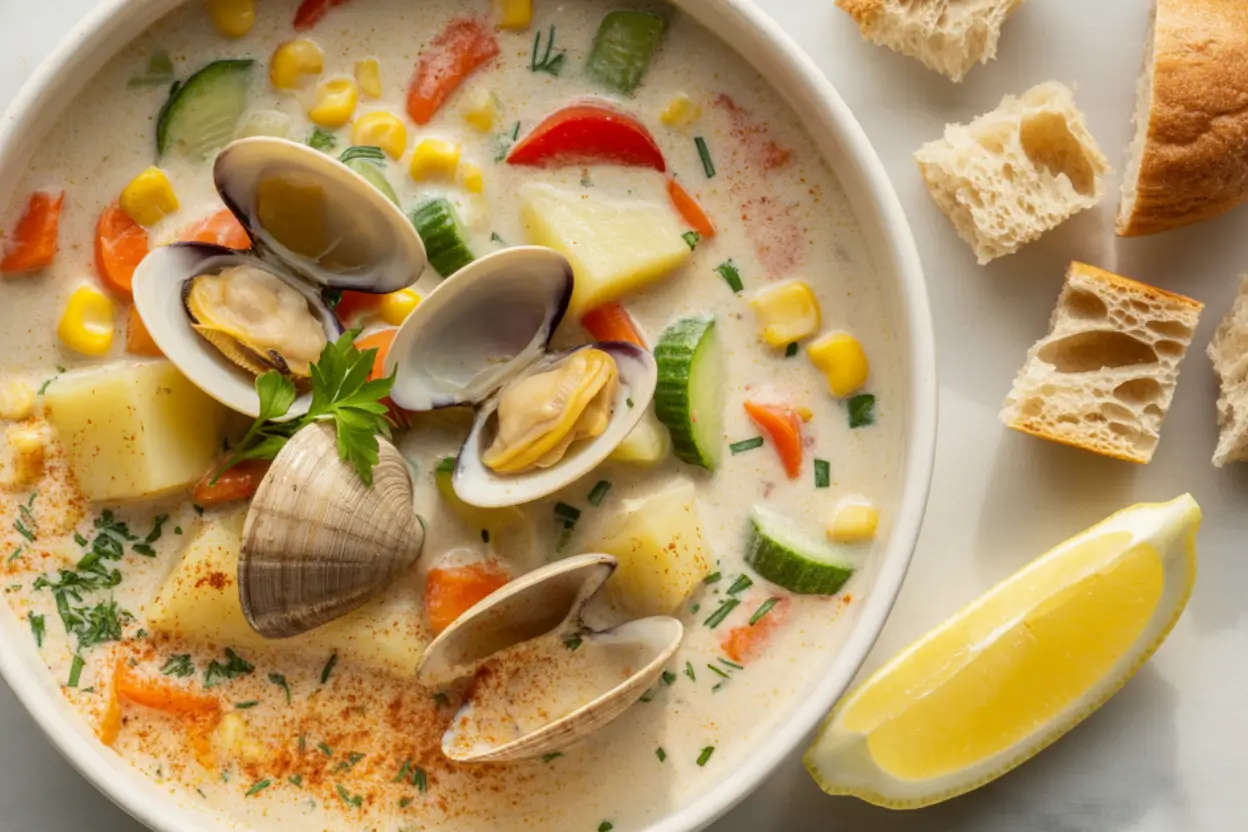
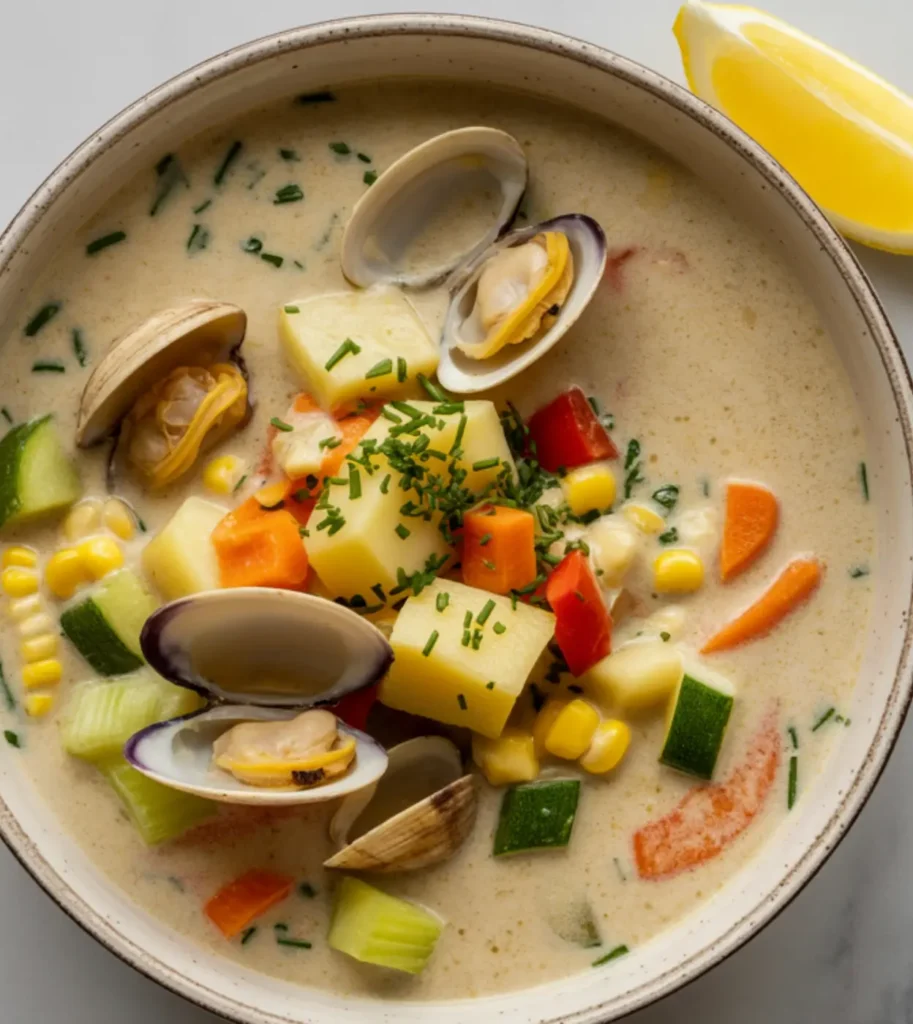
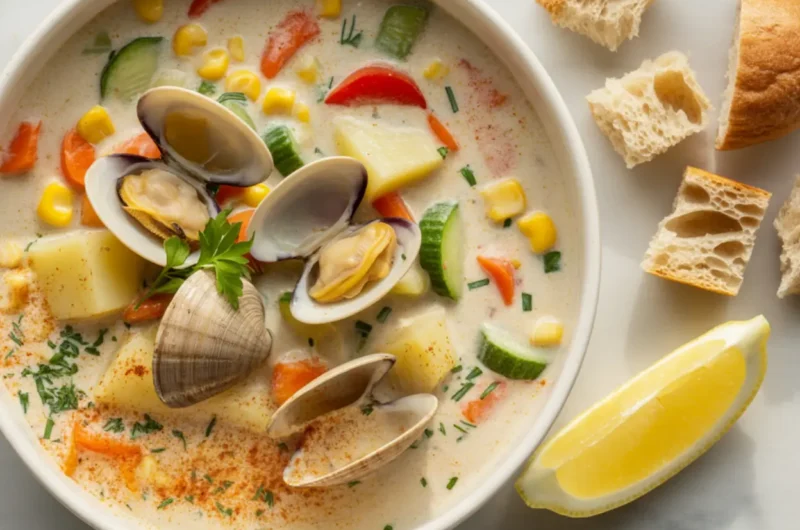
kcalA lighter, vegetable-rich twist on the classic clam chowder, this Californian version balances creamy seafood flavors with vibrant veggies like red bell pepper, zucchini, and corn. Finished with fresh herbs and a splash of lemon, it’s coastal comfort in a bowl.
Ingredients
4 tablespoons unsalted butter
1 large yellow onion, finely diced, should yield about 1½ cups.
2 stalks celery, finely diced (about ¾ cup)
1 medium red bell pepper, diced (about ¾ cup)
1 medium carrot, peeled and diced (about ½ cup)
4 cloves garlic, minced
¼ cup all-purpose flour
4 cups seafood stock or clam juice (can substitute with chicken broth)
2 bay leaves
½ teaspoon dried thyme
½ teaspoon smoked paprika
¼ teaspoon cayenne pepper (optional, for heat)
1 pound Yukon Gold potatoes, diced into ½-inch cubes (about 3 cups)
1½ cups half-and-half
1 cup whole milk
Two (6.5 oz) cans of chopped clams, drained — be sure to save the juice for later.
1 pound fresh clams, scrubbed clean (optional, for extra flavor and presentation)
1 cup fresh corn kernels (from approximately 2 ears of corn)
1 medium zucchini, diced (about 1 cup)
1 tablespoon fresh lemon juice
3 tablespoons fresh parsley, chopped
2 tablespoons fresh chives, chopped
Salt and freshly ground black pepper, to taste
Extra chopped fresh chives
Lemon wedges
Oyster crackers or sourdough croutons
Directions
- Build the Flavorful Base
Start by melting the butter in a large pot over medium heat. Sauté the onion, celery, red bell pepper, and carrot for about 5–7 minutes until soft and translucent. Stir in the garlic and cook for 30 seconds. Sprinkle the flour over the veggies and cook, stirring constantly, for 1–2 minutes to form a thickening roux. Gradually pour in the seafood stock (including the reserved clam juice), stirring to keep the mixture smooth and slightly thickened. - Add Potatoes and Seasonings
Mix in the bay leaves, thyme, smoked paprika, and cayenne (if using), then add the diced potatoes. Stir everything well, bring it to a simmer, and reduce the heat. Cover and simmer for 10–15 minutes, just until the potatoes are fork-tender but still hold their shape. Stir occasionally and add more stock or water if it gets too thick. - Make It Creamy and Add Veggies
Once the potatoes are tender, gently stir in the half-and-half and whole milk. Bring it back to a gentle simmer—avoid boiling. Add the fresh corn and diced zucchini, and simmer for another 5 minutes. This softens the veggies while keeping their color and texture vibrant. - Add Clams and Fresh Herbs
If using fresh clams, add them now and cook covered for 5–7 minutes until they open. Discard any that don’t. If using canned clams, stir them in gently. Add lemon juice, most of the chopped parsley and chives, and season to taste with salt and pepper. Be cautious—seafood stock and clams can already be salty. - Rest and Serve
Remove the pot from the heat and discard the bay leaves. Let the chowder sit for 5 minutes to let the flavors settle. Serve in bowls, making sure each portion has plenty of clams and vegetables. Garnish with the reserved herbs, a touch of black pepper, and a squeeze of lemon. Serve hot with oyster crackers or sourdough croutons on the side.
Notes
- This chowder is a beautiful fusion of hearty and fresh. The use of both canned and fresh clams adds depth, while vegetables like zucchini, corn, and bell pepper bring a California farmer’s market vibe. If you want an extra touch of smokiness, try grilling the corn beforehand. And don’t skip the lemon—it truly brightens every spoonful.