
Charbroiled oysters: How to Make Them in 4 Easy Steps
Table of Contents
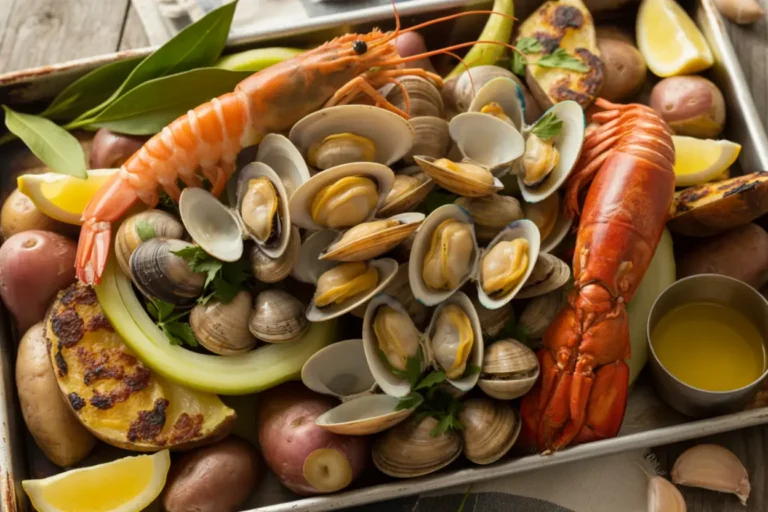
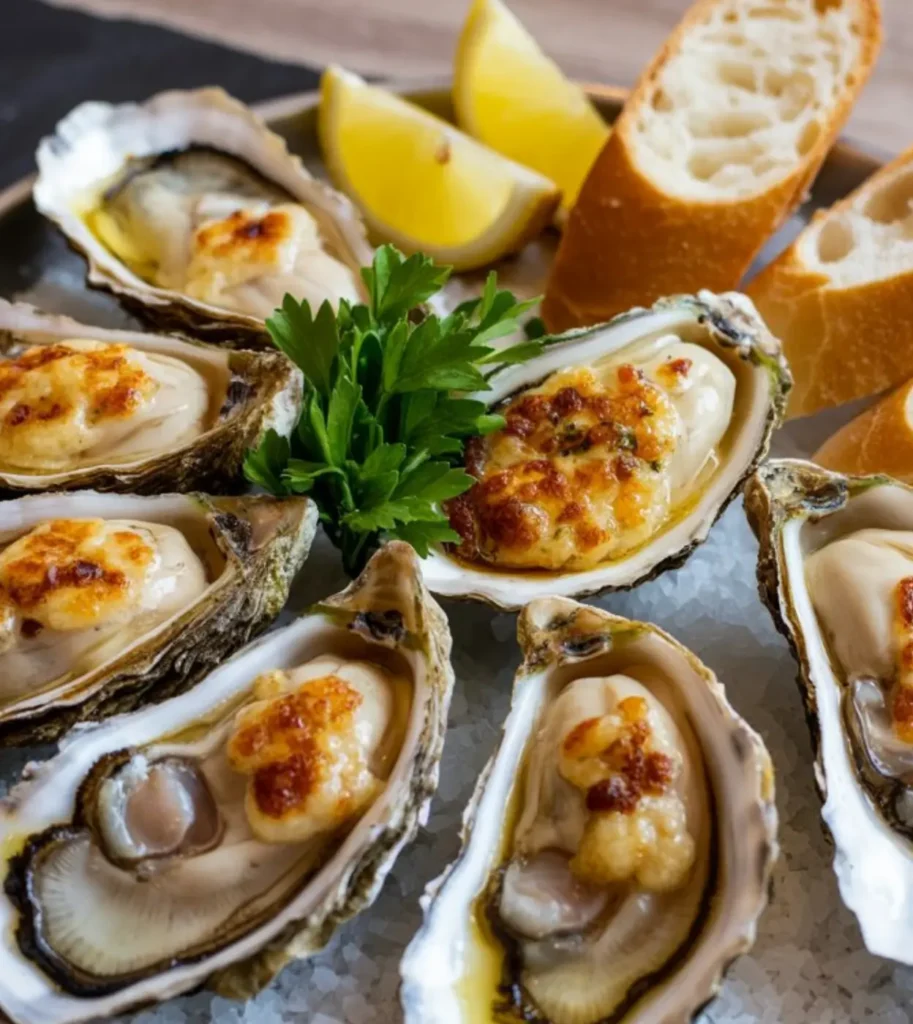
There’s something magical about the sizzle and aroma of perfectly charbroiled oysters fresh off the grill. After years of perfecting this New Orleans classic at home, I’m excited to share my foolproof method that delivers restaurant-quality results every time. Whether you’re an experienced seafood enthusiast or a curious home cook looking to expand your repertoire, these charbroiled oysters will transform your next gathering into an unforgettable culinary experience.
Thank you for reading this post, don't forget to subscribe!The beauty of charbroiled oysters lies in their ability to convert even the most skeptical oyster doubters into devoted fans. The smoky char from the grill combined with the rich, garlicky butter sauce creates an irresistible flavor profile that showcases the oysters’ natural brininess while making them approachable for everyone at your table.
How to Make Charbroiled Oysters
Quick Overview
Charbroiled oysters offer the perfect balance of simplicity and sophisticated flavor. Unlike raw oysters, which can intimidate some diners, this preparation method adds depth through a savory garlic-herb butter that bubbles and caramelizes on the grill, creating an incredible sauce that enhances the oysters’ natural sweetness.
What makes this recipe particularly special is how the high heat transforms the oysters’ texture, creating slightly firmer, juicier morsels that retain their oceanic essence while taking on smoky notes from the grill. The melted butter mixture, infused with garlic, herbs, and cheese, forms a delicious sauce in the shell that’s perfect for sopping up with crusty bread.
Despite their gourmet reputation, charbroiled oysters are surprisingly straightforward to prepare. With just 15-20 minutes of active preparation and another 5-7 minutes on the grill, you can create an impressive appetizer or main course that tastes like it came straight from a high-end seafood restaurant. The key lies in the quality of your ingredients and mastering the simple techniques involved.
The Ingredients I Use to Bring My Charbroiled Oysters to Life
For the Oysters:
- 24 fresh oysters, preferably large Gulf or East Coast varieties
- Rock salt or uncooked rice (for stabilizing oysters on the serving platter)
For the Garlic-Herb Butter:
- 16 tablespoons (2 sticks) unsalted butter, softened
- 8 garlic cloves, very finely minced (about 3 tablespoons)
- 2 tablespoons finely chopped fresh parsley
- 1 tablespoon finely chopped fresh thyme (or 1 teaspoon dried)
- 1 teaspoon dried oregano
- 1 teaspoon smoked paprika
- 1/2 teaspoon cayenne pepper (adjust to taste for heat preference)
- 2 teaspoons fresh lemon zest
- 1/2 teaspoon freshly ground black pepper
- 1/2 teaspoon kosher salt
For Topping and Serving:
- 1 cup freshly grated Parmesan cheese
- 1/2 cup freshly grated Romano cheese (substitute with more Parmesan if unavailable)
- Fresh lemon wedges for serving
- 2 tablespoons finely chopped fresh parsley for garnish
- 1 French baguette, sliced, for serving
Tools Needed:
- Oyster knife/shucking knife
- Heavy-duty glove or kitchen towel for shucking
- Gas or charcoal grill
- Sheet pan or large heat-resistant platter
- Small bowl for discarded top shells
- Pastry brush or spoon for butter application
Step-by-Step Instructions
Step 1: Prepare the Oysters
- Clean the oysters thoroughly. Using a stiff brush, scrub each oyster under cold running water to remove any mud, sand, and loose shell fragments. Pay special attention to the hinge and crevices where debris tends to hide.
- Prepare for shucking. Put on a cut-resistant glove or wrap a kitchen towel around your non-dominant hand that will hold the oyster. This protection is essential as the shucking knife can slip.
- Shuck the oysters properly:
- Hold the oyster cup-side down in your protected hand, with the hinge facing toward you.
- Insert the tip of the oyster knife into the hinge, applying firm pressure while wiggling the knife slightly.
- Once you feel the knife penetrate the hinge, twist the knife to pop the shell open.
- Run the knife along the top of the shell to cut the adductor muscle.
- Gently remove the top shell, taking care to keep as much of the oyster’s natural juice (also called liquor) in the bottom shell as possible.
- Slide the knife carefully underneath the oyster to cut the bottom muscle, loosening the meat while keeping it nestled in the shell.
- Arrange the shucked oysters: Place the shucked oysters (in their bottom half shells) on a bed of rock salt or uncooked rice spread on a baking sheet. The salt or rice helps stabilize the oysters and prevents them from tipping over, keeping their juices intact.
Step 2: Make the Garlic-Herb Butter
- Combine butter ingredients. In a medium bowl, add the softened butter, minced garlic, chopped parsley, thyme, oregano, smoked paprika, cayenne pepper, lemon zest, black pepper, and kosher salt.
- Mix thoroughly. Using a fork or rubber spatula, mix all ingredients until completely combined and uniform. You want every bit of butter to carry all the flavors.
- Adjust seasoning. Taste a tiny amount of the compound butter and adjust the seasonings if needed. Remember that the butter will be somewhat diluted by the oyster liquor during cooking.
- Prepare for application. If the butter mixture is too soft to work with, refrigerate it for about 10 minutes until it firms up slightly. You want it pliable but not runny.
Step 3: Prepare the Grill and Apply Toppings
- Heat the grill. Preheat your grill to high heat, around 450–500°F (232–260°C). If you’re using a charcoal grill, spread the coals out evenly for direct heat. For a gas grill, simply turn all the burners to high.
- Apply the butter mixture. Using a small spoon or pastry brush, generously top each oyster with approximately 1-2 teaspoons of the garlic-herb butter mixture. Ensure the butter covers the entire exposed surface of the oyster.
- Add the cheese topping. Sprinkle each butter-topped oyster with a combination of the grated Parmesan and Romano cheeses, using about 1 tablespoon of cheese per oyster. The cheese should form a light layer across the top.
- Final preparation. Ensure your oysters are stable on their bed of salt or rice and arranged so they can be easily transferred to and from the grill. If your sheet pan isn’t grill-safe, prepare a heat-resistant platter for serving.
Step 4: Grill the Oysters to Perfection
- Place oysters on the grill. Carefully transfer the oysters to the preheated grill. You can place them directly on the grill grates, ensuring they’re stable and level to prevent spilling their contents. Alternatively, if using a sheet pan that’s grill-safe, place the entire pan on the grill.
- Close the grill lid. Cook with the lid closed for 5-7 minutes, or until the oysters begin to curl at the edges, the butter is bubbling vigorously, and the cheese has melted and started to brown slightly.
- Monitor carefully. Check the oysters after about 4 minutes. They cook quickly, and overcooking can make them tough. They’re done when the edges begin to curl, the butter is bubbling, and the cheese has melted and started to brown in spots.
- Remove from grill. Using tongs, carefully remove the oysters from the grill and arrange them on the serving platter, still nestled in salt or rice to keep them stable.
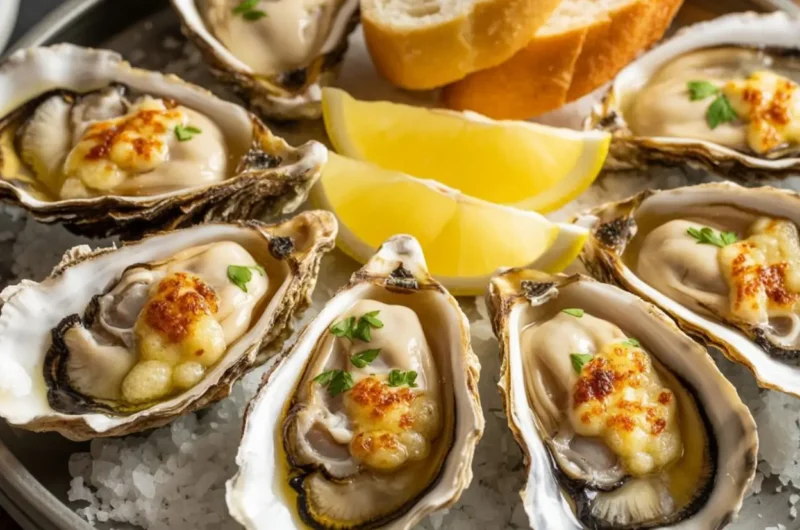
- Garnish and serve immediately. Sprinkle the hot oysters with the remaining chopped parsley and serve with lemon wedges and slices of French baguette. The bread is essential for sopping up the delicious butter sauce that accumulates in the shells.
What to Serve Charbroiled Oysters With
Charbroiled oysters make a stunning centerpiece for any meal, but they truly shine when paired with complementary sides and beverages:
Bread Options:
- Crusty French baguette slices (essential for soaking up the buttery sauce)
- Garlic bread for an extra layer of flavor
- Sourdough bread for tangy contrast
Side Dishes:
- A simple green salad tossed with lemon vinaigrette adds a fresh, zesty contrast that helps balance out the richness of the dish.
- Cold pasta salad with fresh vegetables
- Grilled asparagus or zucchini for a light, smoky complement
- Steamed new potatoes with herbs
- Crispy brussels sprouts with a hint of lemon
Appetizers and Accompaniments:
- Lemon and herb marinated olives
- Chilled shrimp cocktail for a seafood feast
- Caprese salad skewers for a fresh counterpoint
Beverage Pairings:
- Bright, crisp white wines like Sauvignon Blanc or an unoaked Chardonnay pair beautifully with this dish.
- Champagne or sparkling wine for celebrations
- Light-bodied pilsners or lagers
- Mineral water with lemon for a non-alcoholic option
- Iced tea with lemon and mint
Top Tips for Perfecting Charbroiled Oysters
Tip #1: Select and Handle Oysters Properly
The foundation of exceptional charbroiled oysters begins with selection and handling:
- Choose fresh, heavy oysters: They should feel substantial for their size and be tightly closed or close when tapped.
- Look for specific varieties: Gulf oysters are traditional for this preparation due to their size and mild flavor, but East Coast varieties like Blue Points also work well.
- Check the harvest date: Ask your fishmonger for the freshest possible oysters, ideally harvested within the past few days.
- Store properly before use: Keep oysters cup-side down in the refrigerator (never in water) covered with a damp towel until ready to use, ideally within 1-2 days of purchase.
- Discard any suspect oysters: If an oyster is open before shucking and doesn’t close when tapped, or if it smells off rather than fresh and briny, discard it.
Tip #2: Master the Butter Mixture
The herb-garlic butter is the soul of this dish:
- Use room temperature butter: Fully softened butter incorporates ingredients more evenly and applies more smoothly to the oysters.
- Mince garlic extremely fine: Large pieces of garlic may burn or remain raw-tasting. Use a microplane or garlic press for the best texture.
- Prepare butter in advance: Making the compound butter a day ahead allows the flavors to meld. Just bring it back to room temperature before using.
- Adjust heat levels thoughtfully: The cayenne provides pleasant warmth, but you can reduce or increase it based on your preference.
- Reserve extra butter: Make a little more than you need and refrigerate or freeze the remainder for an instant flavor boost to vegetables, steaks, or bread.
Tip #3: Perfect Your Grilling Technique
Temperature and timing are critical for ideal results:
- Ensure proper grill temperature: The grill should be hot enough to quickly cook the oysters without drying them out—450-500°F is ideal.
- Create heat zones: If using a charcoal grill, arrange coals for both high and medium heat zones, allowing you to move oysters that are cooking too quickly.
- Consider a grilling tray: If you’re concerned about oysters tipping over, a perforated grilling tray or platter designed for seafood can be helpful.
- Don’t walk away: These cook quickly, usually in 5-7 minutes, and can go from perfect to overcooked in less than a minute.
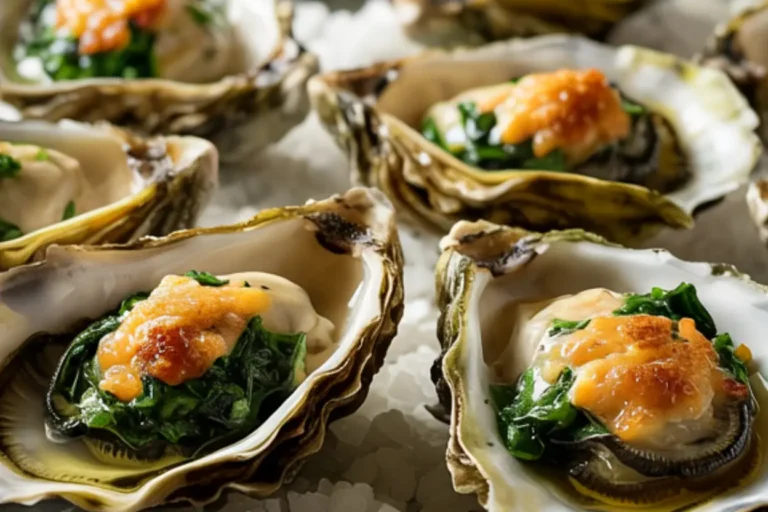
- Look for visual cues: Perfectly done charbroiled oysters have curled edges, bubbling butter, and cheese that’s melted and just beginning to brown in spots.
Tip #4: Preparation and Serving Details
The final touches make all the difference:
- Stabilize with salt: Rock salt not only keeps oysters level during cooking but makes a beautiful presentation and helps maintain heat when served.
- Serve immediately: These are at their peak straight from the grill when the butter is still bubbling and the cheese is perfectly melted.
- Provide the right tools: Offer small forks or seafood picks for eating the oysters and plenty of napkins for the buttery goodness.
- Don’t forget the bread: Serving crusty bread for sauce-sopping is non-negotiable—it’s almost as treasured as the oysters themselves.
- Consider a pre-grill drizzle: For extra richness, add a small splash of fresh lemon juice to each oyster just before adding the butter mixture.
Storing and Reheating Tips
While charbroiled oysters are undeniably best enjoyed fresh off the grill, there are ways to handle leftovers if necessary:
Immediate Storage:
- Allow any leftover oysters to cool to room temperature (no more than 30 minutes).
- Carefully remove the oyster meat and sauce from the shells, storing them together in an airtight container.
- Refrigerate promptly; seafood should not be left unrefrigerated for extended periods.
- Consume within 24 hours for best quality and safety.
Reheating Methods:
- Oven Method (Preferred):
- Preheat oven to 375°F (190°C).
- Place leftover oysters and sauce in a small, oven-safe dish.
- Cover with foil and heat for approximately 5-7 minutes until warmed through.
- For the last minute, remove foil and sprinkle with a little fresh grated cheese if desired.
- Serve with fresh bread for the full experience.
- Stovetop Method:
- Heat a small skillet over medium-low heat.
- Add the oysters with their sauce.
- Warm gently for 2-3 minutes, being careful not to overcook.
- Serve immediately with bread or crackers.
- Microwave (Last Resort):
- Place oysters and sauce in a microwave-safe dish.
- Cover with a damp paper towel.
- Heat on 50% power for 30 seconds, then check.
- Continue in 15-second intervals until just warmed through.
- Note that this method will not maintain the original texture as well.
Alternative Uses for Leftovers:
- Chop leftover oysters and stir into scrambled eggs for a luxurious breakfast.
- Add to pasta with some additional butter and herbs for a quick seafood pasta.
- Mix into rice with the sauce for a simplified oyster rice dish.
Freezing (Not Recommended):
- Cooked oysters generally don’t freeze well, as they can become tough and rubbery when thawed.
- The butter sauce may also separate when frozen and reheated.
- If you must freeze, store in an airtight container for no longer than one month.
- Thaw overnight in the refrigerator before reheating using the oven method above.
Preparation Ahead of Time:
- If planning to serve at a gathering, consider preparing all elements ahead of time:
- Clean and shuck oysters up to 2 hours before cooking, keeping them refrigerated.
- Make the garlic-herb butter up to 3 days in advance, storing refrigerated but bringing to room temperature before using.
- Grate cheeses ahead of time and store in the refrigerator.
- Have your serving platter prepared with rock salt before guests arrive.
By following these detailed instructions and expert tips, you’ll be able to create restaurant-quality charbroiled oysters that will impress even the most discerning seafood lovers. The combination of fresh, high-quality ingredients and proper technique yields a dish that’s remarkably simple yet undeniably sophisticated—perfect for everything from casual backyard gatherings to special celebrations.
Charbroiled Oysters: How to Make Them in 4 Easy Steps
Cuisine: Cajun / CreoleDifficulty: Moderate6
servings30
minutes8
minutes300-350
kcalCharbroiled oysters are a smoky, buttery, and indulgent seafood dish made famous in New Orleans. These oysters are grilled on the half shell with a rich garlic-herb butter, topped with Parmesan and Romano cheeses, and finished with a kiss of fire until bubbling and golden. Served with lemon wedges and crusty baguette slices, they make for an unforgettable appetizer or main course.
Ingredients
24 fresh oysters, preferably large Gulf or East Coast varieties
Rock salt or uncooked rice (for stabilizing oysters on the serving platter)
16 tablespoons (2 sticks) unsalted butter, softened
8 garlic cloves, very finely minced (about 3 tablespoons)
2 tablespoons finely chopped fresh parsley
1 tablespoon finely chopped fresh thyme (or 1 teaspoon dried)
1 teaspoon dried oregano
1 teaspoon smoked paprika
1/2 teaspoon cayenne pepper (adjust to taste for heat preference)
2 teaspoons fresh lemon zest
1/2 teaspoon freshly ground black pepper
1/2 teaspoon kosher salt
1 cup freshly grated Parmesan cheese
1/2 cup freshly grated Romano cheese (substitute with more Parmesan if unavailable)
Fresh lemon wedges for serving
2 tablespoons finely chopped fresh parsley for garnish
1 French baguette, sliced, for serving
Directions
- Clean and Shuck the Oysters
Start by scrubbing the oysters under cold running water to remove any grit or debris. Using a shucking knife and a protective glove or towel, carefully open each oyster over a bowl to catch any juices. Detach the oyster from the top and bottom shells, keeping the meat in the bottom half. Arrange the shucked oysters on a baking sheet lined with rock salt or uncooked rice to keep them steady and upright. - Make the Garlic-Herb Butter
In a bowl, mix the softened butter with minced garlic, parsley, thyme, oregano, smoked paprika, cayenne, lemon zest, black pepper, and salt. Stir until well combined into a flavorful compound butter. Taste and adjust seasoning if needed. Chill the butter slightly if it’s too soft, so it’s easy to spoon onto the oysters later. - Prep the Grill and Top the Oysters
Preheat your grill to high heat (450–500°F). Spoon about 1–2 teaspoons of the garlic-herb butter onto each oyster. Then, sprinkle each with a generous layer of grated Parmesan and Romano cheeses. Make sure the oysters are stable and easy to transfer to the grill—either on the baking sheet (if grill-safe) or a heatproof platter. - Grill and Serve
Place the oysters directly on the grill or on the prepared tray. Close the lid and grill for 5–7 minutes, until the oysters begin to curl at the edges, the butter bubbles, and the cheese is melted and lightly browned. Carefully remove them with tongs, garnish with chopped parsley, and serve immediately with lemon wedges and slices of baguette to soak up the savory garlic butter.
Notes
- The magic of charbroiled oysters lies in the balance of flavors—briny oysters, rich garlic butter, smoky paprika, and tangy cheese all come together under a high-heat flame. For best results, use large, freshly shucked oysters and grill them over high heat until the butter sizzles and the cheese is golden. Serve immediately with lemon wedges and slices of baguette to soak up every drop of that flavorful butter.