
Clam Cake: 5 Secrets to Crispy, Golden Perfection
Table of Contents
There’s something irresistible about a perfectly executed clam cake – that magical combination of a crispy, golden exterior giving way to a tender interior studded with briny clams. After years of testing and refining techniques along the New England coast, I’m excited to share my definitive guide to creating restaurant-quality clam cakes at home. These beloved seafood fritters may seem simple, but achieving the ideal texture and flavor balance requires attention to detail and a few insider secrets I’ve gathered from seaside shack owners and professional chefs alike.
Thank you for reading this post, don't forget to subscribe!Whether you’re a New England native craving a taste of home or someone who’s never experienced the joy of freshly fried clam cakes, this recipe will guide you through creating this iconic coastal treat in your own kitchen. Let’s dive into the secrets that separate mediocre clam fritters from truly exceptional clam cakes.
How to Make Clam Cake
Quick Overview
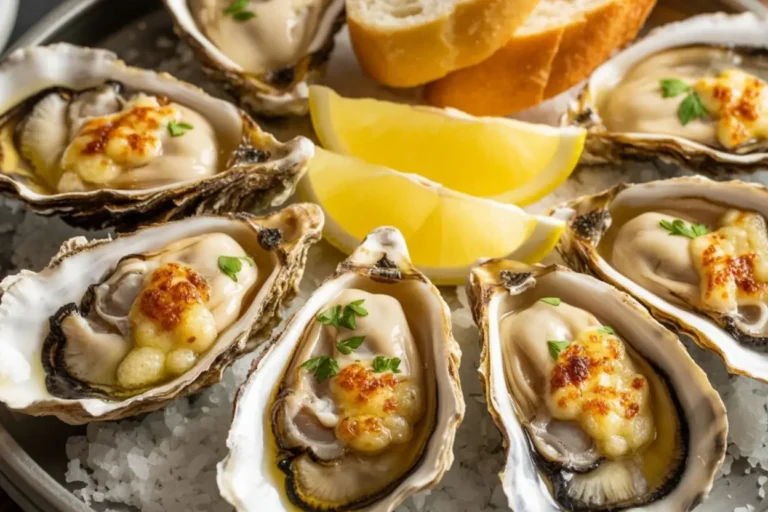
Clam cakes represent New England coastal cuisine at its finest – unpretentious yet deeply satisfying. These golden fritters strike the perfect balance between a light, crispy exterior and a tender, flavorful interior where the sweet brininess of clams shines through in every bite.
What makes this recipe special is its focus on proper proportions and technique. Many clam cake recipes produce heavy, doughy results, but this version creates a batter that’s substantial enough to suspend the clams while remaining delicate after frying. The addition of cornmeal provides a subtle textural contrast and authentic flavor that elevates these above standard fritters.
Despite their gourmet taste, clam cakes are remarkably straightforward to prepare. The batter comes together in just minutes, and the actual cooking process takes less than half an hour. The result is a versatile dish that works equally well as an impressive appetizer for guests or a satisfying main course paired with simple sides. Best of all, these clam cakes maintain their wonderful texture even as they cool slightly, making them practical for serving to groups.
The Ingredients I Use to Bring My Clam Cake to Life
For the Clam Preparation:
- 2 cups fresh clams, shucked and chopped (about 24 cherrystone or 16-18 quahog clams) OR 2 (6.5 oz) cans of chopped clams
- 1/3 cup clam juice (reserved from fresh or canned clams)
For the Batter:
- 1¾ cups all-purpose flour
- 1/4 cup yellow cornmeal (fine or medium grind)
- 1 tablespoon baking powder
- 1 teaspoon salt
- 1/2 teaspoon freshly ground black pepper
- 1/2 teaspoon dried thyme
- 1/4 teaspoon Old Bay seasoning
- 2 large eggs, lightly beaten
- 1/3 cup whole milk
- 2 tablespoons unsalted butter, melted and cooled
- 1 tablespoon fresh lemon juice
- 2 tablespoons fresh parsley, finely chopped
- 1 tablespoon fresh chives, finely chopped (optional)
- 1/2 cup onion, very finely diced (about half a medium onion)
- 1 clove garlic, minced
For Frying:
- 4 cups vegetable oil or canola oil for frying
For Serving:
- Lemon wedges
- Tartar sauce (see quick recipe below)
Quick Tartar Sauce Recipe:
- 3/4 cup mayonnaise
- 2 tablespoons sweet pickle relish
- 1 tablespoon capers, rinsed and chopped
- 1 tablespoon fresh lemon juice
- 1 tablespoon fresh dill, chopped (or 1 teaspoon dried)
- 1/2 teaspoon Dijon mustard
- Salt and pepper to taste
Step-by-Step Instructions
Step 1: Prepare the Clams
- If using fresh clams:
- Scrub the clam shells thoroughly under cold water to remove any sand or grit.
- Add the clams to a large pot with 1 cup of water. Cover the pot and bring it to a boil over high heat.
- Steam for about 5-8 minutes until all the clams have opened. Discard any that remain closed.
- Remove the clam meat from the shells.
- Chop the clams into small pieces (about 1/4-inch dice), reserving 1/3 cup of the cooking liquid (clam juice).
- Place the chopped clams in a fine-mesh strainer over a bowl to catch any additional juice.
- If using canned clams:
- Drain the clams, reserving 1/3 cup of the clam juice.
- Place the drained clams on paper towels and gently pat to remove excess moisture.
Step 2: Make the Clam Cake Batter
- In a large mixing bowl, combine the dry ingredients: flour, cornmeal, baking powder, salt, pepper, dried thyme, and Old Bay seasoning. Whisk thoroughly to ensure even distribution.
- In a separate medium bowl, whisk together the wet ingredients: beaten eggs, milk, melted butter, lemon juice, and the reserved 1/3 cup clam juice.
- Stir the finely diced onion, minced garlic, chopped parsley, and chives (if using) into the wet ingredients until everything is well combined.
- Pour the wet ingredient mixture into the dry ingredients and stir gently with a wooden spoon or rubber spatula until just combined. Be careful not to overmix – a few small lumps are fine. The batter should be slightly thicker than pancake batter but still drop easily from a spoon.
- Gently fold in the chopped clams until evenly distributed throughout the batter.
- Cover the bowl with plastic wrap and let the batter rest for 10-15 minutes at room temperature. This allows the flour to hydrate properly and the flavors to meld.
Step 3: Heat the Oil
- While the batter is resting, pour vegetable oil into a heavy-bottomed pot or Dutch oven to a depth of about 2 inches. The pot should be large enough so that the oil fills it no more than halfway.
- Heat the oil over medium heat until it reaches 350°F (175°C). Use a candy or deep-fry thermometer to monitor the temperature accurately.
- Line a baking sheet with paper towels and set a wire rack on top. This setup will help drain excess oil while keeping the clam cakes crispy.
Step 4: Fry the Clam Cakes
- Once the oil has reached 350°F, gently drop batter by heaping tablespoons into the hot oil. A small ice cream scoop or cookie scoop works perfectly for consistent sizing. Avoid overcrowding the pot – fry in batches of 4-5 clam cakes at a time.
- Fry for about 2-3 minutes on the first side until golden brown on the bottom.
- Using a slotted spoon or spider strainer, carefully flip each clam cake and fry for an additional 2 minutes until golden brown all over.
- Monitor the oil temperature between batches, adjusting the heat as needed to maintain 350°F.
- Use a slotted spoon to transfer the cooked clam cakes to the prepared wire rack to drain. Sprinkle with a pinch of salt while still hot if desired.
- Let the oil heat back up to the right temperature before adding the next batch.
Step 5: Prepare Tartar Sauce and Serve
- While the clam cakes are frying, make the tartar sauce by combining all sauce ingredients in a small bowl and stirring well.
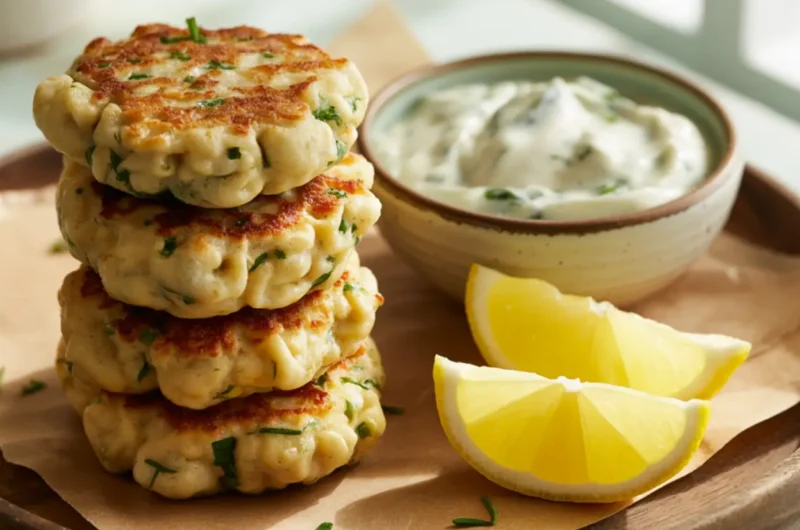
- Serve the clam cakes right away while they’re still hot, alongside lemon wedges and tartar sauce.
- For a true New England touch, serve them in a paper-lined basket and garnish with a sprinkle of fresh parsley.
What to Serve Clam Cake With
Clam cakes are versatile and pair wonderfully with a variety of accompaniments:
Classic Pairings:
- New England clam chowder for a complete seafood experience
- Fresh coleslaw with a vinegar-based dressing for a tangy contrast
- Simple green salad with lemon vinaigrette
- Corn on the cob, slathered with butter and sprinkled with sea salt.
Side Dishes:
- French fries or sweet potato fries
- Grilled summer vegetables like zucchini or bell peppers
- Garlic sautéed spinach or kale
- Fresh tomato and cucumber salad with herbs
Sauces and Condiments:
- Traditional tartar sauce (recipe included above)
- Lemon aioli for a more sophisticated option
- Spicy remoulade for heat lovers
- Simple cocktail sauce with fresh horseradish
Beverage Pairings:
- Cold New England-style IPA or light lager
- A chilled, crisp white wine such as Pinot Grigio or Sauvignon Blanc.
- Fresh lemonade
- Iced tea with mint
Top Tips for Perfecting Clam Cake
Secret #1: Manage Moisture For Maximum Crispiness
The difference between soggy and crispy clam cakes begins with moisture control:
- Thoroughly drain the clams: Whether using fresh or canned, removing excess moisture is crucial. Place chopped clams in a fine-mesh strainer for at least 10 minutes, or gently press between paper towels.
- Use precisely measured clam juice: Adding exactly 1/3 cup of clam juice provides necessary flavor and moisture without making the batter too wet.
- Let the batter rest: A 10-15 minute rest allows the flour to properly hydrate and prevents the clam cakes from absorbing too much oil during frying.
- Never refrigerate the batter: Cold batter drops into hot oil create steam, which prevents proper browning and crisping. Room temperature batter is essential.
- Avoid overmixing: Stir just until ingredients are combined. Overmixing develops gluten, resulting in tough, doughy clam cakes.
Secret #2: Perfect Your Oil Temperature Control
Temperature management is perhaps the most critical factor in achieving golden, crispy clam cakes:
- Use a reliable thermometer: Don’t guess – an accurate reading is essential for perfect results.
- Maintain 350°F consistently: Too hot (over 375°F), and the exterior burns before the center cooks; too cool (under 325°F), and the clam cakes absorb oil, becoming greasy.
- Heat stabilization: When adding batter to the oil, the temperature will drop. Adjust heat as needed to maintain target temperature.
- Fry in small batches: Adding too many clam cakes at once dramatically drops oil temperature.
- Allow oil to recover: Give the oil time to return to 350°F between batches.
- Use the right pot: A heavy-bottomed Dutch oven or cast iron pot maintains temperature better than thin metal pots.
Secret #3: Find the Right Texture Balance
Creating the perfect clam cake texture requires careful attention to ingredients and proportions:
- The cornmeal secret: The 1:7 ratio of cornmeal to flour provides traditional texture without heaviness.
- Be precise with leavening: The tablespoon of baking powder might seem like a lot, but it’s essential for the light, airy interior.
- Drop consistency matters: The batter should be thick enough to hold together but loose enough to drop from a spoon. If it’s too thick, add a bit more clam juice; if too thin, add a tablespoon of flour.
- Size control: Using a small ice cream scoop or cookie scoop (about 1½-inch diameter) ensures even cooking.
- Test batch wisdom: Start by cooking just one clam cake to test the texture and doneness. Adjust the batter if needed before frying the whole batch.
Secret #4: Amplify Clam Flavor Without Overpowering
Balancing clam flavor requires a delicate touch:
- Choose the right clams: Quahogs or cherrystone clams have robust flavor profiles ideal for clam cakes. If using canned, look for brands packed in clam juice rather than water.
- Chop, don’t mince: Cut clams into small dice (about ¼-inch) rather than mincing. This preserves their texture and creates pockets of clam flavor.
- Clam distribution: Aim for a good clam-to-batter ratio. Each bite should contain at least a piece or two of clam.
- Enhanced clam juice: For deeper flavor, simmer your clam juice with a bay leaf and thyme sprig for 10 minutes, then cool before adding to the batter.
- Herb balance: The thyme, parsley, and optional chives complement clams without masking their natural flavor. Avoid strong herbs like rosemary or sage that would compete with the delicate clam taste.
Secret #5: Perfect Your Frying Technique
The method of frying makes all the difference in the final texture:
- Oil selection: Vegetable or canola oil has a high smoke point and neutral flavor ideal for seafood.
- Right depth: Two inches of oil allows clam cakes to float freely without touching the bottom of the pot.
- Gentle handling: Use a slotted spoon to carefully turn clam cakes rather than tongs, which can break them apart.
- Listen for the sizzle change: The vigorous bubbling will subside slightly when the exterior is properly set.
- Visual doneness cues: Look for an even golden-brown color and tiny bubbles escaping from the clam cakes, indicating the interior is properly cooked.
- Proper draining: Use a wire rack over paper towels rather than placing directly on paper, which can create steam and soggy bottoms.
Storing and Reheating Tips
While clam cakes are unquestionably at their best fresh from the fryer, proper storage and reheating can maintain much of their quality for later enjoyment:
Short-Term Storage:
- Allow any leftover clam cakes to cool completely to room temperature before storing.
- Arrange them in a single layer on a paper towel-lined plate or container.
- Cover loosely with paper towels, then wrap in aluminum foil or place in an airtight container.
- Store in the refrigerator for up to 2 days. Beyond this timeframe, quality significantly deteriorates.
Freezing Option:
- For longer storage, freeze cooled clam cakes in a single layer on a baking sheet until solid (about 2 hours).
- Transfer to a freezer-safe container or heavy-duty freezer bag, separating layers with parchment paper.
- Label with the date and use within 2 months for best quality.
- Freeze any extra raw batter in an airtight container for up to 1 month. Thaw overnight in the refrigerator, then bring to room temperature before frying.
Reheating Methods:
- Oven Method (Best for Maintaining Crispness):
- Preheat your oven to 375°F (190°C).
- Place clam cakes on a wire rack over a baking sheet to allow air circulation.
- Reheat for 7-10 minutes until heated through and exterior has crisped up again.
- If reheating from frozen, add 5 additional minutes to the heating time.
- Air Fryer Method (Excellent Alternative):
- Preheat air fryer to 350°F (175°C).
- Place clam cakes in a single layer in the air fryer basket.
- Heat for 3-4 minutes until crispy and warmed through.
- This method provides results nearly as good as fresh-fried.
- Toaster Oven Method:
- Heat at 350°F for 5-7 minutes on a small tray or foil.
- This works well for smaller batches and uses less energy than a full-sized oven.
- Skillet Reheating Method:
- Warm a little oil in a non-stick skillet over medium heat.
- Add clam cakes and heat for 2 minutes per side until crispy and warmed through.
- Microwave Method (Not Recommended, but Quick Option):
- While microwaving won’t restore crispness, it works in a pinch.
- Place clam cakes on a microwave-safe plate.
- Cover with a damp paper towel and microwave on 50% power for 30 seconds.
- Check temperature and continue in 15-second intervals until just warmed through.
- Finish in a toaster oven for 1-2 minutes if possible to regain some crispness.
Revitalizing Tips:
- Add a few drops of fresh lemon juice to the reheated clam cakes to brighten up the flavor.
- Serve with freshly made tartar sauce to compensate for any textural changes.
- A light sprinkle of Old Bay seasoning or smoked paprika can add new dimension to reheated clam cakes.
- Remember that reheated clam cakes, while still delicious, won’t have exactly the same texture as freshly made ones.
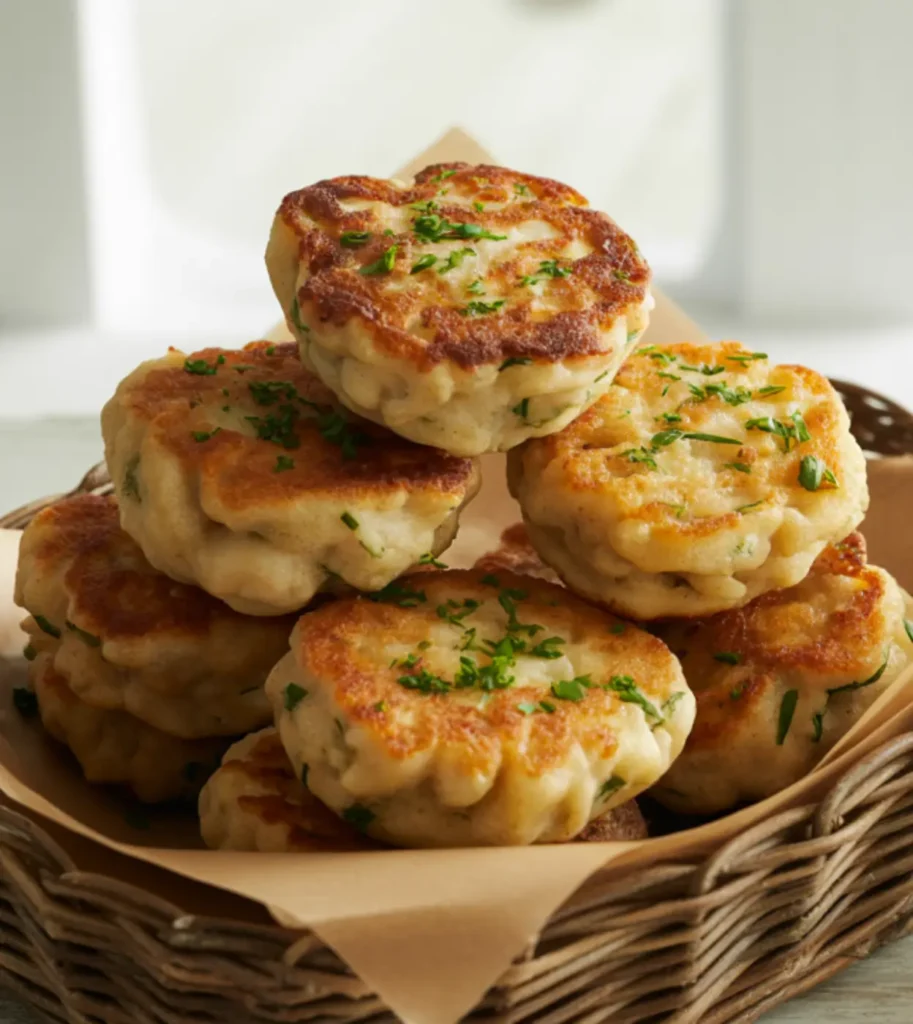
By following these detailed instructions and incorporating these five crucial secrets, you’ll create clam cakes that rival those from the finest New England seafood shacks. The perfect clam cake requires attention to detail, but the reward is a golden, crispy exterior giving way to a tender, flavorful interior studded with briny clams. This iconic coastal treat captures the essence of seaside dining and brings it directly to your table, no matter where you live.
Clam Cake: 5 Secrets to Crispy, Golden Perfection
Cuisine: AmericanDifficulty: Easy4
servings20
minutes20
minutes180–220
kcalThese crispy golden clam cakes are a beloved coastal classic—light, savory fritters packed with fresh herbs, onion, and tender clams, then deep-fried to perfection. Serve them hot with lemon wedges and a quick homemade tartar sauce for the ultimate seaside snack or appetizer.
Ingredients
1¾ cups all-purpose flour
1/4 cup yellow cornmeal (fine or medium grind)
1 tablespoon baking powder
1 teaspoon salt
1/2 teaspoon freshly ground black pepper
1/2 teaspoon dried thyme
1/4 teaspoon Old Bay seasoning
2 large eggs, lightly beaten
1/3 cup whole milk
2 tablespoons unsalted butter, melted and cooled
1 tablespoon fresh lemon juice
2 tablespoons fresh parsley, finely chopped
1 tablespoon fresh chives, finely chopped (optional)
1/2 cup onion, very finely diced (about half a medium onion)
1 clove garlic, minced
4 cups vegetable oil or canola oil for frying
Lemon wedges
Tartar sauce (see quick recipe below)
Tartar Sauce
Directions
- Prepare the Clams
If using fresh clams, steam them in a covered pot with water until they open, then chop the meat finely and reserve some of the cooking liquid. For canned clams, drain and pat them dry, saving some of the juice. Either way, the clams should be chopped small and relatively dry to avoid watery batter. - Make the Batter
In one bowl, whisk together the dry ingredients—flour, cornmeal, baking powder, salt, pepper, thyme, and Old Bay. In a second bowl, mix the eggs, milk, melted butter, lemon juice, and the reserved clam juice. Stir in the onion, garlic, parsley, and optional chives. Combine the wet and dry ingredients gently, then fold in the chopped clams. Let the batter rest for 10–15 minutes. - Heat the Oil
Pour 2 inches of oil into a heavy pot and heat it to 350°F (175°C). Use a deep-fry thermometer to keep it steady. Prepare a paper towel-lined baking sheet topped with a wire rack for draining the cooked clam cakes. - Fry the Clam Cakes
Drop spoonfuls of batter into the hot oil using a scoop or spoon, being careful not to overcrowd. Fry each cake for about 2–3 minutes per side until golden brown. Transfer them to the rack to drain and sprinkle with salt while hot. Let the oil return to temperature before frying the next batch. - Make the Sauce & Serve
While frying, stir together your tartar sauce. Serve the hot clam cakes immediately with lemon wedges and the sauce on the side. For extra charm, serve them in a basket with parchment and garnish with fresh parsley.
Notes
- These clam cakes draw inspiration from classic New England seafood shacks, where they’re often enjoyed with a splash of lemon or dipped into creamy tartar sauce. The blend of cornmeal and flour gives them a tender yet slightly crisp texture, while Old Bay and fresh herbs add bright, savory depth. If you want extra flavor, consider folding in a few chopped clams or a dash of hot sauce to the batter.