Fried Oysters: 5 Tips for Crunchy, Juicy Perfection
Table of Contents
There’s nothing quite like biting into the perfect fried oyster—that magical moment when the crisp, golden crust gives way to the tender, briny center. After years of perfecting my technique, I’m sharing my definitive guide to creating restaurant-quality fried oysters at home that will impress even the most discerning seafood lovers.
Thank you for reading this post, don't forget to subscribe!Whether you’re a longtime oyster enthusiast or just beginning to explore these coastal delicacies, this recipe will transform how you approach frying oysters. Get ready to discover the secrets to achieving the ideal balance of crunch and succulence that makes fried oysters so irresistible.
How to Make Fried Oysters
Quick Overview
Fried oysters represent the perfect harmony of textures – a crispy, well-seasoned exterior surrounding the delicate, juicy oyster meat that practically melts in your mouth. What makes this recipe special is its focus on preserving the oyster’s natural briny sweetness while adding just enough seasoning and crunch to elevate it to something extraordinary.
Despite their gourmet reputation, fried oysters are remarkably straightforward to prepare at home. The entire process takes about 30 minutes of active cooking time, making them accessible even on busy weeknights. The trick is in the details – from properly draining and drying the oysters to achieving the ideal frying temperature.
My approach creates a coating that adheres perfectly to the oyster without becoming heavy or overwhelming. The contrast between the substantial crunch of the exterior and the delicate creaminess of the interior creates a textural masterpiece that will have everyone reaching for seconds.
The Ingredients I Use to Bring My Fried Oysters to Life
For the Oysters:
- 1 pint (about 2 cups) fresh shucked oysters
- 1 tablespoon kosher salt (for the initial rinse water)
For the Dredging Mixture:
- 1 cup all-purpose flour
- 1 cup yellow cornmeal (medium grind)
- 2 tablespoons cornstarch
- 2 teaspoons kosher salt
- 1 teaspoon freshly ground black pepper
- 1 teaspoon garlic powder
- 1 teaspoon onion powder
- 1 teaspoon paprika
- ½ teaspoon cayenne pepper (adjust according to heat preference)
- ½ teaspoon dried thyme
For the Wet Mixture:
- 2 large eggs
- ½ cup buttermilk
- 1 tablespoon hot sauce (like Tabasco or Louisiana-style)
- ½ teaspoon salt
For Frying:
- 4 cups vegetable oil or peanut oil (for deep frying)
For Serving:
- Fresh lemon wedges
- ¼ cup chopped fresh parsley (optional, for garnish)
For Quick Remoulade Sauce (Optional):
- 1 cup mayonnaise
- 2 tablespoons Dijon mustard
- 2 tablespoons sweet pickle relish
- 1 tablespoon fresh lemon juice
- 1 tablespoon capers, rinsed and chopped
- 1 teaspoon paprika
- 1 teaspoon hot sauce
- 1 clove garlic, minced
- 2 tablespoons finely chopped green onions
- 2 tablespoons finely chopped fresh parsley
- ½ teaspoon salt
- ¼ teaspoon black pepper
Step-by-Step Instructions
Step 1: Prepare the Oysters
- In a colander, gently rinse the shucked oysters under cold running water. This helps remove any remaining shell fragments or grit.
- Place the rinsed oysters in a bowl with cold water and 1 tablespoon kosher salt for 10 minutes. This brief soak helps clean the oysters and firms up their texture slightly.
- Drain the oysters in a colander again, then spread them on several layers of paper towels.
- Gently pat the oysters dry with additional paper towels, being careful not to damage the delicate meat. Properly dried oysters are essential for the coating to adhere well.
- Let the oysters rest on fresh paper towels while you prepare the dredging stations. This additional air-drying time helps the coating stick better.
Step 2: Set Up Your Dredging Stations
- In a shallow bowl or pie plate, whisk together the flour, cornmeal, cornstarch, salt, black pepper, garlic powder, onion powder, paprika, cayenne pepper, and dried thyme until well combined.
- In a separate bowl, whisk the eggs until well beaten, then whisk in the buttermilk, hot sauce, and salt until smooth.
- Arrange your stations in this order: dried oysters, egg mixture, dredging mixture, and finally a baking sheet lined with a wire rack (for the finished fried oysters).
Step 3: Heat the Oil
- In a heavy-bottomed pot, large cast iron skillet, or deep fryer, add oil to a depth of about 2-3 inches.
- Attach a deep-fry or candy thermometer to the side of the pot if using a pot or skillet.
- Heat the oil to 350°F (175°C). Maintaining a steady temperature is crucial for perfectly fried oysters.
- While the oil is heating, begin coating your oysters.
Step 4: Coat the Oysters
- Working with 4-5 oysters at a time (to prevent crowding), gently place them in the egg mixture, turning to coat completely.
- Using a fork or slotted spoon, lift each oyster from the egg mixture, allowing excess to drip off.
- Transfer to the dredging mixture and coat thoroughly, gently pressing the mixture onto the oysters to ensure it adheres well.
- Shake off any excess coating and place the coated oysters on a plate or cutting board until ready to fry.
- For extra crispiness, you can double-coat the oysters by returning them to the egg mixture and then back to the dredging mixture for a second coat.
Step 5: Fry the Oysters
- Once the oil has reached 350°F, carefully lower 4-6 coated oysters into the hot oil using a slotted spoon or spider strainer. Avoid overcrowding, which can lower the oil temperature and lead to soggy oysters.
- Fry the oysters for 2-3 minutes, until they’re golden brown and crispy. They should float to the top when done.
- Use a slotted spoon or spider strainer to gently lift the fried oysters out of the oil and place them on the wire rack. The rack lets air circulate underneath, helping them stay crisp and not soggy.
- Immediately sprinkle the hot fried oysters with a pinch of salt while they’re still hot.
- Allow the oil to return to 350°F before adding the next batch of oysters.
- Continue the process until all oysters are fried.
Step 6: Make the Remoulade Sauce (if using)
- While the oysters are frying or just before, combine all remoulade ingredients in a bowl and whisk until well combined.
- Refrigerate until ready to serve to allow the flavors to meld.
Step 7: Serve Immediately
- Transfer the fried oysters to a serving platter lined with additional paper towels if desired.
- Garnish with chopped parsley and lemon wedges.
- Serve immediately with ramekins of remoulade sauce or your preferred dipping sauce.
- Enjoy while hot and crispy!
What to Serve Fried Oysters With
Fried oysters are tremendously versatile and pair beautifully with various accompaniments:
- Classic Accompaniments:
- Remoulade sauce (recipe included above)
- Tartar sauce with capers and dill
- Simple cocktail sauce with fresh horseradish
- Lemon wedges for a bright, acidic touch
- Side Dishes:
- Creamy coleslaw with a vinegar base to cut through the richness
- Crispy french fries or sweet potato fries
- Southern-style hush puppies
- Grilled corn on the cob with herb butter
- Roasted garlic mashed potatoes
- Fresh green salad with a light vinaigrette
- Meal Presentations:
- Fried oyster po’ boy sandwich with lettuce, tomato, and remoulade
- Appetizer platter with various dipping sauces
- Oyster Caesar salad with fried oysters replacing chicken
- Seafood platter alongside grilled shrimp, crab cakes, or fish
- Beverages:
- Ice cold craft beer, particularly lagers or pilsners
- Champagne or sparkling wine
- Light, crisp white wines like Sauvignon Blanc or Pinot Grigio pair beautifully.
- Iced sweet tea (Southern-style)
- Fresh lemonade
Top Tips for Perfecting Fried Oysters
Tip #1: Select and Prepare Your Oysters Properly
The foundation of great fried oysters begins with selection and preparation:
- Freshness is paramount: Look for oysters that smell fresh and briny like the ocean, never fishy.
- Size matters: Medium-sized oysters (select or standard) are ideal for frying – large ones can be too chewy, while small ones can overcook quickly.
- Thorough drying is crucial: After rinsing, pat oysters completely dry with paper towels. Moisture is the enemy of crispy coating.
- Cold oysters coat better: Keep the oysters refrigerated until just before coating them.
- Inspect carefully: Remove any remaining shell fragments before coating.
Tip #2: Master the Art of Temperature Control
Temperature management is perhaps the most critical factor in achieving perfect fried oysters:
- Use a thermometer: Don’t guess – an accurate reading is essential for perfect results.
- Maintain 350°F consistently: This temperature creates the ideal balance between a crispy exterior while keeping the interior tender.
- Never overcrowd the pot: Adding too many oysters at once drops the oil temperature dramatically. Work in small batches.
- Rest between batches: Allow the oil to return to 350°F before adding the next batch.
- Choose the right pot: A heavy-bottomed vessel retains heat better and provides more consistent temperature.
- Have a recovery strategy: Keep your burner adjusted so you can increase heat slightly after adding oysters to maintain temperature.
Tip #3: Perfect Your Coating Technique
The coating makes all the difference between ordinary and extraordinary fried oysters:
- The cornmeal-flour mix: This combination provides the perfect balance – cornmeal for crunch and flour for adherence.
- Don’t skip the cornstarch: It creates an unparalleled crispiness that stays crisp longer.
- Season aggressively: The coating needs to be well-seasoned as it’s the primary flavor component.
- Rest after coating: Let coated oysters sit for 2-3 minutes before frying to help the coating adhere better.
- Double-coating option: For extra-crunchy oysters, dip twice in both wet and dry mixtures.
- Use one hand for wet, one for dry: This prevents your fingers from becoming coated and making the mixtures clumpy.
Tip #4: Focus on Proper Draining and Serving
What happens after frying is just as important as the frying itself:
- Use a wire rack, not paper towels alone: This prevents steam from softening the bottom of your fried oysters.
- Season immediately after frying: Salt adheres better to hot food.
- Serve promptly: Fried oysters are at their peak within 5 minutes of frying.
- Avoid covering: Covering hot fried oysters creates steam that softens the coating.
- Elevate with garnishes: Fresh herbs and lemon wedges add color and complementary flavors.
Tip #5: Troubleshoot Common Problems
Even experienced cooks encounter issues – here’s how to solve them:
- Coating falling off: Ensure oysters are completely dry before coating and that oil temperature is hot enough.
- Greasy oysters: Oil temperature was likely too low. Maintain 350°F consistently.
- Burnt exterior, raw interior: Oil temperature was too high. Lower to 350°F and ensure your thermometer is accurate.
- Bland flavor: Season both the oysters themselves with a light sprinkle of salt before coating and ensure your dry mixture is well-seasoned.
- Soggy coating: Likely served on a plate without proper draining or placed in a covered container while hot.
Storing and Reheating Tips
While fried oysters are undeniably best served fresh from the fryer, life sometimes leaves us with leftovers. Here’s how to handle them:
Short-Term Storage (Not Ideal, But Possible):
- Allow fried oysters to cool completely at room temperature.
- Line an airtight container with paper towels.
- Place oysters in a single layer in the container.
- Store in the refrigerator for no more than 24 hours. Beyond this timeframe, both texture and food safety become concerns.
Reheating Methods:
- Oven Method (Best Option):
- Preheat oven to 400°F (200°C).
- Set the oysters on a wire rack placed over a baking sheet to catch any drips and keep them crisp.
- Reheat for 5-7 minutes until heated through and exterior has crisped up again.
- This method best preserves the crispiness of the coating.
- Air Fryer Method (Excellent Alternative):
- Preheat air fryer to 375°F (190°C).
- Place oysters in a single layer in the air fryer basket.
- Reheat for 2-3 minutes until crispy and heated through.
- This method provides results nearly as good as fresh-fried.
- Toaster Oven Method:
- Preheat to 375°F (190°C).
- Place on a small tray or foil.
- Heat for 4-5 minutes until crispy.
- Skillet Method:
- Heat a small amount of oil in a skillet over medium heat.
- Place oysters in the skillet and heat for 1-2 minutes per side.
- This adds a bit more oil but helps restore crispiness.
- Microwave Method (Not Recommended):
- Although convenient, microwaving will make the coating soggy.
- If you must use this method, place on a microwave-safe plate.
- Heat on 50% power for 30 seconds, then in 15-second increments until just warm.
Freezing (Not Recommended):
- Fried oysters do not freeze well after cooking as they become tough and rubber-like when thawed.
- The coating also becomes soggy upon thawing and reheating.
- If you want to prepare in advance, it’s better to freeze shucked, uncooked oysters, then thaw and fry them fresh.
Make-Ahead Alternative:
- Rather than storing fried oysters, consider preparing the dredging mixtures in advance.
- The dry mixture can be stored in an airtight container at room temperature for up to 1 week.
- The wet mixture can be prepared and refrigerated up to 24 hours in advance.
- This prep work makes it easier to fry fresh oysters quickly when desired.
By following these detailed instructions and implementing these five crucial tips, you’ll create fried oysters that rival those from the finest seafood restaurants. The combination of properly selected oysters, well-seasoned coating, and precise frying technique yields the perfect balance of crunchy exterior and tender, briny interior that makes this dish so beloved. Whether served as an appetizer, main course, or in a sandwich, these fried oysters are sure to impress even the most discerning palates.

Fried Oysters: 5 Tips for Crunchy, Juicy Perfection
Cuisine: Southern / Coastal AmericanDifficulty: Moderate4
servings30
minutes10
minutes400–500
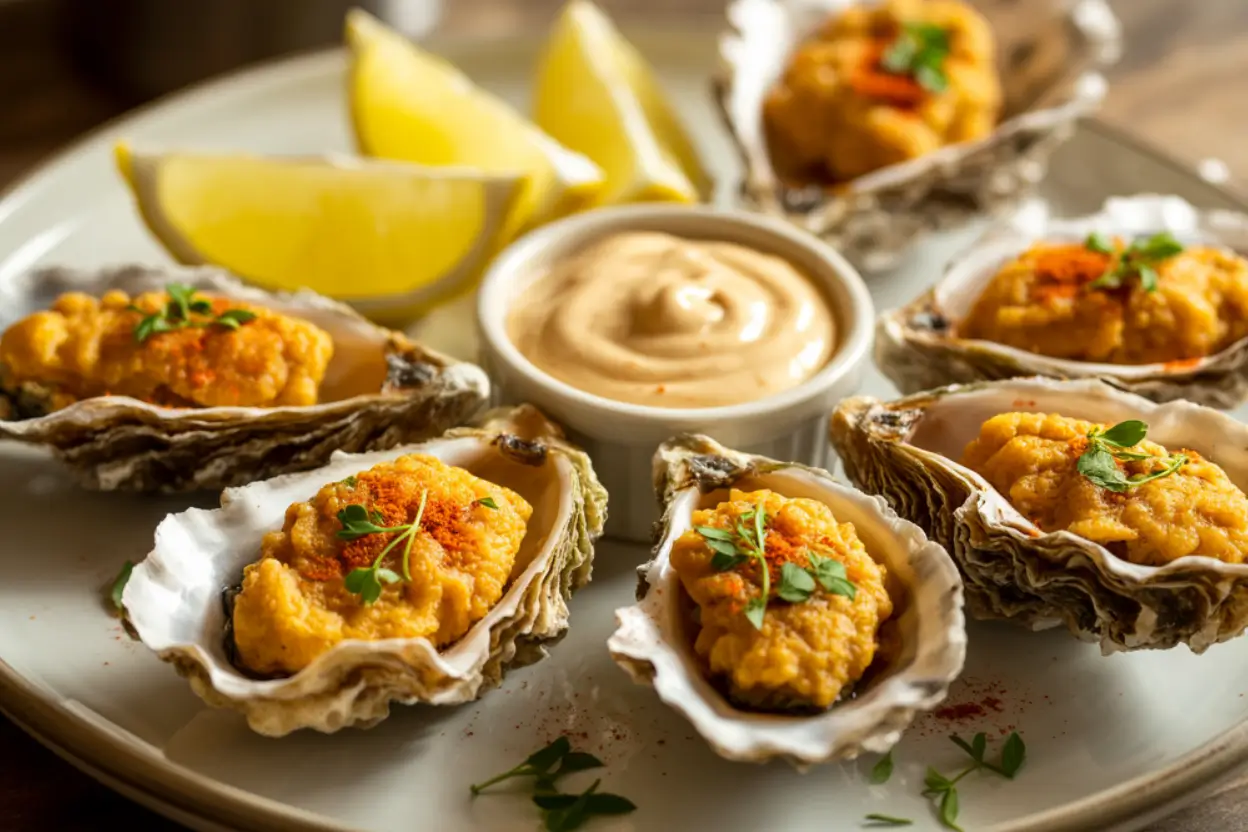
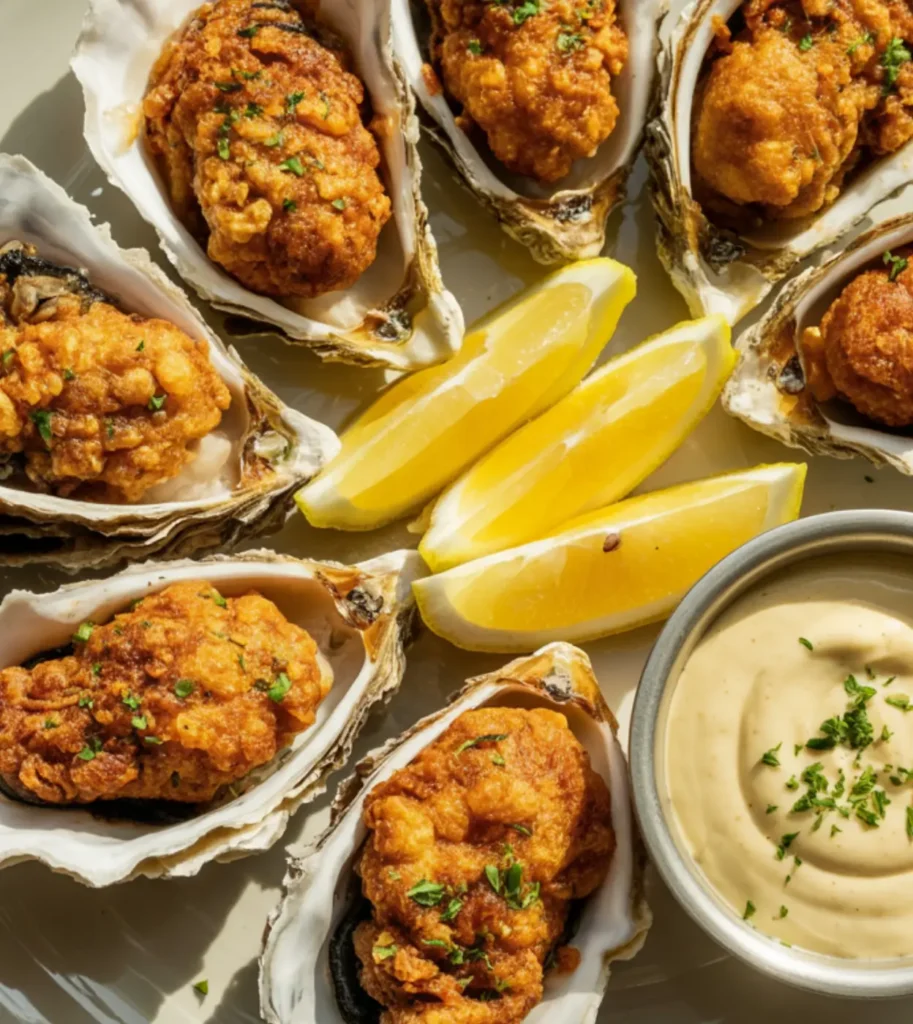
kcalThese Southern-style fried oysters are golden, crispy on the outside, and tender on the inside. Coated in a flavorful cornmeal blend and deep-fried to perfection, they’re a classic seafood appetizer or main dish. Serve them hot with lemon wedges, chopped parsley, and a bold remoulade sauce for a restaurant-quality experience at home.
Ingredients
1 pint (about 2 cups) fresh shucked oysters
1 tablespoon kosher salt (for the initial rinse water)
1 cup all-purpose flour
1 cup yellow cornmeal (medium grind)
2 tablespoons cornstarch
2 teaspoons kosher salt
1 teaspoon freshly ground black pepper
1 teaspoon garlic powder
1 teaspoon onion powder
1 teaspoon paprika
½ teaspoon cayenne pepper (adjust according to heat preference)
½ teaspoon dried thyme
2 large eggs
½ cup buttermilk
1 tablespoon hot sauce (like Tabasco or Louisiana-style)
½ teaspoon salt
4 cups vegetable oil or peanut oil (for deep frying)
Fresh lemon wedges
¼ cup chopped fresh parsley (optional, for garnish)
Remoulade Sauce
Directions
- Prep the Oysters
Start by rinsing the shucked oysters gently under cold running water to remove any grit or shell fragments. Soak them in a bowl of cold water mixed with kosher salt for about 10 minutes to help firm them up and clean them further. Drain the oysters, then lay them out on paper towels and pat them completely dry. Let them rest on a fresh layer of paper towels while you prep the coating—this extra air-drying time helps the batter stick better. - Set Up the Coating Station
In one shallow dish, whisk together the flour, cornmeal, cornstarch, salt, pepper, garlic powder, onion powder, paprika, cayenne, and thyme. In another bowl, whisk the eggs, then stir in the buttermilk, hot sauce, and a bit of salt until smooth. Arrange your dredging station in this order: dried oysters, egg mixture, dry coating, and a wire rack-lined baking sheet for the finished oysters. - Heat the Oil
In a deep skillet, Dutch oven, or fryer, pour in 2–3 inches of oil and heat it to 350°F (175°C). Use a thermometer if possible to keep the temperature steady. While the oil is heating, begin coating the oysters so they’re ready to fry once the oil is hot. - Coat the Oysters
Working in small batches, dip 4–5 oysters into the egg mixture, turning to coat. Let the excess drip off, then dredge them in the seasoned flour-cornmeal mix, gently pressing to help the coating stick. For a thicker crust, you can repeat the egg and flour steps. Set the coated oysters aside on a plate while you prepare the rest. - Fry the Oysters
Once the oil reaches temperature, carefully lower a few oysters into the hot oil using a slotted spoon. Fry for 2–3 minutes until golden brown and crispy. When they float and look golden, lift them out and place them on the wire rack. Sprinkle a little salt over them while they’re still hot. Let the oil return to temperature before frying the next batch. - Make the Remoulade (Optional)
If you’re serving remoulade, whisk all the sauce ingredients together in a bowl until smooth. Pop it in the fridge until serving time so the flavors can blend. This sauce adds a bold, tangy kick that complements the oysters perfectly. - Serve and Enjoy
Transfer the fried oysters to a platter or basket lined with paper towels. Garnish with chopped parsley and serve immediately with lemon wedges and remoulade sauce or your favorite dip. These are best enjoyed hot and crispy, straight out of the fryer!
Notes
- Fresh, high-quality oysters are the star of this dish—make sure to rinse them gently in salted water to remove any grit. The combination of buttermilk, hot sauce, and a seasoned flour-cornmeal coating creates an irresistibly crispy crust. Peanut or vegetable oil works well for frying, and don’t skip the remoulade—its tangy, spicy flavor perfectly balances the richness of the oysters. Serve with a crisp white wine like Sauvignon Blanc or a cold beer for the full coastal experience.