
Hawaiian Garlic Shrimp Recipe: How to Get It Just Right
Table of Contents
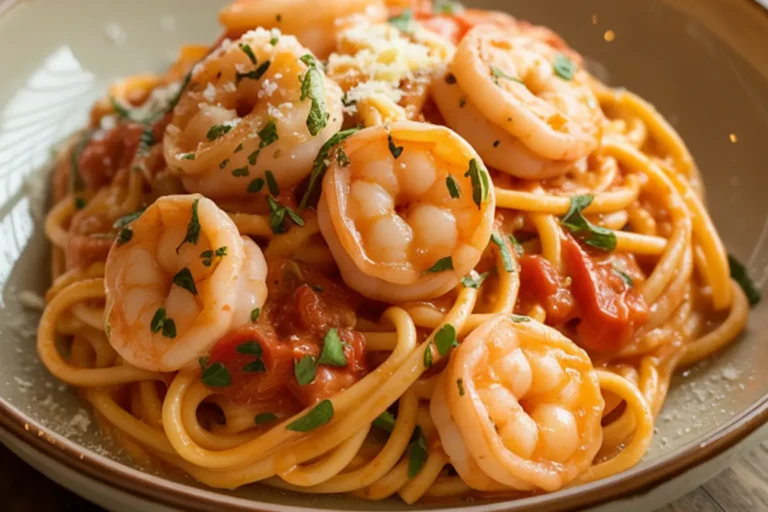
There’s something magical about biting into perfectly cooked Hawaiian Garlic Shrimp – that distinctive combination of sweet, succulent shrimp coated in a buttery garlic sauce with just the right hint of tropical flavor. After countless attempts to recreate the mouthwatering garlic shrimp I first experienced from North Shore food trucks on Oahu, I’ve finally perfected a recipe that captures that authentic island taste right in your home kitchen.
Thank you for reading this post, don't forget to subscribe!This beloved Hawaiian dish has its roots in the culinary traditions brought by Kahuku’s shrimp farms and has evolved into one of the islands’ most iconic comfort foods. What makes it special is the simplicity that allows the quality ingredients to shine through – plump shrimp, abundant garlic, and a perfect blend of butter and oil that creates that signature sauce you’ll want to soak up every last drop of. If you’ve been dreaming about those white trucks serving paper plates of garlicky goodness since your last vacation, or if you’re simply looking to bring a taste of paradise to your dinner table, my foolproof Hawaiian Garlic Shrimp recipe will transport your taste buds straight to the North Shore.
How to Make Hawaiian Garlic Shrimp
Quick Overview
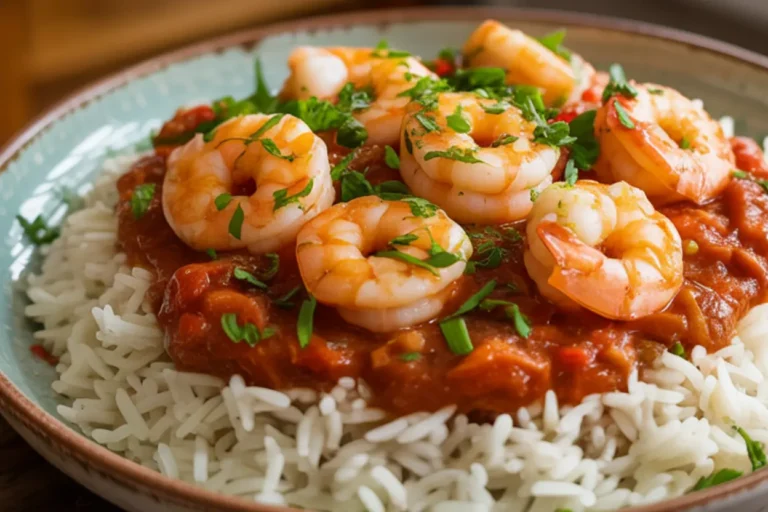
This Hawaiian Garlic Shrimp recipe delivers irresistibly succulent shrimp bathed in a buttery garlic sauce that strikes the perfect balance between savory and sweet. What makes this dish special is its ability to transform just a few simple ingredients into something extraordinary through the right cooking technique and timing. The recipe stays true to the authentic style found at North Shore food trucks, with plump shrimp still in their shells to lock in moisture and flavor, and enough garlic to make any vampire think twice before approaching.
One of the greatest aspects of this dish is its efficiency – from start to finish, you’re looking at just about 20 minutes total cooking time, including preparation. The cooking process itself happens remarkably quickly, with the shrimp taking only 2-3 minutes per side to transform into perfect doneness. This makes Hawaiian Garlic Shrimp an excellent option for everything from quick weeknight dinners to impressive yet low-stress entertaining. Despite its quick preparation, the flavor payoff is tremendous – garlicky, buttery richness coating each perfectly cooked shrimp, with a subtle sweetness and warming hint of paprika that elevates the entire experience.
The Ingredients I Use to Bring My Hawaiian Garlic Shrimp to Life
- 2 pounds of large shrimp (21-25 count), with shells on and deveined
- 16-20 cloves garlic (approximately 2 whole heads), minced or pressed
- 6 tablespoons unsalted butter
- 4 tablespoons neutral oil (vegetable or canola)
- 1 tablespoon all-purpose flour
- 2 teaspoons of paprika (preferably Hawaiian or Spanish for a more authentic flavor)
- 1½ teaspoons kosher salt
- 1 teaspoon freshly ground black pepper
- ½ teaspoon cayenne pepper (optional, for heat)
- 2 tablespoons brown sugar
- 2 tablespoons fresh lemon juice
- ⅓ cup chicken broth or water
- ¼ cup fresh parsley, finely chopped
- Lemon wedges for serving
- White rice for serving
Step-by-Step Instructions
Step 1: Prepare the Shrimp
- Leave the shells on the shrimp, but use kitchen scissors to cut along the back of each shrimp to expose and remove the vein if this hasn’t been done already. The shells add tremendous flavor and help prevent the shrimp from overcooking, which is key to authentic Hawaiian garlic shrimp.
- Pat the shrimp thoroughly dry with paper towels. Excess moisture will prevent proper browning and create steam when cooking, which alters the final texture.
- In a large bowl, toss the dried shrimp with the flour, 1 teaspoon of the salt, black pepper, paprika, and cayenne pepper (if using) until evenly coated. The flour helps the garlic and seasonings adhere to the shrimp and creates a slightly thickened sauce.
- Set the seasoned shrimp aside while you prepare the garlic, allowing them to come to room temperature for more even cooking (about 10-15 minutes).
Step 2: Prepare the Garlic Mixture
- Peel all the garlic cloves and either finely mince them with a knife or use a garlic press. For an authentic Hawaiian garlic shrimp dish, don’t hold back on the garlic – the abundant amount is key to its distinctive flavor.
- In a small bowl, combine the minced garlic with the brown sugar and remaining ½ teaspoon of salt. Mix well to create a paste-like mixture. The sugar helps the garlic caramelize and adds that subtle sweetness characteristic of Hawaiian-style garlic shrimp.
Step 3: Cook the Shrimp
- Heat a large, heavy-bottomed skillet or wok over medium-high heat. Cast iron is particularly ideal for this recipe, as it retains heat evenly and aids in achieving a nice caramelization.
- Add the butter and oil to the hot pan, allowing the butter to melt completely and begin to foam slightly. The mix of butter and oil increases the smoke point while preserving the rich flavor of the butter.
- Add the garlic-sugar mixture to the hot fat and cook for 45-60 seconds, stirring continuously, until fragrant but not browned. Garlic burns quickly and turns bitter, so keep a close eye on it.
- Immediately add the seasoned shrimp to the skillet in a single layer (cook in batches if needed to avoid overcrowding, which causes steaming instead of searing).
- Cook the shrimp for about 2-3 minutes on the first side, until they start to turn pink and develop a slight golden edge.
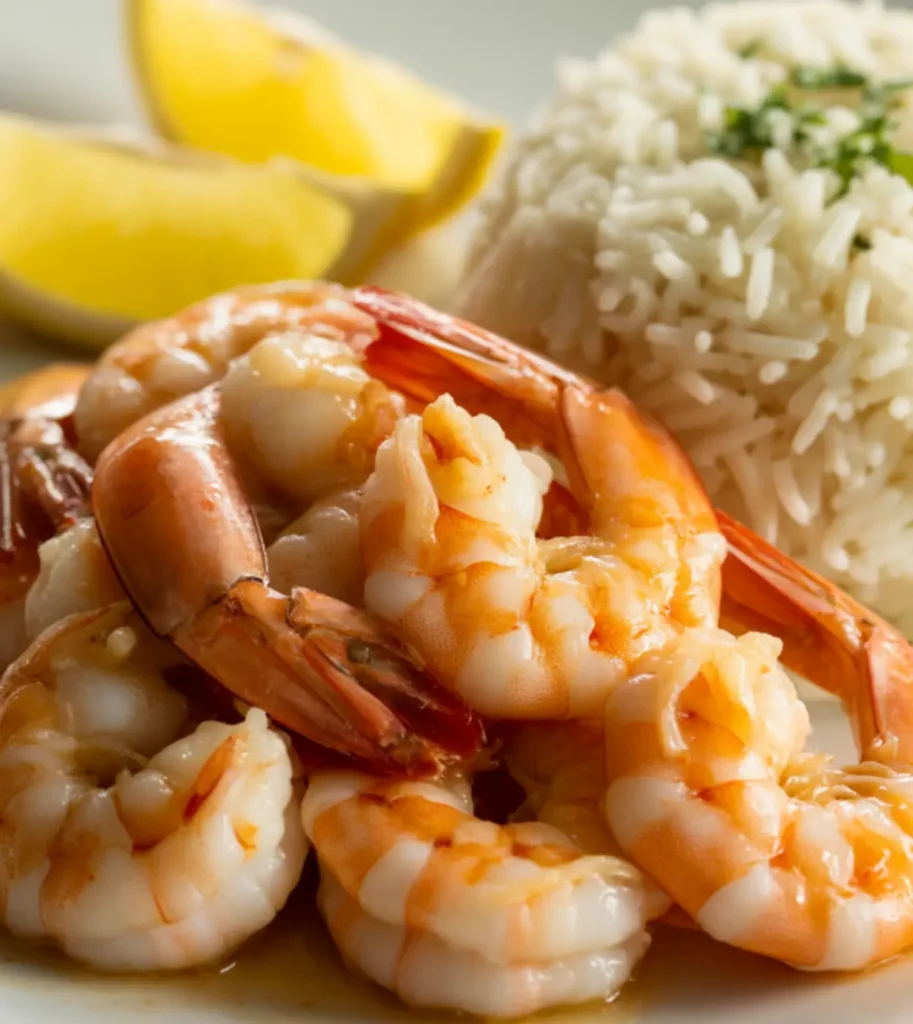
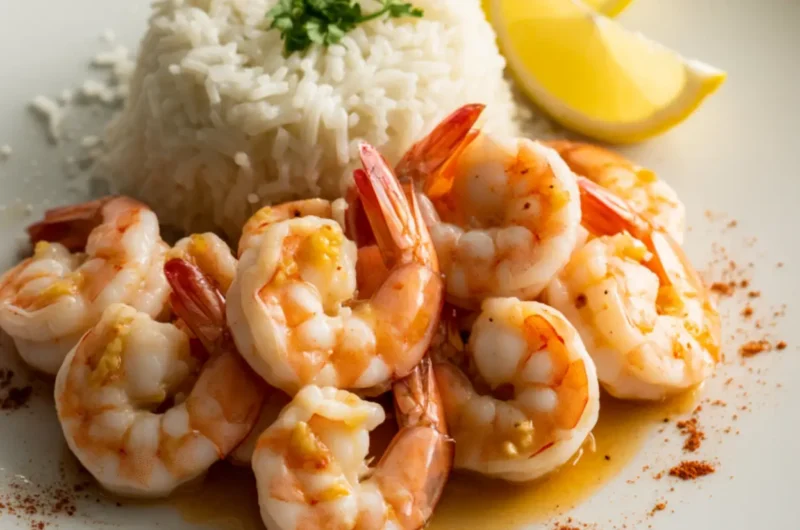
- Flip each shrimp and cook for another 2 minutes on the second side. As they cook, the shells will turn a beautiful orange-red color, and the flesh will become opaque.
- Add the chicken broth or water and lemon juice to the pan, stirring to combine with the garlic and butter to create a sauce. This additional liquid helps deglaze the pan and creates more of that delicious sauce to serve with rice.
- Let the sauce simmer for an additional minute, allowing it to reduce slightly and ensuring the shrimp are fully cooked. Avoid overcooking; perfectly cooked shrimp should curve into a loose “C,” while overcooked shrimp will curl tightly into an “O.”
Step 4: Finish the Dish
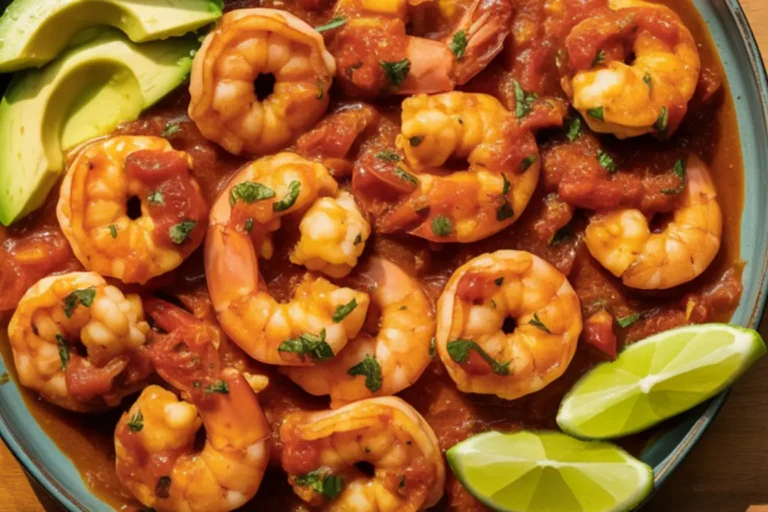
- Remove the skillet from the heat and sprinkle the chopped fresh parsley over the shrimp, stirring to incorporate.
- Taste the sauce and adjust seasonings if needed, adding more salt, pepper, or lemon juice according to your preference.
- Transfer the shrimp and all the garlic sauce to a serving platter or individual plates, making sure to scrape all the caramelized bits from the bottom of the pan – these contain tremendous flavor.
- Garnish with additional fresh parsley and serve immediately with lemon wedges on the side for squeezing over the top.
What to Serve Hawaiian Garlic Shrimp With
To create an authentic Hawaiian plate lunch experience or simply complement the rich, garlicky flavors of this dish, consider these accompaniments:
Traditional Hawaiian sides:
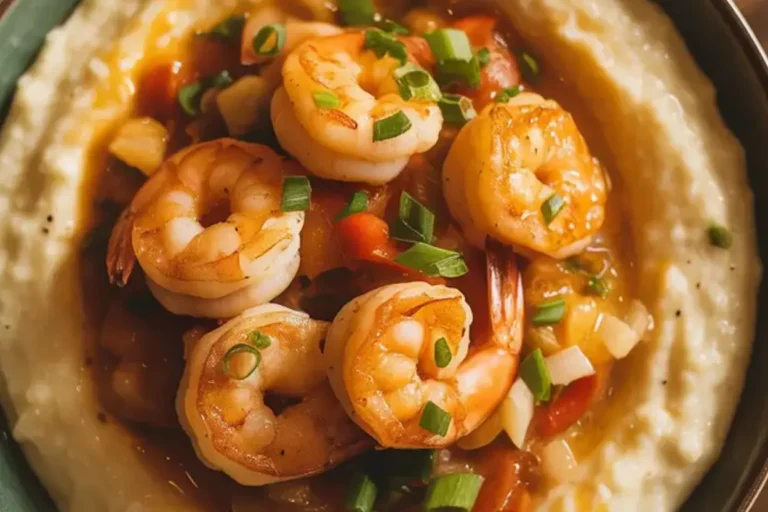
- Steamed white rice (essential for soaking up the garlic butter sauce)
- Hawaiian mac salad (creamy macaroni salad with a touch of sweetness)
- Scoops of poi (traditional taro paste) for an authentic touch
- Lomi lomi salmon (fresh tomato and salmon salad)
Vegetable options:
- Grilled pineapple slices brushed with a little honey
- Stir-fried bok choy or Chinese broccoli with ginger
- Simple green salad with mandarin oranges and sesame dressing
- Cucumber namasu (Japanese-inspired vinegar cucumber salad)
Beverage pairings:
- Cold Longboard Lager or other Hawaiian beer
- Tropical fruit punch
- Coconut water served in the shell
- Pineapple-infused iced tea
- Mai Tais or Blue Hawaiians for a festive touch
Complete the meal with:
- Haupia (coconut pudding squares) for dessert
- Fresh tropical fruit platter with passion fruit, mango, and papaya
- Shave ice with tropical flavors
- Malasadas (Portuguese-Hawaiian donuts)
Top Tips for Perfecting Hawaiian Garlic Shrimp
- Keep the shells on: This might seem counterintuitive for easy eating, but the shells protect the delicate shrimp meat from direct heat, allowing it to cook more gently and stay juicier. The shells also impart tremendous flavor. For an authentic experience, eat the shrimp as Hawaiians do – peel them as you go, licking the garlic sauce from your fingers (with plenty of napkins nearby!).
- Don’t skimp on the garlic: The abundant garlic is what gives this dish its signature flavor. It might seem excessive, but 16-20 cloves create that authentic taste. For best results, use fresh garlic cloves rather than pre-minced garlic, which lacks the same potency and aromatic qualities. Using a garlic press makes this step much quicker.
- Control the heat carefully: The key to perfectly cooked shrimp is managing your heat level. Medium-high heat is ideal because it allows the garlic to become fragrant without burning and gives the shrimp a good sear without overcooking. If your pan starts smoking or the garlic begins to darken too quickly, reduce the heat immediately.
- Choose the right pan: A heavy-bottomed skillet, preferably cast iron, provides even heating and good heat retention. This helps create the perfect caramelization on both the garlic and shrimp. Non-stick pans generally don’t get hot enough to achieve the same results.
- Size matters with shrimp: Look for large shrimp (21-25 per pound) for this recipe. They’re substantial enough to stand up to the bold garlic flavor and easier to peel while eating. Wild-caught shrimp generally have better flavor than farm-raised, though either will work.
- Ingredient substitutions and variations:
- No fresh garlic? In an absolute pinch, you can use 4 tablespoons of minced garlic from a jar, but the flavor won’t be as vibrant
- Butter alternatives: Use ghee (clarified butter) for a more pronounced butter flavor without the risk of burning
- Spice adjustments: For authentic North Shore “hot” style, double the cayenne pepper
- Health-conscious version: Use half the butter and increase the oil slightly
- Timing is everything: The entire cooking process for the shrimp takes just 4-5 minutes total. Have all your ingredients prepped and ready before heating the pan, as the cooking moves quickly. Watch for visual cues – the shells turning bright orange-red indicates they’re nearly done.
Storing and Reheating Tips
Hawaiian Garlic Shrimp is best enjoyed immediately after cooking, but if you find yourself with leftovers, here’s how to handle them:
Short-term storage:
- Allow the shrimp to cool completely before refrigerating
- Store in an airtight container in the refrigerator
- Keep for up to 2 days maximum – seafood has a limited refrigerator life
Freezing (not ideal but possible):
- For best results, freeze only uncooked, seasoned shrimp
- If freezing cooked shrimp, remove from shells first and store in airtight containers with some of the sauce
- Use within 1 month for best quality
- Thaw overnight in the refrigerator before reheating
Reheating methods:
For best texture:
- Gentle stovetop method: Place shrimp and sauce in a skillet over low heat. Cover and warm for 2-3 minutes, just until heated through. Avoid high heat, which will make the shrimp tough.
Quick method:
- Microwave: Place shrimp in a microwave-safe dish, cover with a damp paper towel, and heat at 50% power in 30-second intervals until just warmed through. Be careful not to overheat, as shrimp can quickly become rubbery.
Repurposing leftovers creatively:
- Remove the shells and chop the leftover shrimp to make garlic shrimp fried rice
- Add to scrambled eggs some diced tomatoes for a flavorful breakfast
- Toss with pasta for a quick garlic shrimp scampi
- Use as filling for tacos with fresh cabbage slaw and avocado
Quality check:
- If the shrimp emit a strong ammonia odor, discard them right away.
- The garlic butter sauce may solidify when refrigerated – this is normal and will liquify again when heated
Hawaiian Garlic Shrimp represents island cooking at its finest – simple ingredients transformed through the right technique into something truly memorable. What makes this dish special is its unpretentious nature combined with bold, satisfying flavors that transport you straight to Oahu’s North Shore with each garlicky, buttery bite.
The beauty of this recipe lies in its balance of authenticity and accessibility. By following the key techniques – keeping the shells on, using abundant fresh garlic, and cooking quickly over proper heat – you can recreate the food truck experience right in your own kitchen. The shells might make for slightly messy eating, but that’s part of the authentic experience, and the flavor payoff is more than worth it.
Whether you’re reminiscing about a Hawaiian vacation or simply looking to add an exciting new dish to your rotation, this Hawaiian Garlic Shrimp recipe delivers restaurant-quality results with remarkably simple preparation. Serve it over steamed white rice to soak up every drop of the buttery garlic sauce, and you’ll understand why this dish has become such a beloved staple of Hawaiian cuisine.
click here to follow me on pinterest
Hawaiian Garlic Shrimp Recipe: How to Get It Just Right
Cuisine: HawaiianDifficulty: Easy4
servings15
minutes10
minutes350-400
kcalThis Hawaiian Garlic Shrimp is a flavorful, buttery dish featuring large shrimp cooked in a savory garlic sauce with a hint of sweetness from brown sugar and a touch of heat from cayenne pepper. Paired with a side of white rice and garnished with fresh parsley and lemon wedges, this dish brings a taste of Hawaii right to your table.
Ingredients
2 pounds of large shrimp (21-25 count), with shells on and deveined
16-20 cloves garlic (approximately 2 whole heads), minced or pressed
6 tablespoons unsalted butter
4 tablespoons neutral oil (vegetable or canola)
1 tablespoon all-purpose flour
2 teaspoons of paprika (preferably Hawaiian or Spanish for a more authentic flavor)
1½ teaspoons kosher salt
1 teaspoon freshly ground black pepper
½ teaspoon cayenne pepper (optional, for heat)
2 tablespoons brown sugar
2 tablespoons fresh lemon juice
⅓ cup chicken broth or water
¼ cup fresh parsley, finely chopped
Lemon wedges for serving
White rice for serving
Instructions
- Prepare the Shrimp:
Leave the shells on the shrimp and cut along the back to remove the vein. Pat the shrimp dry with paper towels to remove excess moisture. Toss the shrimp in a bowl with flour, salt, pepper, paprika, and cayenne pepper (if using) until evenly coated. Set the seasoned shrimp aside to come to room temperature. - Prepare the Garlic Mixture:
Peel and finely mince the garlic or use a garlic press. In a small bowl, combine the garlic with brown sugar and the remaining salt to create a paste-like mixture. This will add flavor and help caramelize the garlic. - Cook the Shrimp:
Heat a large skillet or wok over medium-high heat and add butter and oil. Once the butter melts and foams, add the garlic-sugar mixture, cooking for 45-60 seconds until fragrant but not browned. Add the shrimp in a single layer and cook for 2-3 minutes on the first side, then flip and cook for another 2 minutes on the second side. Add chicken broth (or water) and lemon juice to deglaze the pan and create a sauce. Let the sauce simmer for an additional minute to reduce slightly. - Finish the Dish:
Remove the skillet from the heat and stir in fresh parsley. Adjust the seasoning with more salt, pepper, or lemon juice if desired. Transfer the shrimp and sauce to a serving platter, scraping up all the flavorful bits from the pan. Garnish with additional parsley and serve with lemon wedges and rice.
Notes
- Hawaiian garlic shrimp is a simple yet delicious dish with a rich, garlicky flavor and a slight sweetness. The shrimp are cooked with a buttery garlic sauce and complemented by paprika and cayenne pepper, which provide a wonderful depth of flavor. The dish is often served with white rice, which helps balance the rich sauce. The freshness of lemon and parsley enhances the overall dish, making it a perfect choice for a quick weeknight meal or a weekend gathering.