Oysters Mosca: 7 Steps to Bold New Orleans Flavor
Table of Contents
There’s something undeniably magical about New Orleans cuisine—the way it blends influences from French, Spanish, Italian, African, and Caribbean traditions into something uniquely American yet entirely its own. Among the city’s many iconic dishes, Oysters Mosca stands as a testament to the Italian-Creole fusion that flourished in the late 19th century. After years of testing and refining techniques both in professional kitchens and at home, I’m excited to share my definitive guide to creating authentic Oysters Mosca that honors this dish’s rich heritage while making it accessible to home cooks everywhere.
Thank you for reading this post, don't forget to subscribe!Whether you’re planning a special dinner party, looking to expand your seafood repertoire, or simply craving a taste of the Big Easy, this Oysters Mosca recipe delivers bold flavors and impressive results that belie its straightforward preparation. Let me walk you through creating this New Orleans classic that perfectly balances the briny sweetness of oysters with a savory, herb-infused breadcrumb topping that will transport your taste buds straight to the French Quarter.
How to Make Oysters Mosca
Quick Overview
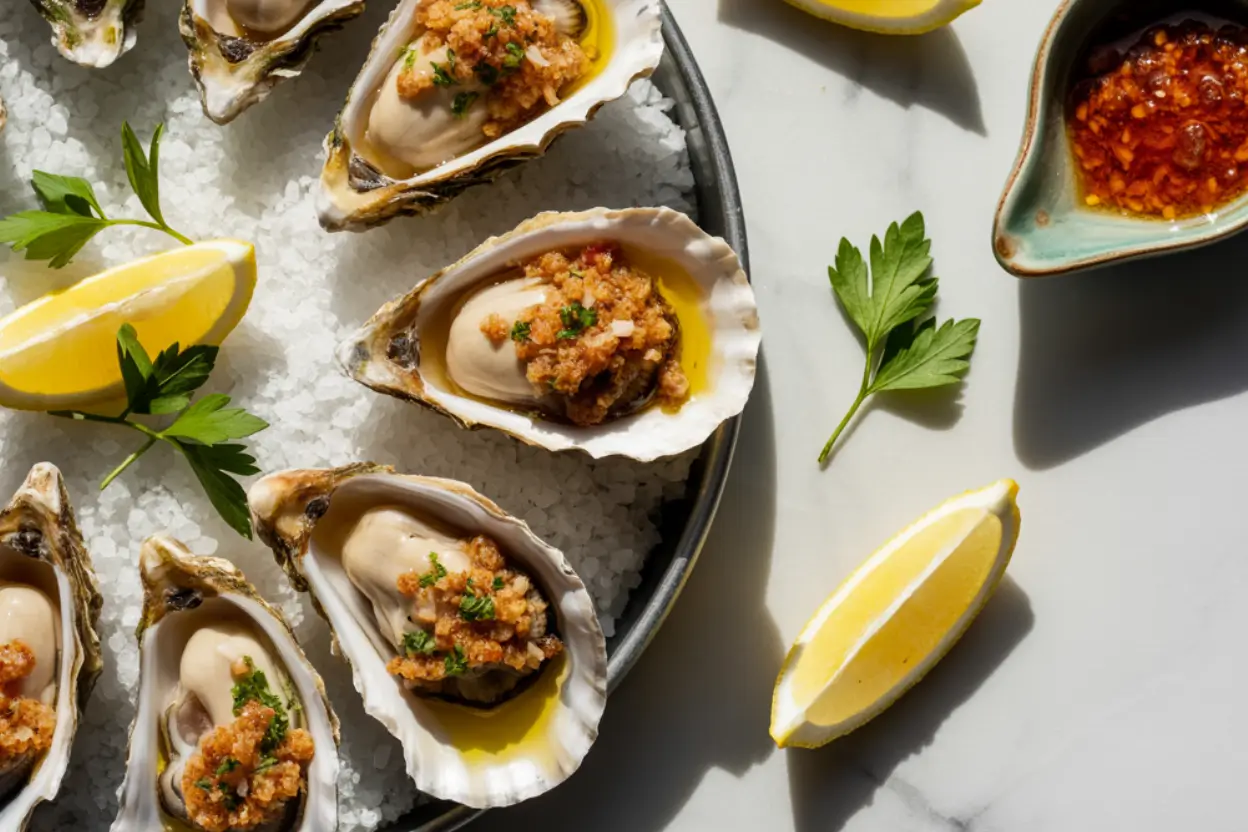
Oysters Mosca represents New Orleans cuisine at its finest—bold, flavorful, and unapologetically indulgent. What makes this dish particularly special is how it transforms the delicate flavor of oysters through a perfect crust of seasoned breadcrumbs, herbs, and a hint of heat. Unlike raw oyster preparations that showcase the mollusk’s natural brininess, Oysters Mosca amplifies their sweet, mineral notes while adding complementary flavors and a satisfying textural contrast.
Despite its impressive presentation and complex flavor profile, Oysters Mosca is remarkably straightforward to prepare. The dish requires minimal active cooking time, with most of the work involving simple assembly before a quick trip to the oven. The breadcrumb mixture comes together in minutes, and once your oysters are shucked (or purchased pre-shucked to save time), the remaining steps flow effortlessly.
What makes Oysters Mosca truly special is the contrast of textures and bold flavors. Each bite combines juicy, tender oysters with a crisp, golden breadcrumb topping that’s rich with garlic, herbs, and a hint of heat from red pepper flakes. The result is a layered, satisfying dish—comforting yet distinctive, familiar yet unexpected. Whether you serve it as a standout appetizer or a main dish with simple sides, Oysters Mosca adds a touch of New Orleans charm to any meal.
The Ingredients I Use to Bring My Oysters Mosca to Life
For the Oysters:
- 24 fresh oysters (preferably Gulf oysters, though any large variety will work)
- 2 cups rock salt (for stabilizing oysters during cooking, optional)
For the Mosca Breadcrumb Topping:
- 1½ cups plain breadcrumbs (preferably homemade from day-old French bread)
- ⅓ cup extra virgin olive oil, plus 2 tablespoons for drizzling
- 4 cloves garlic, very finely minced
- 3 tablespoons fresh flat-leaf parsley, finely chopped
- 2 tablespoons of finely chopped fresh oregano, or substitute with 2 teaspoons of dried oregano.
- 2 tablespoons fresh basil, finely chopped
- 1 tablespoon fresh thyme leaves
- 2 tablespoons green onions, finely sliced (both white and green parts)
- 2 tablespoons lemon juice, freshly squeezed
- 2 teaspoons lemon zest
- ½ teaspoon red pepper flakes (adjust to taste)
- ½ teaspoon smoked paprika
- 1 teaspoon kosher salt
- ½ teaspoon freshly ground black pepper
- 2 tablespoons grated Parmesan cheese
Garnish Options:
- Additional chopped fresh parsley
- Lemon wedges
- Hot sauce (preferably Crystal or Tabasco)
Step-by-Step Instructions
Step 1: Prepare Your Workspace and Ingredients
- Before beginning, gather all ingredients and measure them out (mise en place). This is especially important when working with oysters, which require focused attention during shucking.
- Preheat your oven to 450°F (232°C). Position a rack in the center of the oven.
- If using whole oysters that need shucking, fill a sheet pan with rock salt to create a stable base that will hold the oyster shells level during cooking. If using pre-shucked oysters in the half shell, prepare the salt bed the same way. The salt bed is optional but helps prevent spilling and provides an attractive serving presentation.
- Wash all fresh herbs thoroughly, pat dry with paper towels, and chop according to the ingredient list. Finely mince the garlic and set aside.
- Zest and juice your lemon, being careful to avoid the bitter white pith when zesting.
Step 2: Shuck the Oysters (Skip if Using Pre-Shucked)
- If working with whole oysters, you’ll need to shuck them. Hold each oyster flat-side up with the hinge (pointed end) facing toward you, wrapped in a kitchen towel to protect your hand.
- Insert an oyster knife at the hinge, applying pressure and twisting gently until you feel it give way. Gently run the knife along the inside of the top shell to cut through the adductor muscle.
- Remove the top shell carefully, preserving as much of the oyster liquor (natural juice) as possible. Run the knife underneath the oyster to detach it from the bottom shell, but leave the oyster in place.
- Inspect each oyster for shell fragments and remove any you find. Place the shucked oysters in their bottom shells on the prepared salt bed.
- If you’re not comfortable shucking oysters, many seafood markets and fishmongers offer fresh pre-shucked oysters on the half shell, which is a perfectly acceptable alternative.
Step 3: Create the Mosca Breadcrumb Topping
- In a medium bowl, mix together the breadcrumbs, minced garlic, chopped parsley, oregano, basil, thyme leaves, and sliced green onions until the herbs are evenly blended throughout.
- Add the lemon juice, lemon zest, red pepper flakes, smoked paprika, kosher salt, and black pepper to the bowl. Mix again to incorporate all the seasonings.
- Pour in the ⅓ cup of olive oil and stir thoroughly until the breadcrumbs are evenly moistened. The mixture should hold together slightly when pressed but still remain somewhat loose and crumbly.
- Fold in the grated Parmesan cheese, distributing it evenly throughout the mixture.
- Taste a small amount of the mixture and adjust seasonings if necessary, keeping in mind that the oysters will contribute their natural brininess to the final dish.
Step 4: Top and Prepare the Oysters
- Using a small spoon, place approximately 1-2 tablespoons of the breadcrumb mixture atop each oyster, completely covering it. The exact amount will depend on the size of your oysters – aim to create a generous but not overwhelming layer.
- Press the topping gently to adhere it to the oyster, but avoid compacting it too much as this will make the crust dense rather than light and crispy.
- Drizzle the topped oysters lightly with the remaining two tablespoons of olive oil, which will help the crust brown beautifully in the oven.
- If preparing in advance, you can cover the topped oysters loosely with plastic wrap and refrigerate for up to 2 hours before cooking. Any longer risks the breadcrumbs becoming soggy.
Step 5: Bake the Oysters Mosca
- Place the sheet pan with the prepared oysters in the preheated oven.
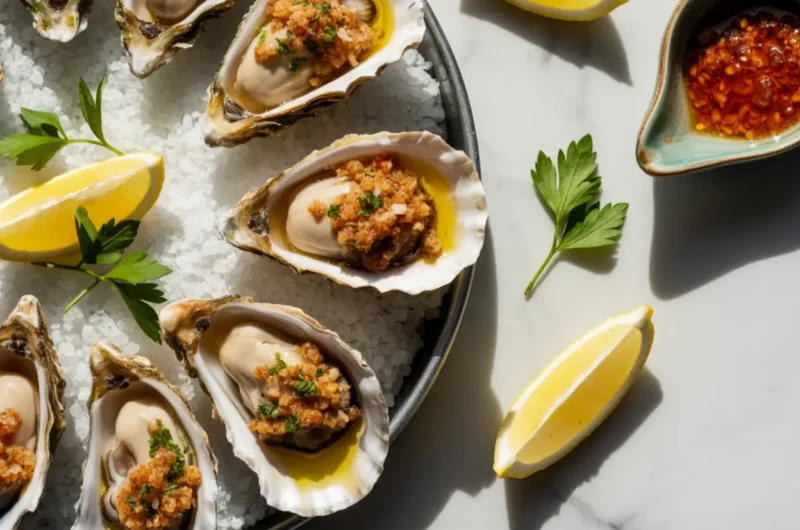
- Bake for 10-12 minutes, until the topping is golden brown and the edges of the oysters begin to curl slightly.
- For an extra-crispy top, switch the oven to broil for the final 1-2 minutes, watching very carefully to prevent burning. The breadcrumbs should reach a deep golden color but not become dark brown.
- The oysters are done when the topping is crispy and golden and the oysters themselves are plump and juicy.
Step 6: Rest and Finish the Dish
- Remove the oysters from the oven and allow them to rest for 1-2 minutes. This brief rest helps the juices redistribute and prevents burned mouths from extremely hot oysters.
- Garnish with additional freshly chopped parsley for color and freshness.
- Arrange lemon wedges around the platter for guests to squeeze over their oysters just before eating, which brightens all the flavors.
- If desired, place a bottle of traditional New Orleans hot sauce on the table for those who enjoy an extra kick of heat with their oysters.
Step 7: Serve with Style and Savor
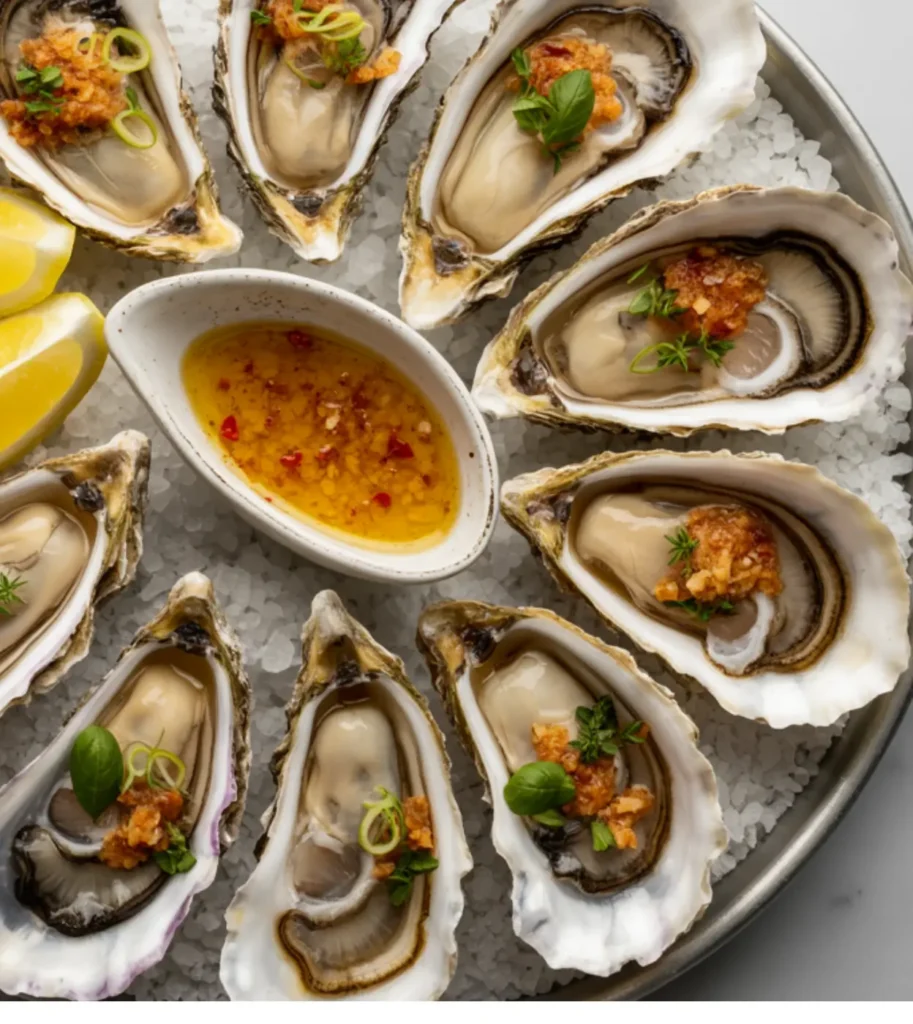
- Present the oysters directly on their cooking vessel if you used the rock salt bed, which makes for an impressive presentation.
- Alternatively, transfer to a serving platter, being careful to keep the oysters level to prevent spilling the flavorful juices.
- Provide small forks or picks for your guests, along with napkins as these are meant to be enjoyed as finger food.
- Instruct guests to squeeze fresh lemon over the oysters just before eating for the brightest flavor.
- Enjoy immediately while the contrast between the crispy topping and the juicy oysters is at its peak.
What to Serve Oysters Mosca With
Oysters Mosca works beautifully as both an appetizer or a main course, depending on how it’s paired:
As an Appetizer:
- Crusty French bread for sopping up the flavorful juices
- Simple mixed greens with lemon vinaigrette
- Celery remoulade for a classic New Orleans starter combination
- Chilled fennel and orange salad for a refreshing contrast
As a Main Course:
- Angel hair pasta tossed with olive oil, garlic, and fresh herbs
- Creole rice pilaf with herbs and vegetables
- Roasted asparagus with lemon
- Grilled or sautéed zucchini with fresh herbs
- Simple risotto with herbs and Parmesan
Complementary Proteins (if serving as part of a larger spread):
- Grilled fish with lemon and herbs
- Seared sea scallops
- Shrimp Creole
- Herb-roasted chicken
Beverage Pairings:
- Crisp white wines like Sauvignon Blanc, Vermentino, or unoaked Chardonnay
- Champagne or Prosecco
- Light, crisp pilsners or wheat beers
- Iced tea with lemon and mint (a New Orleans staple)
- Sparkling water with citrus
Top Tips for Perfecting Oysters Mosca
Tip #1: Master Oyster Selection and Handling
The foundation of exceptional Oysters Mosca begins with the shellfish itself:
- Choose the right variety: Gulf oysters are traditional for this dish due to their plump size and mild flavor, but any large variety will work. East Coast varieties like Blue Points are smaller but more widely available in many areas.
- Freshness indicators: Look for oysters with tightly closed shells that feel heavy for their size. They should smell like the ocean—fresh and briny, never fishy.
- Pre-shucked option: If you’re not comfortable shucking oysters, many seafood markets offer freshly shucked oysters on the half-shell. This is perfectly acceptable and saves considerable time and effort.
- Temperature control: Keep oysters properly refrigerated until ready to prepare. Once shucked, they should be kept on ice if not being cooked immediately.
- Shell cleaning: Scrub closed oysters under cold running water with a stiff brush before shucking to remove any grit or debris from the shells.
Tip #2: Perfect Your Breadcrumb Mixture
The aromatic, herb-infused breadcrumb topping is what distinguishes Oysters Mosca:
- Breadcrumb source matters: Homemade breadcrumbs from day-old French bread provide the best flavor and texture. Simply tear the bread into pieces, pulse in a food processor until coarse, and let dry for a few hours before using.
- Freshness of herbs: Whenever possible, use fresh herbs rather than dried for this recipe. The volatile oils in fresh herbs create a more vibrant, aromatic topping. If substituting dried herbs, use only one-third the amount specified for fresh.
- Olive oil quality: Use a good-quality extra virgin olive oil for this dish—its flavor will come through in the final product.
- Texture balance: The breadcrumb mixture should be moist enough to hold together slightly when pressed but not so wet that it becomes pasty. If your mixture seems too dry, add a bit more olive oil; if too wet, add additional breadcrumbs.
- Make-ahead limits: While you can prepare the breadcrumb mixture up to 24 hours in advance (stored covered in the refrigerator), don’t top the oysters until you’re ready to bake them. This prevents the breadcrumbs from absorbing too much moisture from the oysters and becoming soggy.
Tip #3: Master the Baking Process
Proper baking ensures the perfect contrast between crispy topping and juicy oysters:
- Temperature matters: The high oven temperature (450°F) is crucial for developing a crisp, golden crust without overcooking the delicate oysters beneath.
- Position awareness: Center rack placement ensures even cooking without burning. If your oven has hot spots, rotate the pan halfway through baking.
- Visual cues: Look for a deep golden color on the breadcrumbs and slight curling at the edges of the oysters as indicators of doneness.
- Broiler finish option: A brief finish under the broiler creates an extra-crispy top, but watch carefully—the difference between perfectly golden and burnt is often just 30 seconds.
- Rest period importance: The brief rest after removing from the oven allows the intense heat to subside slightly, preventing burnt mouths while still serving the oysters hot.
Tip #4: Adapt to Oyster Size Variations
Different oyster varieties require slight technique adjustments:
- Topping ratio adjustment: Smaller oysters (like Kumamoto or Blue Point) need less breadcrumb topping than larger Gulf oysters. Aim to cover the oyster completely without overwhelming it—about a 2:1 ratio of breadcrumbs to oyster is ideal.
- Cooking time modification: Smaller oysters will cook more quickly, sometimes in as little as 8 minutes. Begin checking at the early end of the time range.
- Quantity considerations: If using smaller oysters, you may want to increase the total number served per person. While two large Gulf oysters might satisfy as an appetizer, you might need 3-4 smaller varieties.
- Plating adjustments: Smaller oysters benefit from being served closer together on the salt bed, which helps maintain their temperature longer after coming out of the oven.
- Salt bed depth: Adjust the depth of your salt bed to accommodate different shell shapes and sizes. Deeper, cupped shells need more support to sit level.
Tip #5: Address Common Challenges
Even experienced cooks can encounter issues with Oysters Mosca:
- Preventing soggy topping: If your oysters are particularly juicy, briefly place them on a paper towel before topping to absorb excess moisture.
- Shell stability solution: If oyster shells are wobbling on your salt bed, press them down more firmly into the salt to create individualized depressions that hold them steady.
- Handling pre-shucked oysters: If using pre-shucked oysters that come in their liquor (juice), drain them partially but not completely—a little liquor adds flavor but too much prevents proper browning.
- Breadcrumb browning issues: If your breadcrumbs aren’t browning properly, try reducing the initial moisture in the topping or drizzling with a touch more olive oil before baking.
- Emergency rescue: If your breadcrumbs are browning too quickly before the oysters are properly heated through, loosely tent with foil to slow the browning process.
Tip #6: Make-Ahead Strategies for Entertaining
Oysters Mosca can be partially prepared in advance to make entertaining easier:
- Component preparation: The breadcrumb mixture can be prepared up to 24 hours in advance and stored in an airtight container in the refrigerator. Bring to room temperature before using.
- Oyster preparation timing: Oysters can be shucked up to 2 hours before cooking if kept properly chilled in their shells on ice.
- Assembly limits: The fully assembled dish (oysters topped with breadcrumbs) can be prepared up to 2 hours ahead and refrigerated. Longer than that risks the breading becoming soggy.
- Staggered baking option: For larger gatherings, prepare all oysters but bake them in batches every 15-20 minutes to ensure each serving is fresh from the oven.
- Equipment preparation: Have all serving plates, forks, napkins, and garnishes ready before the oysters come out of the oven, as they’re best served immediately.
Tip #7: Serving and Presentation Excellence
The final touches elevate the entire experience:
- Temperature consideration: Oysters Mosca should be served hot, but not burning hot—about 2 minutes after removing from the oven is perfect.
- Salt bed presentation: Serving on the rock salt bed not only looks impressive but helps insulate the oysters, keeping them warm longer.
- Lemon service timing: Provide lemon wedges for squeezing, but advise guests to add the lemon juice just before eating, not all at once when serving. This preserves the breadcrumb’s texture.
- Garnish with purpose: The final sprinkle of fresh parsley adds more than color—it adds a final note of freshness that balances the rich, warm dish.
- Accompaniment timing: If serving with hot side dishes, time them to finish just as the oysters come out of the oven for the most cohesive meal experience.
Storing and Reheating Tips
Oysters Mosca is undeniably best when freshly made, but there are options for storing and reheating if necessary:
Short-Term Storage:
- Ideally, prepare only what you plan to eat immediately, as the contrast between crispy topping and juicy oysters is what makes this dish special.
- If you must store leftovers, allow them to cool completely, then refrigerate in an airtight container for no more than 24 hours.
- Store the oysters in their shells if possible, which helps preserve their shape and texture.
- Be aware that the breadcrumb topping will lose its crispness during storage.
Reheating Methods:
- Oven Method (Best Option):
- Preheat your oven to 375°F (190°C).
- Place leftover Oysters Mosca on a baking sheet.
- Drizzle with a few drops of olive oil to help restore moistness.
- Reheat for approximately 5-7 minutes, until warmed through.
- For added crispness, finish under the broiler for 1 minute.
- Toaster Oven Method (Good for Small Quantities):
- Preheat to 375°F (190°C).
- Reheat for 4-6 minutes until hot.
- This method works well for just a few oysters.
- Microwave (Not Recommended, but Possible in a Pinch):
- Use 50% power in short 15-second bursts.
- Check frequently to avoid overcooking.
- The breadcrumb topping will not recrisp with this method, but the flavors will still be good.
Safety Considerations:
- Seafood is particularly prone to bacteria growth, so refrigerate any leftovers promptly.
- If oysters have been left at room temperature for more than 2 hours, discard them rather than attempting to store them.
- Never freeze prepared Oysters Mosca, as both the oysters and the topping will suffer significant textural degradation.
Creative Repurposing:
Rather than simply reheating, consider these ways to repurpose leftover Oysters Mosca:
- Pasta Addition: Remove the oysters from their shells, chop roughly, and fold into a simple pasta dish with olive oil, garlic, and herbs.
- Stuffed Mushrooms: Chop leftover oysters and breadcrumb topping together, then use as a filling for mushroom caps. Bake until the mushrooms are tender.
- Seafood Toast: Roughly chop the oysters with their topping and spread on garlic-rubbed toast points for a quick appetizer.
- Seafood Omelet: Incorporate chopped leftover Oysters Mosca into a morning omelet with a bit of cheese for an indulgent breakfast.
By following these detailed instructions and incorporating these professional tips, you’ll create Oysters Mosca that perfectly captures the bold, herb-forward flavors that make New Orleans cuisine so distinctive. The contrast between crispy, aromatic breading and juicy, tender oysters creates a dish that’s simultaneously refined and deeply satisfying. Whether served as an impressive appetizer or the centerpiece of a seafood feast, this classic recipe proves why New Orleans remains one of America’s most important culinary destinations.
Oysters Mosca: 7 Steps to Bold New Orleans Flavor
Cuisine: ModerateDifficulty: Creole / Italian-American6
servings25
minutes12
minutes250–300
kcalOysters Mosca is a rich, garlicky New Orleans–style baked oyster dish that celebrates bold Creole-Italian flavors. Fresh oysters are topped with a fragrant mixture of herbs, olive oil, breadcrumbs, and Parmesan, then baked until golden and aromatic. Served hot with lemon wedges and hot sauce, this dish makes an unforgettable appetizer or elegant seafood course.
Ingredients
24 fresh oysters (preferably Gulf oysters, though any large variety will work)
2 cups rock salt (for stabilizing oysters during cooking, optional)
1½ cups plain breadcrumbs (preferably homemade from day-old French bread)
⅓ cup extra virgin olive oil, plus 2 tablespoons for drizzling
4 cloves garlic, very finely minced
3 tablespoons fresh flat-leaf parsley, finely chopped
2 tablespoons of finely chopped fresh oregano, or substitute with 2 teaspoons of dried oregano.
2 tablespoons fresh basil, finely chopped
1 tablespoon fresh thyme leaves
2 tablespoons green onions, finely sliced (both white and green parts)
2 tablespoons lemon juice, freshly squeezed
2 teaspoons lemon zest
½ teaspoon red pepper flakes (adjust to taste)
½ teaspoon smoked paprika
1 teaspoon kosher salt
½ teaspoon freshly ground black pepper
2 tablespoons grated Parmesan cheese
Additional chopped fresh parsley
Lemon wedges
Hot sauce (preferably Crystal or Tabasco)
Directions
- Prep Ingredients and Tools
Start by gathering and measuring all ingredients. Preheat your oven to 450°F (232°C) and position a rack in the center. If using, spread rock salt on a sheet pan to keep oysters level during baking. Wash, dry, and chop all herbs, mince the garlic, and zest and juice your lemon. Having everything ready will make the process smoother, especially when working with oysters. - Shuck the Oysters
If you’re using whole oysters, carefully shuck them using an oyster knife, preserving the liquor and removing any shell fragments. Place each oyster in its bottom shell on the prepared salt bed. If you’re using pre-shucked oysters on the half shell, you can skip this step and simply arrange them on the salt. - Make the Breadcrumb Topping
In a medium bowl, combine the breadcrumbs, garlic, parsley, oregano, basil, thyme, and green onions. Mix in lemon juice, zest, red pepper flakes, smoked paprika, salt, and pepper. Add olive oil and stir until moistened. Fold in Parmesan cheese and taste the mixture to adjust seasoning. It should be fragrant, slightly crumbly, and full of flavor. - Top the Oysters
Spoon 1–2 tablespoons of the breadcrumb mixture onto each oyster, pressing gently to form a generous, even layer. Drizzle the oysters with a bit of olive oil for browning. If needed, you can refrigerate the prepared oysters for up to 2 hours before baking—but no longer, to avoid soggy crumbs. - Bake Until Golden
Bake the oysters in the preheated oven for 10–12 minutes, or until the topping is golden brown and the oyster edges begin to curl. For a crispier top, broil for the final 1–2 minutes while watching closely. The oysters should be plump, juicy, and lightly bubbling beneath the crisp topping. - Rest and Garnish
Let the oysters rest for 1–2 minutes out of the oven. Sprinkle with fresh chopped parsley and arrange lemon wedges around the tray for a pop of brightness. Set out a bottle of hot sauce for guests who want extra heat—Crystal or Tabasco are traditional favorites. - Serve and Enjoy
Serve the oysters directly on the salt bed or carefully transfer them to a platter, keeping them level to retain their juices. Offer small forks or picks and napkins, and encourage guests to squeeze lemon over the top just before eating. Enjoy immediately while the contrast of crispy topping and tender oyster is at its best.
Notes
- The beauty of Oysters Mosca lies in the vibrant herb blend and balance of textures—from the crispy, golden breadcrumb topping to the tender, briny oysters beneath. Using Gulf oysters is traditional, but any large, fresh oyster will shine in this preparation. Homemade breadcrumbs from day-old French bread offer better texture and flavor than store-bought. Serve immediately with lemon wedges and your favorite hot sauce for an authentic Louisiana touch.