
Shrimp Chippewa: How to Cook It in Just 30 Minutes
Table of Contents
There’s something magical about discovering a seafood dish that combines bold flavors with straightforward preparation. As a culinary enthusiast who’s always searching for that perfect balance between impressive and accessible recipes, I’m excited to share my take on Shrimp Chippewa – a dish that delivers restaurant-quality results in just half an hour. Whether you’re planning a dinner party or simply want to elevate your weeknight meals, this recipe deserves a prominent place in your cooking repertoire.
Thank you for reading this post, don't forget to subscribe!How to Make Shrimp Chippewa
Quick Overview
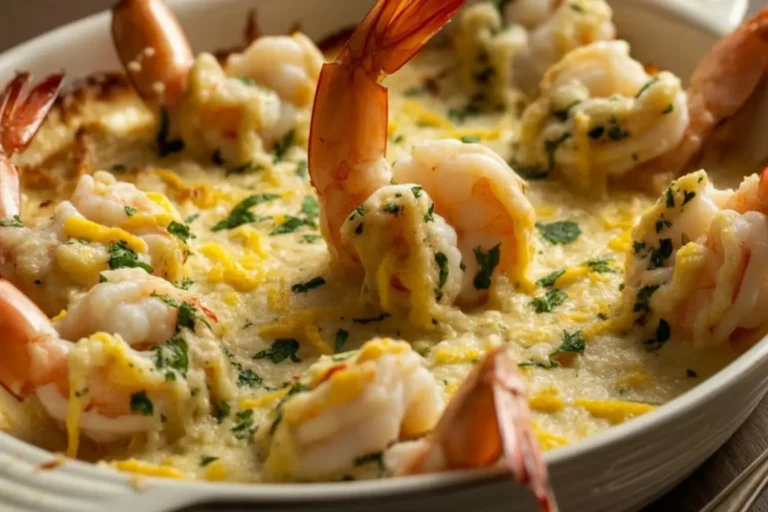
Shrimp Chippewa is a delightful seafood creation that showcases plump, tender shrimp in a rich, creamy sauce accented with a medley of vegetables and aromatic herbs. What makes this dish truly special is how the natural sweetness of the shrimp harmonizes with the velvety sauce, creating a luxurious mouthfeel that belies its quick preparation time. The beauty of Shrimp Chippewa lies in its perfect balance – it’s hearty without being heavy, sophisticated without being complicated, and quick without cutting corners on flavor development.
The dish comes together in under 30 minutes, making it ideal for both impromptu gatherings and busy weeknights when you want something extraordinary without spending hours in the kitchen. The sauce achieves an impressive depth of flavor through layering simple ingredients, while the cooking technique ensures the shrimp remain succulent and tender. It’s the kind of dish that makes guests believe you’ve spent far more time preparing it than you actually have – and that’s a culinary win in my book.
The Ingredients I Use to Bring My Shrimp Chippewa to Life
To create this impressive yet approachable dish, you’ll need the following ingredients:
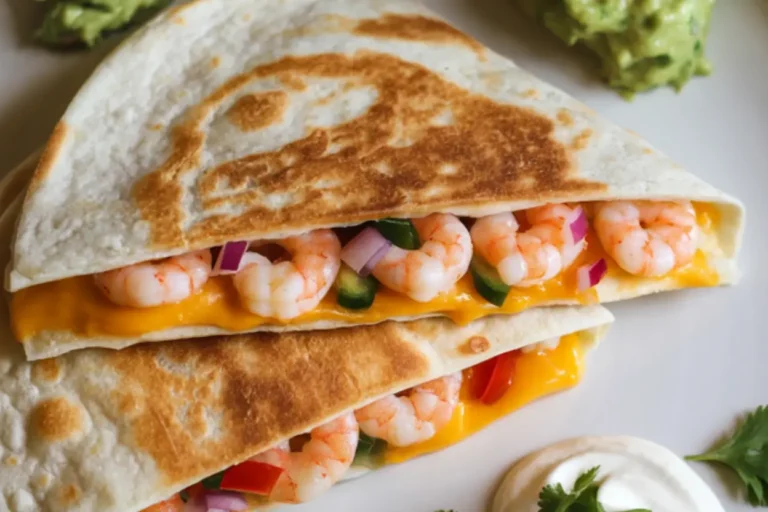
- 1½ pounds large shrimp (21-25 count), peeled and deveined, tails left on if desired
- 3 tablespoons olive oil, divided
- 1 medium yellow onion, finely diced (about 1 cup)
- 2 celery stalks, finely diced (about ½ cup)
- 1 red bell pepper, seeded and diced
- 3 cloves garlic, minced
- 1 teaspoon dried thyme
- ½ teaspoon dried oregano
- ¼ teaspoon cayenne pepper (adjust to taste)
- 2 bay leaves
- 1 tablespoon tomato paste
- 1 can (14.5 oz) diced tomatoes, undrained
- 1 cup seafood stock or clam juice
- ¾ cup heavy cream
- 2 tablespoons unsalted butter
- 2 tablespoons all-purpose flour
- ¼ cup fresh parsley, chopped, plus extra for garnish
- 1 tablespoon fresh lemon juice
- 1 teaspoon lemon zest
- ½ teaspoon salt (or to taste)
- ¼ teaspoon freshly ground black pepper
- 2 green onions, thinly sliced (for garnish)
Step-by-Step Instructions
Step 1: Prepare the Shrimp
Begin by ensuring your shrimp are properly cleaned. If you purchased frozen shrimp, make sure they’re fully thawed. Pat the shrimp dry with paper towels – this step is crucial for achieving a nice sear rather than steaming them. Season the shrimp with ¼ teaspoon salt and a pinch of black pepper, tossing to coat evenly.
Heat 2 tablespoons of olive oil in a large, deep skillet or Dutch oven over medium-high heat until shimmering. Add the shrimp in a single layer, being careful not to overcrowd the pan (work in batches if necessary). Cook for approximately 1-2 minutes per side until they just turn pink and start to curl. The shrimp should be slightly undercooked, as they’ll finish cooking in the sauce later. Remove the shrimp to a plate and set aside.
Step 2: Create the Aromatic Base
In the same skillet, add the remaining tablespoon of olive oil. Reduce heat to medium and add the diced onion, celery, and bell pepper. Cook for 4-5 minutes, stirring occasionally, until the vegetables begin to soften and the onions become translucent.
Add the minced garlic, dried thyme, dried oregano, cayenne pepper, and bay leaves to the vegetable mixture. Stir continuously for 30-60 seconds until fragrant, being careful not to burn the garlic as this will impart a bitter taste to your sauce.
Step 3: Build the Sauce Foundation
Add the tomato paste to the skillet and cook for 1-2 minutes, stirring constantly. This step helps to caramelize the tomato paste, removing any raw flavor and developing a deeper, more complex taste profile.
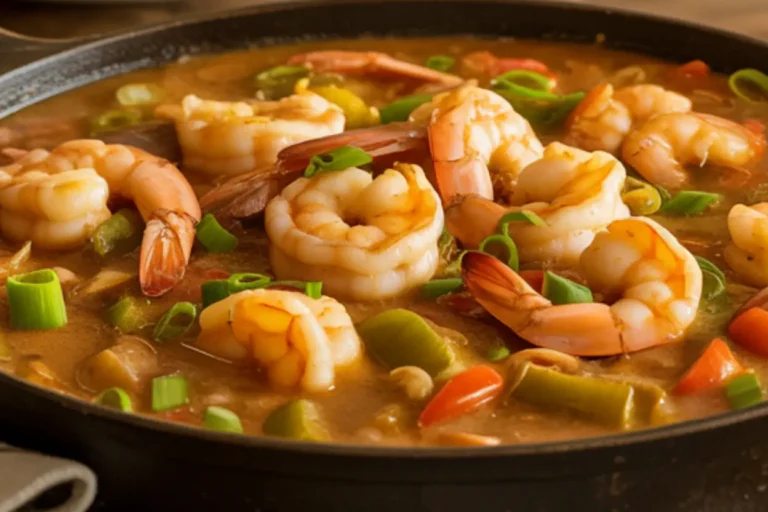
Pour in the diced tomatoes with their juices and the seafood stock. Bring the mixture to a gentle boil, then reduce heat to maintain a steady simmer. Allow the sauce to cook uncovered for about 8-10 minutes, stirring occasionally, until it begins to reduce and the flavors meld together.
Step 4: Create the Creamy Element
While the sauce is simmering, prepare a quick roux in a separate small saucepan. Melt the butter over medium-low heat, then whisk in the flour. Cook for 1-2 minutes, whisking constantly, until the mixture turns slightly golden and smells nutty.
Slowly whisk in the heavy cream until smooth, then continue cooking for another 1-2 minutes until the mixture thickens slightly. This creates a velvety base that will give your Shrimp Chippewa its signature rich texture.
Step 5: Combine and Finish the Dish
Remove the bay leaves from the tomato mixture. Gradually stir the cream mixture into the tomato base, incorporating it fully. Reduce heat to low and simmer for 2-3 minutes, allowing the sauce to thicken slightly.
Return the partially cooked shrimp to the skillet along with any accumulated juices. Gently fold the shrimp into the sauce and simmer for 2-3 minutes until the shrimp are just cooked through. Be careful not to overcook them – properly cooked shrimp should form a “C” shape; if they curl into a tight “O,” they’re overcooked.
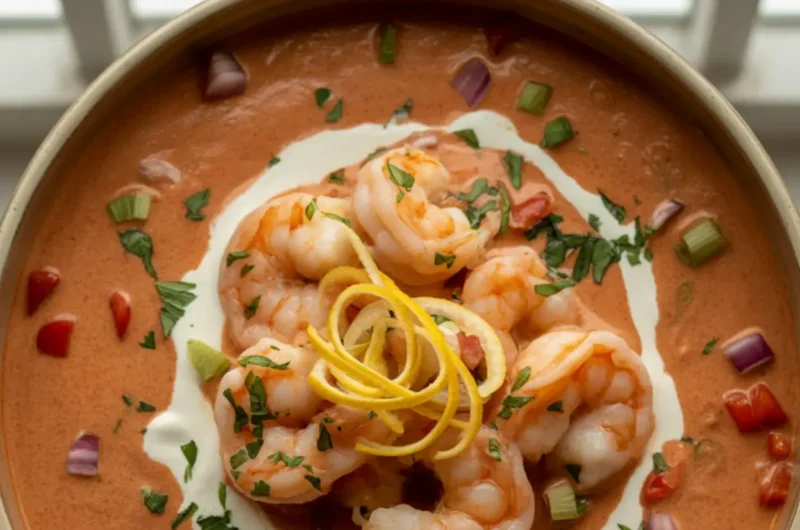
Stir in the fresh parsley, lemon juice, and lemon zest. Taste and adjust seasoning with additional salt and pepper if needed. Remove from heat and let stand for 2 minutes to allow the flavors to harmonize.
Serve the Shrimp Chippewa hot, garnished with sliced green onions and additional chopped parsley.
What to Serve Shrimp Chippewa With
Shrimp Chippewa’s rich, creamy sauce begs for complementary sides that can help balance the meal and soak up that delicious sauce. Here are some excellent pairing options:
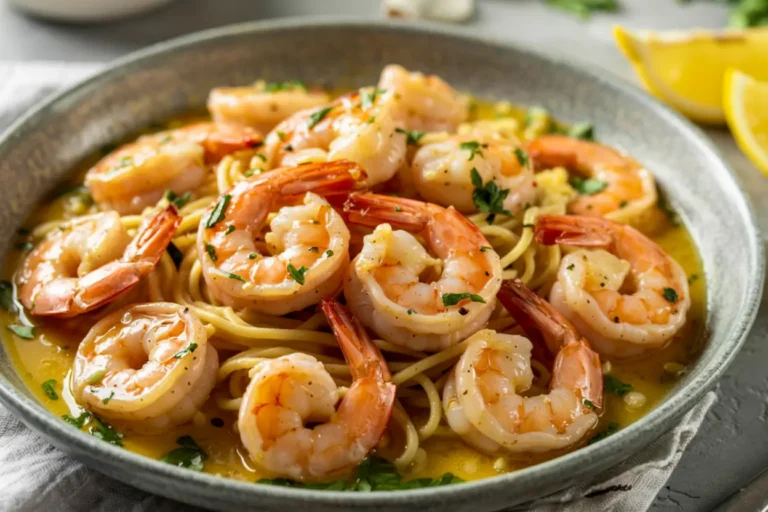
- Steamed Rice: A bed of fluffy white rice or aromatic jasmine rice provides the perfect canvas for Shrimp Chippewa. The neutral flavor allows the complex sauce to shine while absorbing its delicious essence.
- Crusty Bread: A good quality French baguette or sourdough bread, lightly toasted, is essential for capturing every last drop of the sauce. Consider serving bread on the side or as crostini for a more elegant presentation.
- Fresh Vegetable Sides: Balance the richness of the dish with simple steamed or roasted vegetables. Asparagus, green beans, or a medley of seasonal vegetables dressed simply with olive oil, salt, and pepper work beautifully.
- Light Salad: A crisp green salad with a bright vinaigrette provides a refreshing contrast to the creamy Shrimp Chippewa. Consider a simple mix of arugula, shaved fennel, and citrus segments with a light lemon vinaigrette.
- Beverage Pairings: A chilled glass of Sauvignon Blanc or Pinot Grigio complements the dish nicely. For non-alcoholic options, sparkling water with a squeeze of lemon or a light iced tea with mint makes for a refreshing accompaniment.

Top Tips for Perfecting Shrimp Chippewa
After preparing this dish countless times, I’ve gathered several insights that can take your Shrimp Chippewa from good to exceptional:
- Shrimp Selection and Preparation: Whenever possible, opt for wild-caught shrimp for superior flavor. Size matters – larger shrimp (21-25 count per pound) work best as they’re less likely to overcook. Leave the tails on for presentation, but remove them for easier eating if serving at a casual gathering.
- Temperature Management: The biggest culprit behind rubbery shrimp is overcooking. Remember that shrimp cook incredibly quickly – they need only about 1-2 minutes per side initially, and they’ll continue cooking when returned to the sauce. If you’re uncertain, it’s better to undercook slightly during the first stage as they’ll finish in the warm sauce.
- Layering Flavors: Don’t rush the vegetable sautéing process. Those 4-5 minutes of softening the aromatics builds essential flavor foundations. Similarly, taking time to properly cook the tomato paste until it darkens slightly (without burning) adds remarkable depth to the final dish.
- Sauce Consistency Adjustments: If your sauce becomes too thick, thin it with a little additional seafood stock or even a splash of water. Conversely, if it’s too thin, you can simmer it longer to reduce or create a quick slurry with 1 teaspoon cornstarch dissolved in 1 tablespoon cold water, then stir it into the simmering sauce.
- Ingredient Substitutions: No seafood stock? You can substitute chicken stock in a pinch, though it won’t have quite the same depth of flavor. For a lighter version, half-and-half can replace heavy cream, though the sauce won’t be quite as rich. Fresh herbs always provide the best flavor, but if dried is all you have available, use one-third the amount called for in the recipe.
- Make-Ahead Strategy: If you’re entertaining, you can prepare the sauce (without the cream component) up to a day ahead and refrigerate it. When ready to serve, reheat the sauce, prepare the cream mixture fresh, and proceed with the final steps of the recipe. This approach saves time without compromising quality.
Storing and Reheating Tips
While Shrimp Chippewa is at its absolute best when freshly made, proper storage and reheating techniques can help maintain its quality if you find yourself with leftovers:
Refrigeration: Transfer any leftover Shrimp Chippewa to an airtight container and refrigerate promptly after the meal. When properly stored, it will keep for up to 2 days. The sauce may thicken considerably when chilled – this is normal and can be adjusted during reheating.
Freezing Considerations: I generally don’t recommend freezing this dish as the cream-based sauce can separate upon thawing, and the texture of the shrimp may become compromised. However, if you must freeze it, store in a freezer-safe container for up to 1 month. Thaw overnight in the refrigerator before reheating.
Reheating Method: The key to successfully reheating Shrimp Chippewa is gentle heat to prevent the shrimp from becoming tough and rubbery. Place leftovers in a saucepan over low to medium-low heat. Add 1-2 tablespoons of water or seafood stock to loosen the sauce, then cover and warm slowly, stirring occasionally until just heated through (about 5-7 minutes). Avoid using the microwave if possible, as it tends to cook shrimp unevenly, often resulting in overcooked, tough shellfish.
Refreshing the Dish: When reheating, consider adding a fresh squeeze of lemon juice and a sprinkle of chopped parsley just before serving to brighten the flavors that may have dulled during storage. This simple step can revitalize the dish remarkably well.
Shrimp Chippewa represents that perfect intersection of impressive yet approachable cooking – a dish that delivers restaurant-quality results with home kitchen simplicity. By following these detailed instructions and tips, you’ll create a memorable meal that’s bound to become a regular in your culinary rotation. The combination of tender shrimp, rich sauce, and bright finishing notes makes this a standout dish worthy of both special occasions and elevated weeknight dinners.
Shrimp Chippewa: How to Cook It in Just 30 Minutes
Cuisine: Southern / Creole-InspiredDifficulty: Moderate4
servings20
minutes25
minutes500–600
kcalShrimp Chippewa is a bold, flavorful seafood dish featuring succulent shrimp simmered in a creamy tomato-based sauce enriched with garlic, herbs, butter, and heavy cream. Finished with a touch of lemon, fresh parsley, and green onion, this Southern-inspired entrée is rich, vibrant, and perfect for impressing guests or elevating a weeknight dinner.
Ingredients
1½ pounds large shrimp (21-25 count), peeled and deveined, tails left on if desired
3 tablespoons olive oil, divided
1 medium yellow onion, finely diced (about 1 cup)
2 celery stalks, finely diced (about ½ cup)
1 red bell pepper, seeded and diced
3 cloves garlic, minced
1 teaspoon dried thyme
½ teaspoon dried oregano
¼ teaspoon cayenne pepper (adjust to taste)
2 bay leaves
1 tablespoon tomato paste
1 can (14.5 oz) diced tomatoes, undrained
1 cup seafood stock or clam juice
¾ cup heavy cream
2 tablespoons unsalted butter
2 tablespoons all-purpose flour
¼ cup fresh parsley, chopped, plus extra for garnish
1 tablespoon fresh lemon juice
1 teaspoon lemon zest
½ teaspoon salt (or to taste)
¼ teaspoon freshly ground black pepper
2 green onions, thinly sliced (for garnish)
Directions
- Sear the Shrimp
Start by patting your cleaned and thawed shrimp dry with paper towels. Season lightly with salt and black pepper. Heat olive oil in a large skillet over medium-high heat and sear the shrimp in a single layer for 1–2 minutes per side, just until they turn pink and start to curl. Don’t overcrowd the pan—cook in batches if needed. Set the shrimp aside once seared; they’ll finish cooking in the sauce later. - Build the Aromatic Base
Using the same skillet, lower the heat to medium and add more olive oil. Sauté diced onion, celery, and red bell pepper for 4–5 minutes until soft and translucent. Stir in minced garlic, thyme, oregano, cayenne, and bay leaves, cooking briefly until the mixture becomes fragrant—just 30–60 seconds, so the garlic doesn’t burn. - Develop the Sauce
Add tomato paste to the aromatics and stir for 1–2 minutes to caramelize it and deepen the flavor. Pour in the diced tomatoes (with their juices) and seafood stock. Bring the sauce to a gentle boil, then reduce to a simmer. Let it cook for 8–10 minutes uncovered, allowing the flavors to come together and the sauce to reduce slightly. - Make the Cream Base
While the tomato mixture simmers, prepare a quick roux by melting butter in a small saucepan. Whisk in flour and cook for 1–2 minutes until golden and nutty. Slowly whisk in the heavy cream and cook until it thickens into a smooth, velvety sauce—about 2 more minutes. This creamy mixture will enrich the tomato base and give the dish its signature texture. - Finish and Serve
Remove the bay leaves from the tomato mixture and stir in the cream sauce. Reduce heat and let it simmer briefly to thicken. Gently fold in the seared shrimp and cook for another 2–3 minutes until they’re just cooked through (don’t overcook!). Stir in parsley, lemon juice, and zest, then adjust seasoning to taste. Serve hot, garnished with green onions and extra parsley.
Notes
- Shrimp Chippewa combines classic Creole-style flavors with a luxurious creamy finish. The fresh lemon juice and zest balance the richness of the butter and cream, while green onions and parsley add freshness. Serve it over rice, grits, or crusty bread to soak up every drop of the sauce. This dish is as comforting as it is impressive, ideal for dinner parties or a cozy seafood night at home.