Tuna Tataki: How to Make It Perfectly at Home
Table of Contents
There’s something truly magical about tuna tataki. Sitting at the intersection of raw and cooked, this Japanese delicacy delivers a symphony of textures and flavors that few other dishes can match. As a home chef who’s spent years perfecting this technique, I’m excited to share how you can create restaurant-quality tuna tataki in your own kitchen, impressing both yourself and any guests lucky enough to sample your culinary creation.
Thank you for reading this post, don't forget to subscribe!Tuna tataki represents Japanese cuisine at its finest – elegant simplicity that showcases the quality of ingredients rather than hiding behind complexity. Let me guide you through the process of creating this impressive dish that’s sure to become a staple in your cooking repertoire.
How to Make Tuna Tataki
Quick Overview
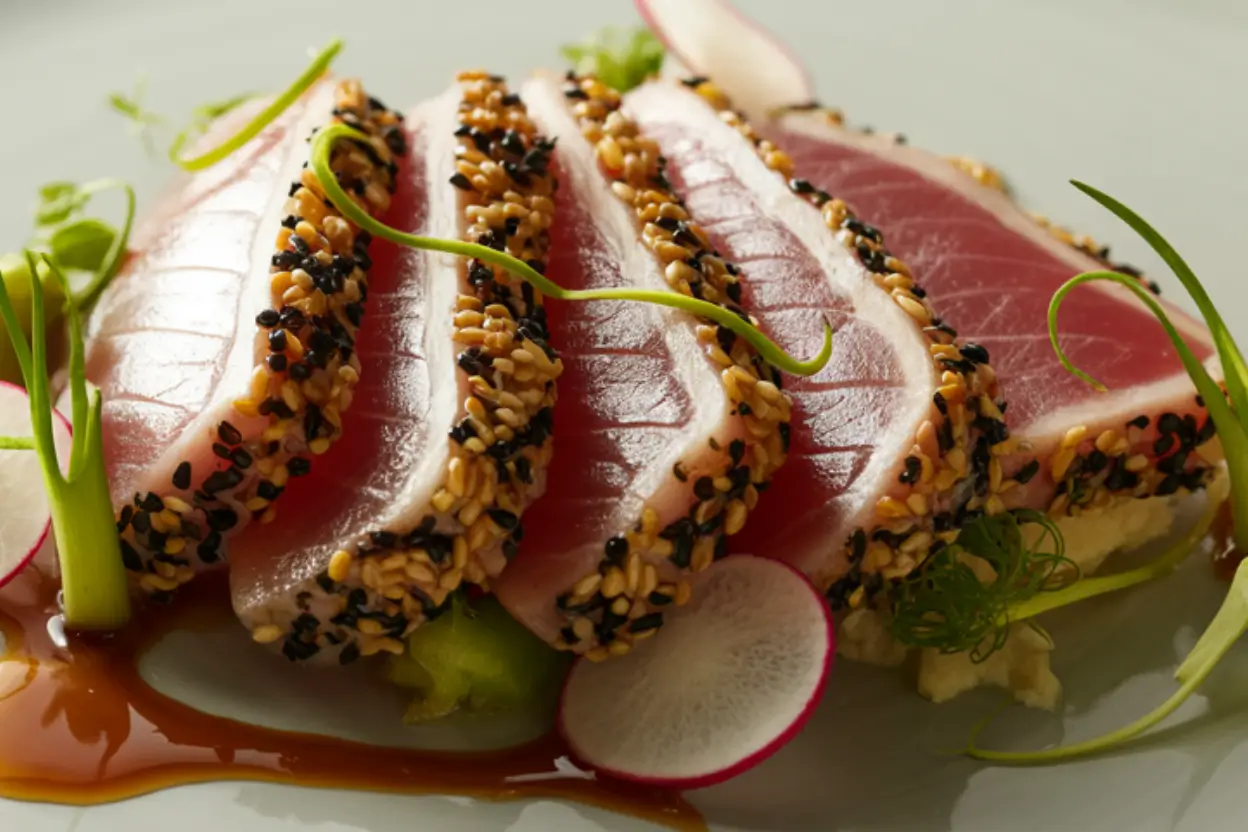
Tuna tataki is a semi-cooked dish featuring fresh tuna that’s briefly seared on the outside while maintaining a beautiful raw center. The contrast between the lightly charred exterior and the velvety, deep red interior creates an incredible textural experience. What makes this dish particularly special is the umami-rich sauce that complements the natural sweetness of the fish.
Despite its upscale restaurant appearance, tuna tataki is surprisingly straightforward to prepare at home. The key lies in quality ingredients and precise timing. The entire process takes just about 20 minutes from start to finish – 10 minutes of preparation and 10 minutes of cooking and assembly. This makes it perfect for a sophisticated weeknight dinner or an impressive appetizer for guests.
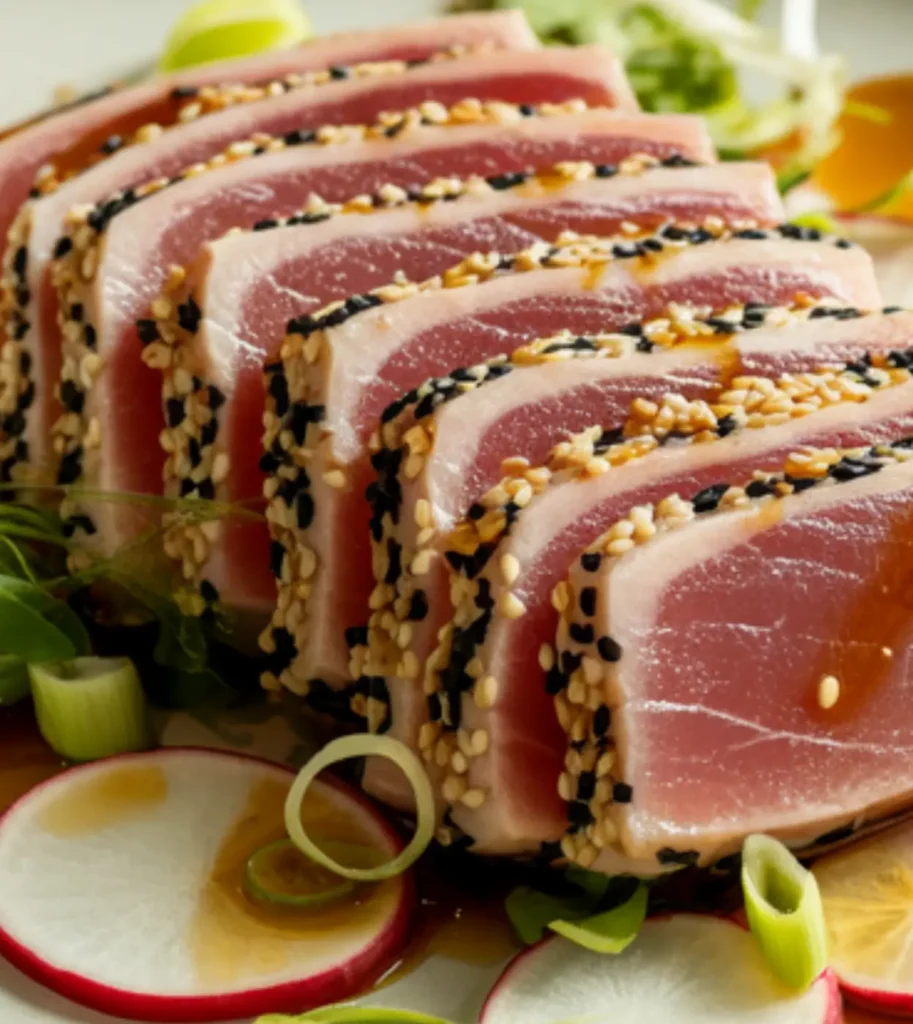
The beauty of tuna tataki lies in its minimalist approach. The brief searing process enhances the fish’s natural flavor while preserving its tender texture and nutritional profile. The thin slices reveal a gorgeous gradient from pink to red, making this not just a treat for your taste buds, but a feast for your eyes as well.
The Ingredients I Use to Bring My Tuna Tataki to Life
For the tuna:
- 1 pound (450g) sushi-grade tuna loin, preferably yellowfin or bluefin
- 1 tablespoon neutral oil (like grapeseed or canola)
- 2 tablespoons white sesame seeds
- 1 tablespoon black sesame seeds
- ¼ teaspoon sea salt
For the ponzu dipping sauce:
- 3 tablespoons soy sauce
- 2 tablespoons fresh lime juice
- 1 tablespoon rice vinegar
- 1 teaspoon honey
- 1 teaspoon grated fresh ginger
- 1 small garlic clove, grated
- 1 small scallion, finely chopped
- ¼ teaspoon red pepper flakes (optional, for heat)
For garnish:
- 2 scallions, thinly sliced on the diagonal
- 1 tablespoon microgreens or daikon sprouts
- 1 small radish, thinly sliced
- 1 teaspoon toasted sesame seeds (mix of black and white)
Step-by-Step Instructions
Step 1: Prepare the Tuna
- Take the tuna out of the refrigerator 15 minutes before cooking to bring it closer to room temperature. This ensures more even cooking.
- Pat the tuna loin completely dry with paper towels. Any moisture will prevent proper searing and cause the sesame seeds to fall off.
- Examine the tuna and trim away any sinew or darker portions if present.
- Cut the tuna loin into an even, rectangular shape. This helps with uniform cooking and creates more attractive slices later. (Save any trimmed pieces for another use like tuna tartare or poke.)
- Season the tuna lightly with sea salt on all sides, gently pressing the salt into the surface.
Step 2: Coat the Tuna with Sesame Seeds
- Mix the white and black sesame seeds together in a shallow dish or plate.
- Press each side of the tuna loin into the sesame seed mixture, ensuring an even coating on all sides. The seeds should adhere to the surface of the fish.
- If you have trouble getting the seeds to stick, you can very lightly brush the surface of the tuna with a tiny amount of neutral oil first.
Step 3: Prepare the Ponzu Dipping Sauce
- Combine all sauce ingredients in a small bowl: soy sauce, lime juice, rice vinegar, honey, grated ginger, grated garlic, chopped scallion, and red pepper flakes if using.
- Whisk thoroughly until the honey is completely dissolved.
- Set aside to let the flavors meld while you cook the tuna.
Step 4: Sear the Tuna
- Heat a heavy-bottomed skillet—cast iron works best—over high heat for about 2 minutes, until it’s piping hot.
- Add the neutral oil to the pan and swirl to coat the surface evenly.
- Carefully place the sesame-coated tuna in the hot pan. For proper searing, don’t move the tuna once it’s in the pan.
- Sear for exactly 30 seconds on each side (including the edges) for a rare center. If you prefer it less rare, you can sear for up to 45 seconds per side, but be careful not to overcook.
- Use tongs to gently turn the tuna, being careful not to dislodge the sesame seed coating.
- Once all sides are seared, immediately remove the tuna from the pan and place it on a clean cutting board to prevent it from cooking further.
Step 5: Slice and Serve
- Let the seared tuna rest for 2 minutes to allow the residual heat to distribute evenly.
- Using a very sharp knife (preferably a sashimi knife if you have one), slice the tuna against the grain into thin slices, about ¼-inch thick.
- Arrange the slices artfully on a serving plate, slightly overlapping.
- Drizzle a small amount of the ponzu sauce over the tuna slices, reserving most of it for dipping.
- Garnish with the sliced scallions, microgreens or daikon sprouts, radish slices, and additional sesame seeds.
- Serve immediately with the remaining ponzu dipping sauce on the side.
What to Serve Tuna Tataki With
Tuna tataki works beautifully as both an appetizer and a main course. Here are some complementary dishes and serving suggestions:
As an appetizer:
- Pair with a small bowl of miso soup for a traditional Japanese starter
- Serve alongside cucumber sunomono (vinegared cucumber salad) for a refreshing contrast
- Offer edamame with sea salt as an additional finger food
As a main course:
- Accompany with steamed short-grain rice and pickled ginger
- Serve with a seaweed salad dressed in sesame oil and rice vinegar
- Offer a side of chilled soba noodles with a simple dipping sauce
Fresh side dishes that complement the flavors:
- Avocado halves drizzled with lime juice and a sprinkle of sea salt
- Shaved daikon and carrot salad with a citrus dressing
- Cucumber and wakame salad for a refreshing crunch
Beverage pairings:
- Japanese green tea (hot or iced)
- Sparkling water with cucumber and mint
- Iced jasmine tea
- Non-alcoholic yuzu spritzer
Top Tips for Perfecting Tuna Tataki
Fish selection is crucial:
- Always use sushi-grade tuna (also labeled as “sashimi-grade”). This quality designation means the fish has been frozen to kill potential parasites and is safe to consume raw or rare.
- Look for tuna with a deep red color, firm texture, and no fishy smell.
- If possible, purchase from a reputable fishmonger who can tell you when the fish arrived.
- Yellowfin (ahi) or bluefin tuna work best for tataki due to their firm texture and rich flavor.
Temperature management:
- Make sure your pan is sizzling hot before you add the tuna. a proper sear should take no more than 30-45 seconds per side.
- If your pan isn’t hot enough, you’ll end up cooking more of the interior without getting the proper sear on the outside.
- Let the tuna come to room temperature for about 15 minutes before cooking for more even searing.
Knife skills matter:
- Use your sharpest knife for slicing—a dull knife will tear the delicate fish and ruin the presentation.
- Slice against the grain for the most tender bite.
- Clean your knife between cuts with a damp cloth for the cleanest slices.
Ingredient substitutions:
- If you can’t find fresh tuna, high-quality frozen sashimi-grade tuna will work—just thaw it slowly in the refrigerator overnight.
- No sesame seeds? You can make tataki without the coating, focusing instead on a perfect sear.
- Lemon juice can substitute for lime juice in the ponzu sauce.
- If you don’t have rice vinegar, apple cider vinegar diluted with a touch of water and sugar can work in a pinch.
Common mistakes to avoid:
- Overcooking is the number one pitfall. Tuna tataki should be very rare in the center—cooking it through ruins the dish.
- Don’t skip patting the tuna dry—moisture is the enemy of a good sear.
- Avoid moving the tuna around in the pan; let it develop a proper crust before turning.
- Don’t cut the slices too thick—ideally, they should be about ¼-inch thick to showcase the contrast between the seared exterior and raw interior.
Storing and Reheating Tips
Tuna tataki is best enjoyed immediately after preparation, when the contrast between the seared exterior and cool interior is at its peak. However, if you find yourself with leftovers:
Short-term storage:
- Tuna tataki can be refrigerated for up to 24 hours, though the quality will diminish somewhat.
- Store the sliced tuna in an airtight container, separating layers with parchment paper to prevent sticking.
- Keep the ponzu sauce in a separate container.
- Refrigerate immediately after serving.
How to serve leftover tataki:
- Tuna tataki should not be reheated, as this would cook the interior and destroy the essence of the dish.
- Instead, remove the leftovers from the refrigerator about 10 minutes before serving to take the chill off.
- You may need to refresh the ponzu sauce with a few drops of fresh lime juice to brighten the flavors.
Creative uses for leftovers:
- Chop any leftover tataki and use it to make a luxurious tuna salad with avocado and a citrus vinaigrette.
- Add to cold soba noodles with some of the ponzu sauce for a refreshing lunch.
- Create hand rolls by wrapping small pieces in nori with a bit of rice and cucumber.
Freezing:
- I don’t recommend freezing prepared tuna tataki, as freezing will alter the texture and diminish the contrast between the seared exterior and raw interior.
- If you have more raw tuna than you need, it’s better to freeze the unused portion before cooking and save it for another day.
Food safety note:
- Because tuna tataki is mostly raw, be especially vigilant about refrigeration and consumption timeframes.
- If the tuna has been at room temperature for more than two hours, it should be discarded.
- Trust your senses—if the leftover tataki has an off smell or appearance, don’t take chances.
Preparing tuna tataki at home allows you to experience one of Japanese cuisine’s most elegant dishes whenever the craving strikes. The simple preparation highlights the natural quality of the fish while creating a visual and textural masterpiece that will impress even the most discerning palates. With practice, you’ll develop the confidence to adjust the searing time to your exact preference, creating a personalized version of this classic that’s perfectly tailored to your taste.
Remember, the true art of tuna tataki lies in respecting the quality of your ingredients and the precision of your technique. Master these elements, and you’ll create a dish that rivals any upscale Japanese restaurant—right in your own kitchen.

Tuna Tataki: How to Make It Perfectly at Home
Cuisine: JapaneseDifficulty: Easy to Moderate4
servings15
minutes3
minutes220–250
kcalTuna Tataki is a Japanese dish featuring lightly seared, sushi-grade tuna coated in sesame seeds and served with a zesty soy-citrus sauce. It’s fresh, flavorful, and beautifully simple—perfect as a light appetizer or elegant main course.
Ingredients
1 pound (450g) sushi-grade tuna loin, preferably yellowfin or bluefin
1 tablespoon neutral oil (like grapeseed or canola)
2 tablespoons white sesame seeds
1 tablespoon black sesame seeds
¼ teaspoon sea salt
3 tablespoons soy sauce
2 tablespoons fresh lime juice
1 tablespoon rice vinegar
1 teaspoon honey
1 teaspoon grated fresh ginger
1 small garlic clove, grated
1 small scallion, finely chopped
¼ teaspoon red pepper flakes (optional, for heat)
2 scallions, thinly sliced on the diagonal
1 tablespoon microgreens or daikon sprouts
1 small radish, thinly sliced
1 teaspoon toasted sesame seeds (mix of black and white)
Directions
- Prepare the Tuna
Let the tuna sit at room temperature for 15 minutes. Pat it completely dry, trim any sinew or dark parts, and shape it into a neat rectangle. Lightly season all sides with sea salt. - Coat with Sesame Seeds
Mix white and black sesame seeds on a plate. Press the tuna into the mixture to coat all sides evenly. Lightly brushing the tuna with oil can help the seeds stick better. - Make the Ponzu Sauce
In a bowl, whisk together soy sauce, lime juice, rice vinegar, honey, ginger, garlic, scallions, and optional red pepper flakes. Set aside to let the flavors meld. - Sear the Tuna
Heat a skillet over high heat and add neutral oil. Sear each side of the tuna for 30–45 seconds without moving it, then remove it from the pan and let it rest. - Slice and Serve
After resting for 2 minutes, slice the tuna thinly against the grain. Arrange on a plate, drizzle with ponzu, garnish with scallions or sprouts, and serve with extra sauce on the side.
Notes
- Tuna Tataki is all about balance—delicate searing preserves the buttery texture of premium tuna, while the sesame crust and citrus-soy dressing add richness, crunch, and brightness. For best results, use sushi-grade yellowfin or bluefin tuna, and slice it just before serving to maintain its freshness and color.